How to set up streaming from JVC GY-HC500U camera using SRT protocol and Callaba Cloud
In this tutorial, we are going to explain how to organize video broadcasting from the wonderful JVC GY-HC500U / JVC GY-HC550U camera using the SRT protocol and Callaba Cloud Live Streaming.
A few words about JVC GY-HC500U / JVC GY-HC550U
The beauty of these is that you can live stream directly from the camera via the SRT protocol. Built-in SRT support allows to organize remote production, which means we no longer need to carry our streaming equipment to the facility, which is a considerable number of bags, suitcases, computer equipment and other things. (The broadcast engineers sigh and nod their heads.)
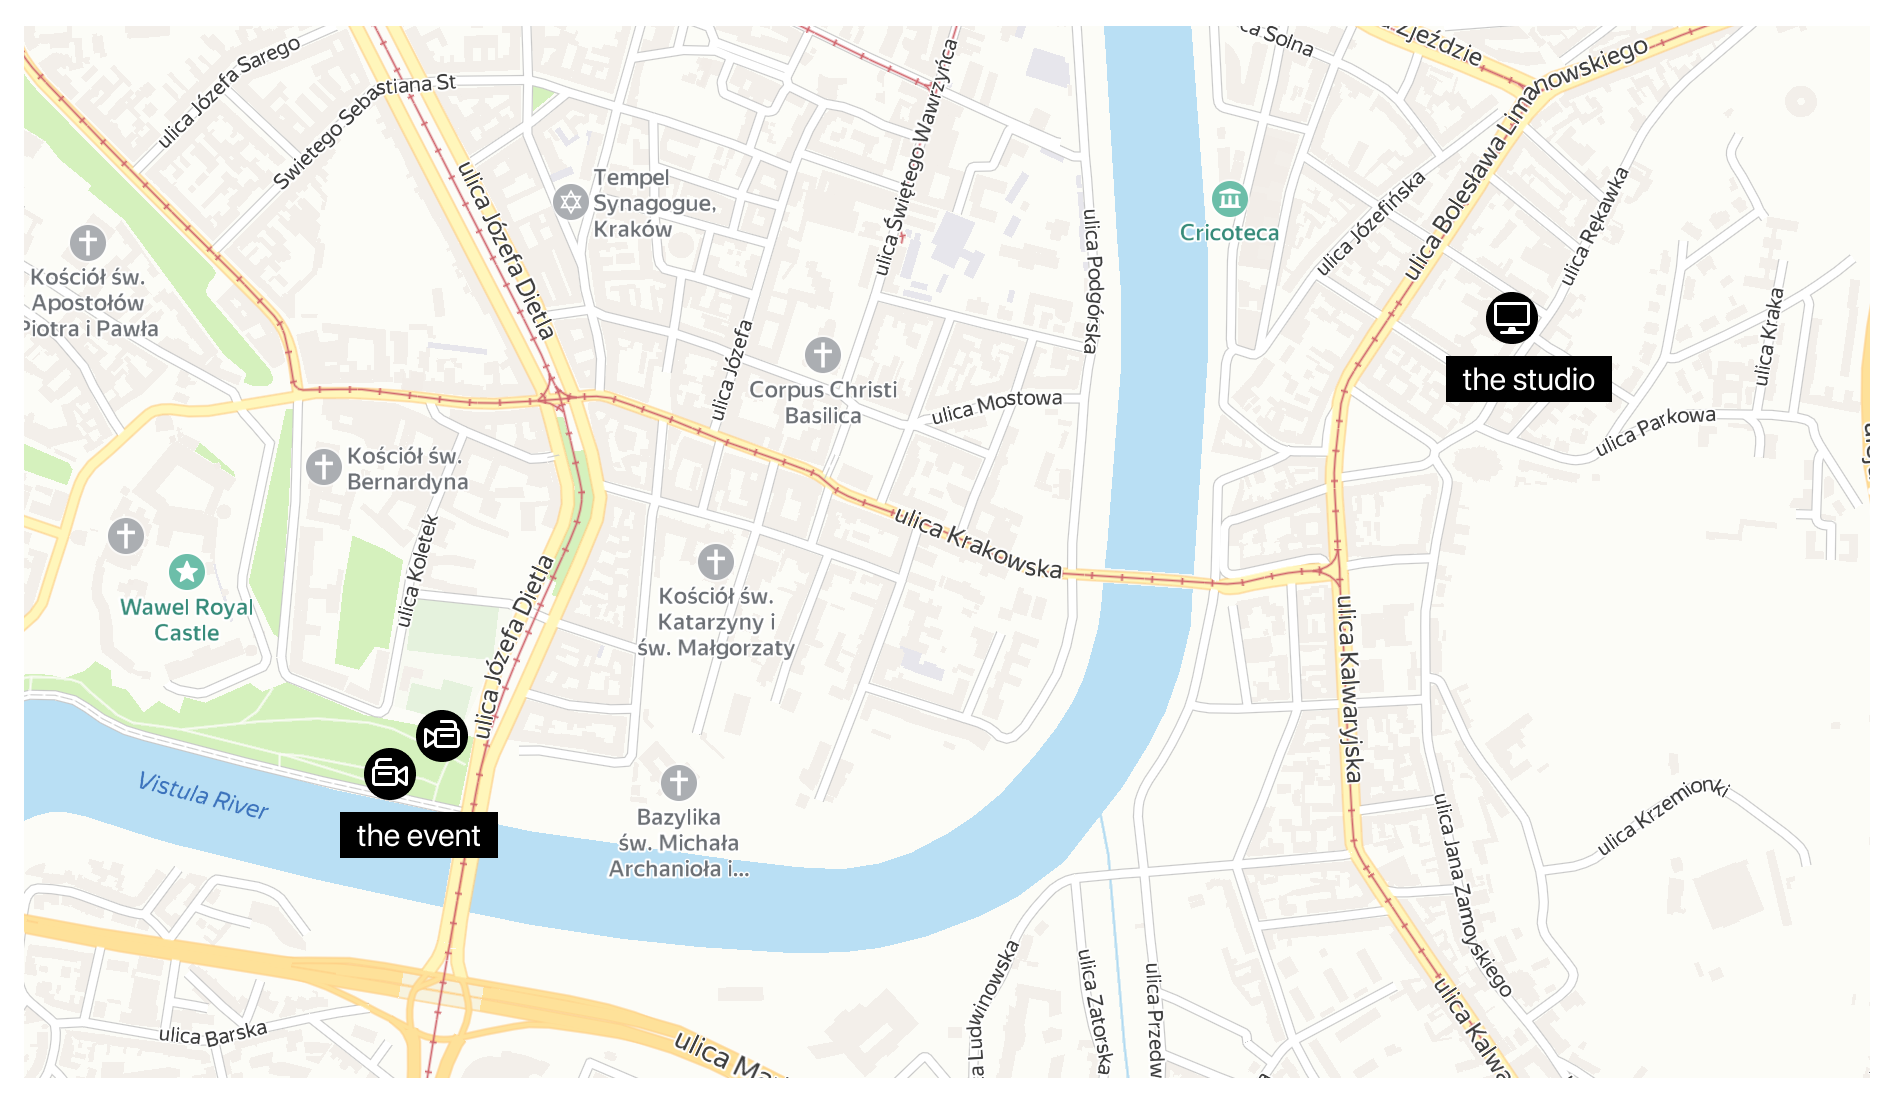
So, we are planning to broadcast our video over the public network to a studio located in another area of the city.
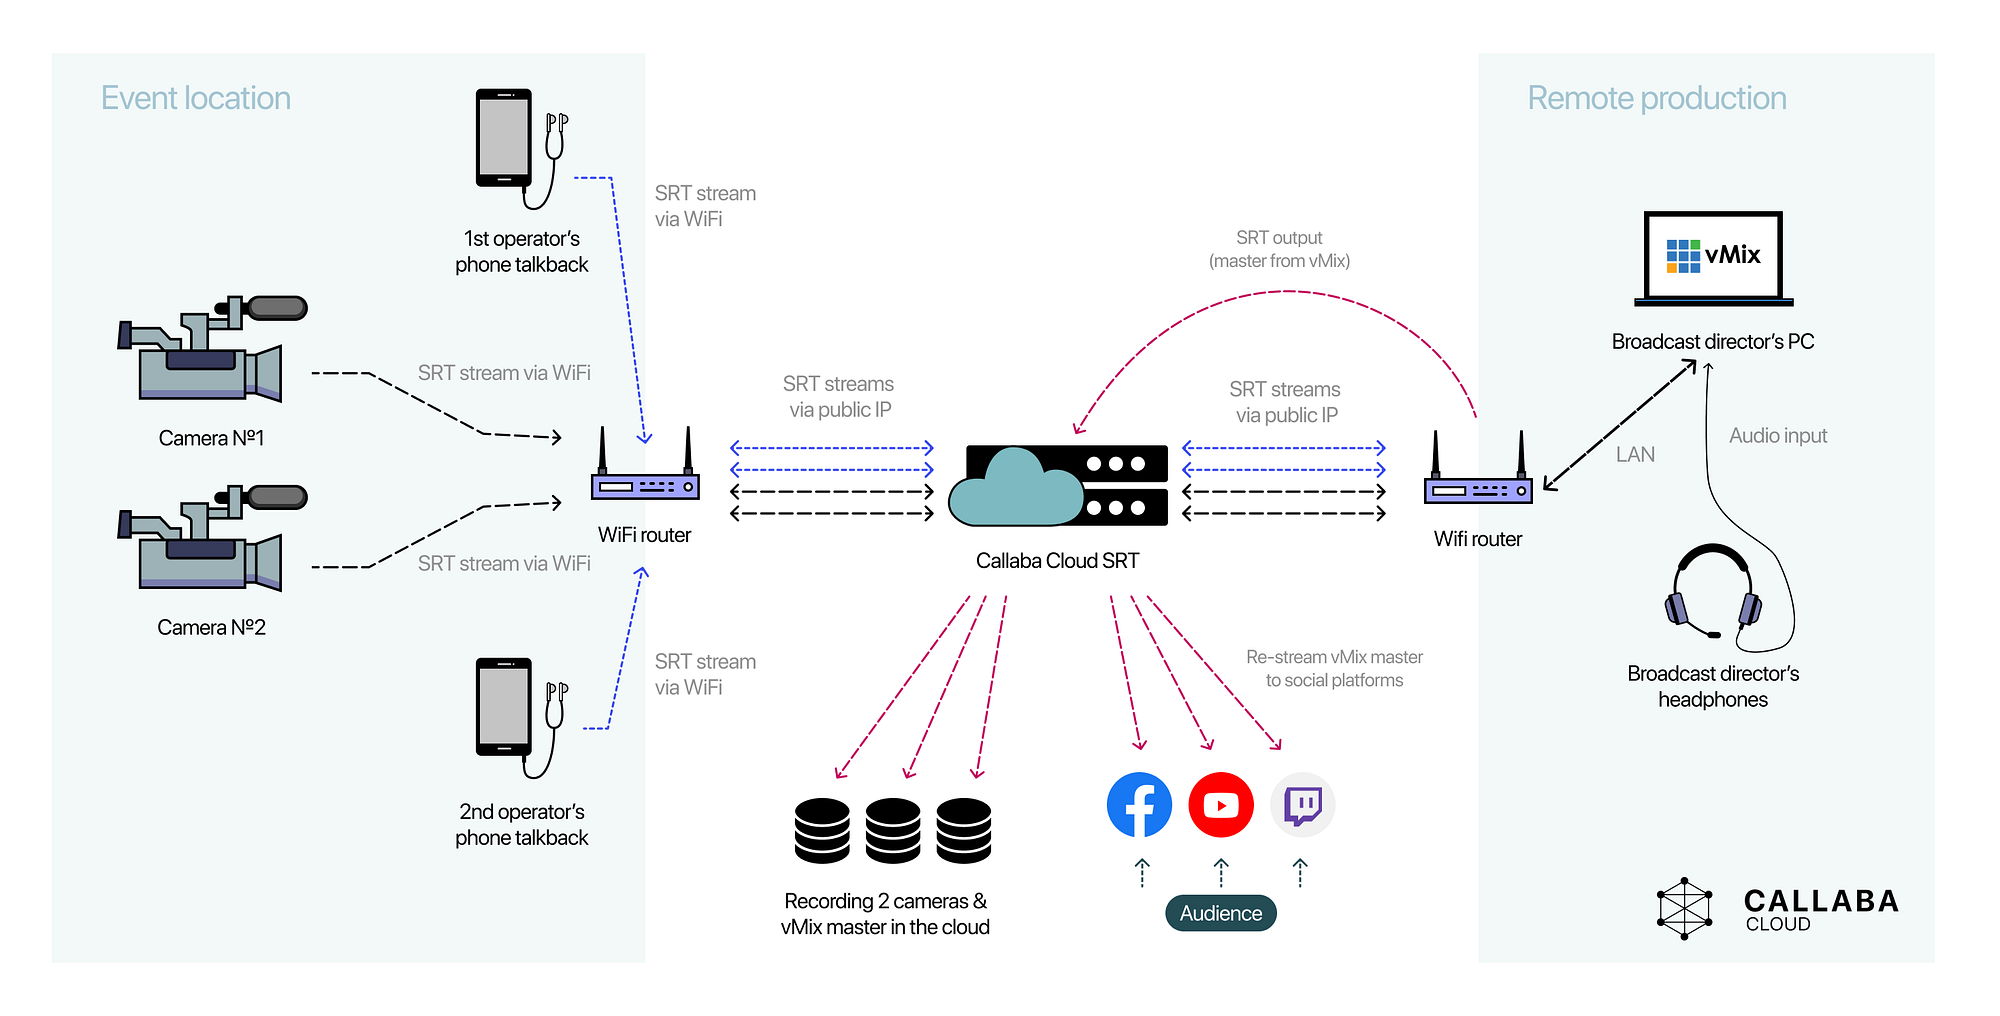
We will have several streams with their own Stream IDs, so it is best to set up an SRT server in the cloud and use it to organize the transport of our streams.
And since 2 operators are involved in our broadcast, we are going to organize radio communication with them using the Larix Broadcaster application, which has a feedback function.
In the end, we should have a structure like this:
We have a separate tutorial on how to set up feedback in Larix + vMix, perhaps it will be useful to you if this is your first time encountering a task like this.
It should be mentioned though, that the camera itself has the option organize feedback, but we prefer using phones, so that when the camera is not in active use, we still keep communication with the broadcast director.
We will need:
- Two cameras JVC GY-HC500U or JVC GY-HC550U
- A working SRT server in the cloud. In our tutorial, we will be using Callaba Cloud Live Streaming.
Step-by-step guide : How to run Callaba Cloud Live Streaming on Amazon Web Services. - Two mobile phones with headset and Larix Broadcaster app installed
- vMix (the one we left in the studio today)
Let’s begin!
First, let’s configure our cameras to broadcast using the SRT protocol.
1 . Go to the camera menu and scroll down to the Network
2. Select Live Streaming and then Live Streaming Server
3. Then select the server type
Type: SRT
4. We will call the server from this camera, so set Connection mode to Caller

6. Next, you need to configure on the camera the destination (or where we will send the stream), in our case it will be Callaba Cloud Live Streaming service.
For the purposes of this tutorial, we assume that you already have a subscription to this product.
Subscribing will take no more than 5 minutes.
How to subscribe and launch Callaba Cloud.
There are a few options for sending video streams to the cloud. You can create 1 server and send all streams to it using StreamID, or you can simply create 2 different SRT servers on different ports.
In our case, it will be more convenient to use the second option, so let’s create our first SRT server for the first camera.
JVC-SRT-CAMERA-1
7. Open Callaba Cloud Live Streaming
Go to the SRT Servers section
Click Add New
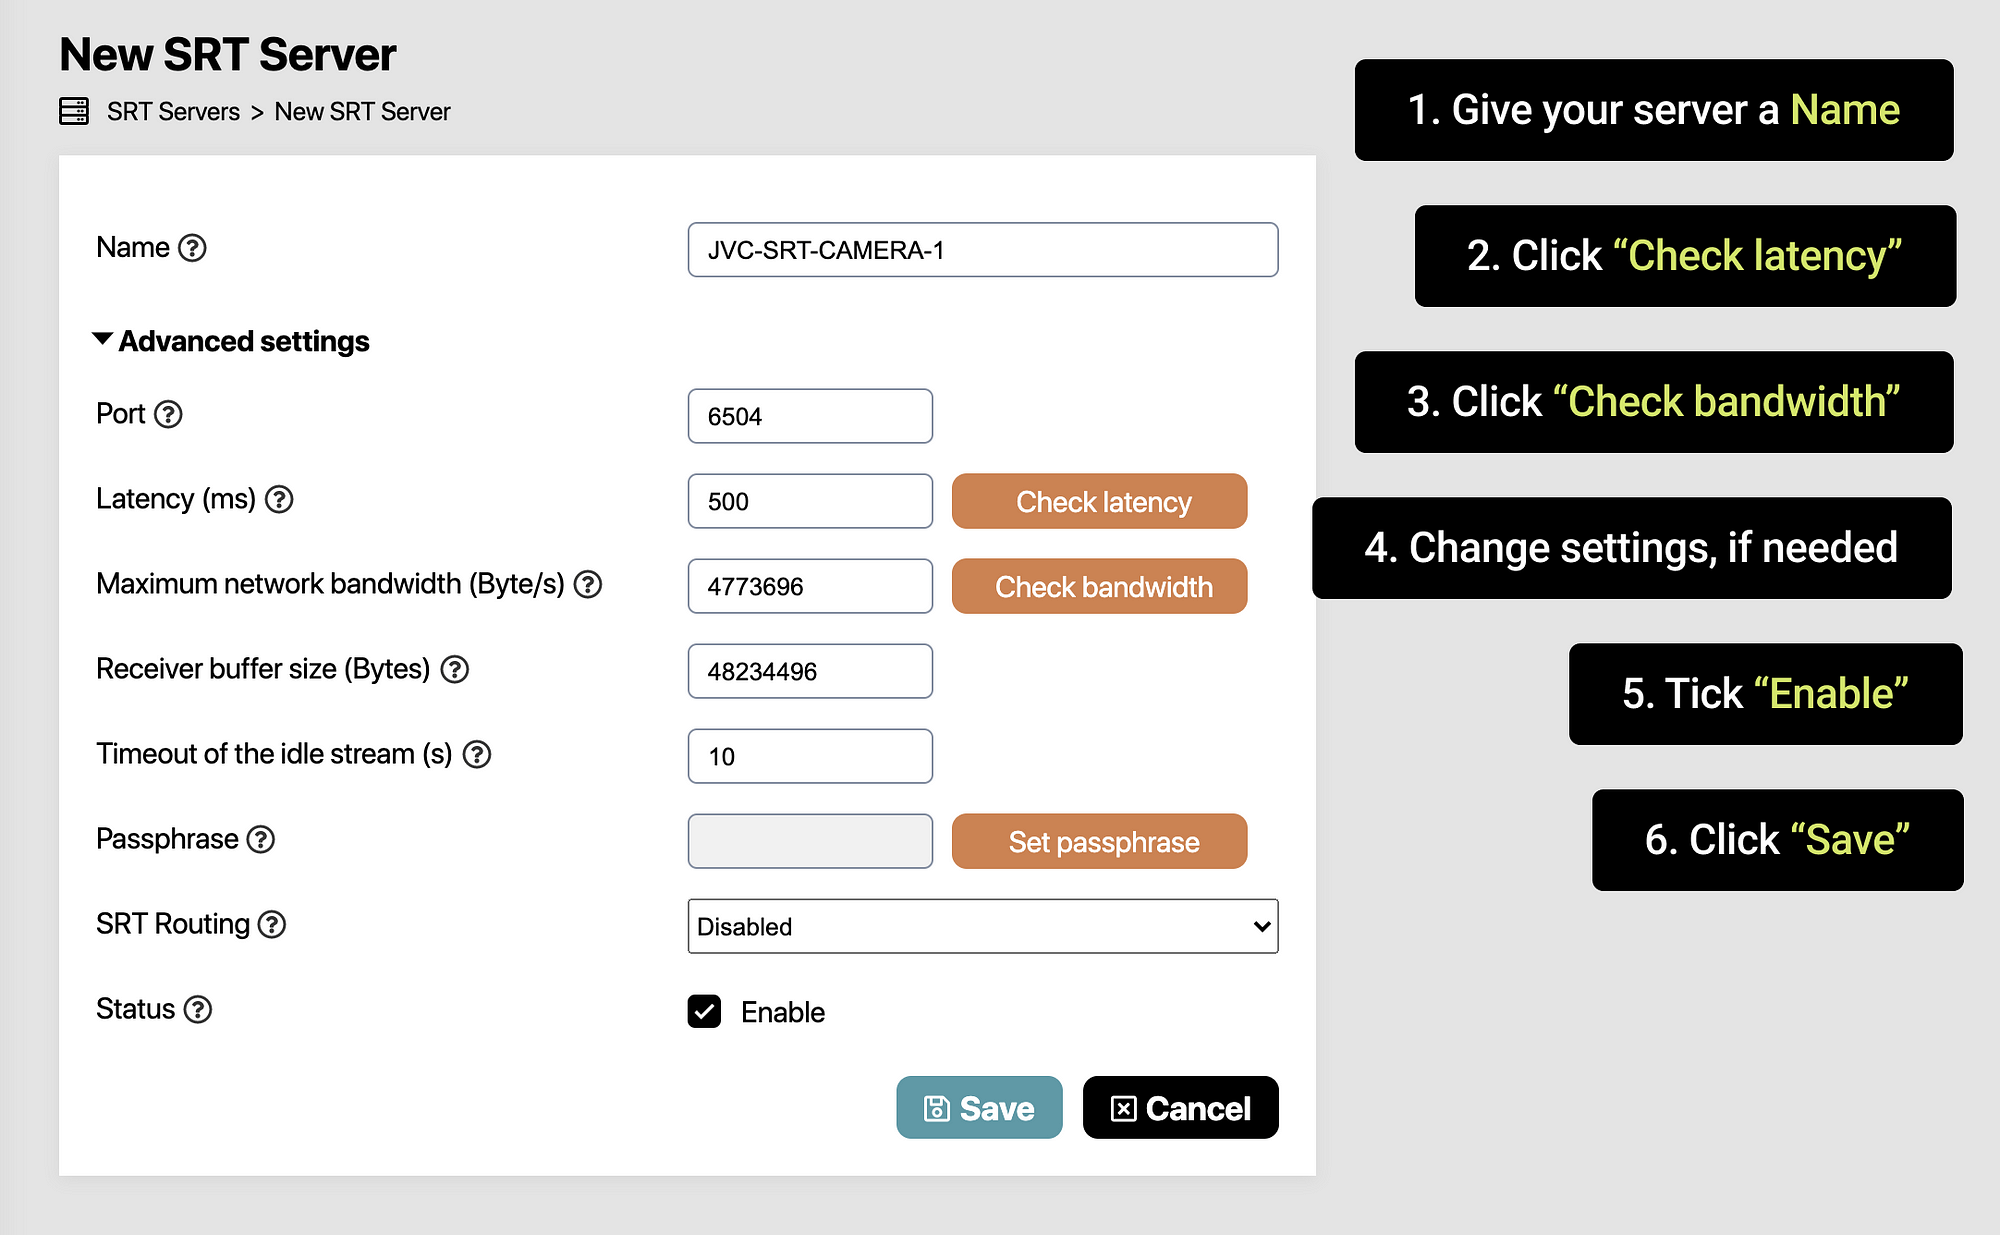
8. Give your server a Name
9. Click the Check Latency button to determine the latency to your cloud.
The recommended latency is the ping to the cloud multiplied by 4, but not less than 120 ms.
10. Click Check bandwidth to determine the maximum bandwidth.
Important! If you do not set this parameter, then there is a chance that the system of recovering lost packets will start working so actively it will clog your main channel through which video frames are being sent. Please set it up to avoid possible issues.
11. Click Save
12. To see information about the server, return to the SRT Servers section and click Info next to the name of the newly created server
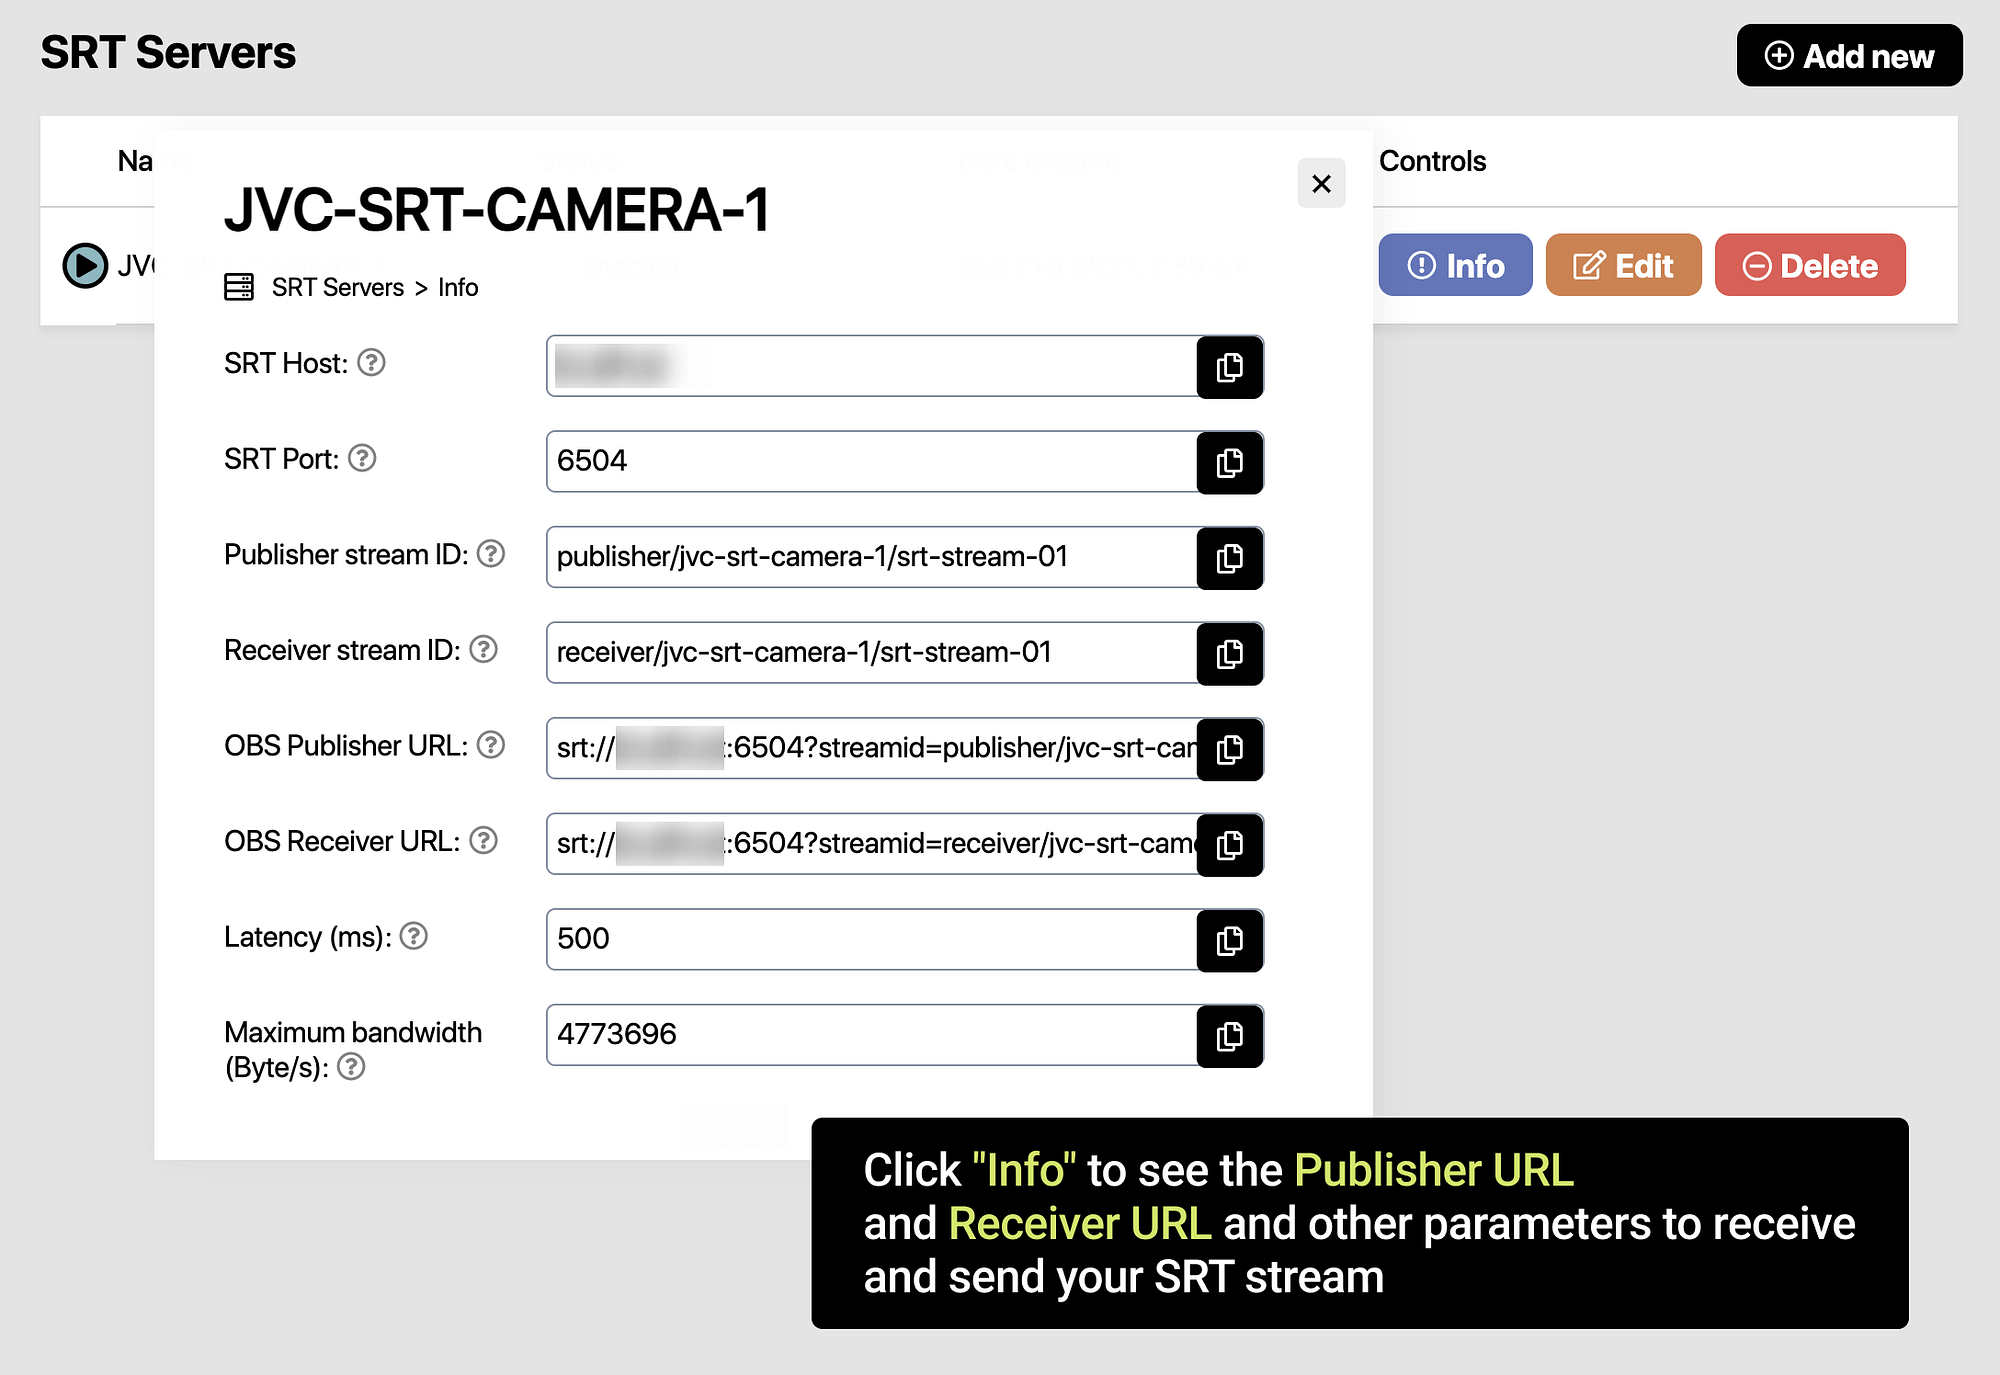
13. Now we need to enter the data of this server in the camera, so let’s go back to the camera of the first operator and fill in the cells:
Destination Address : Enter SRT Host
Port : enter SRT Port
StreamID : we usually don’t use this parameter, so we will remove it
Latency : In our case, the latency is 500
14. Next, we will determine the resolution and the bitrate.
The public network at the site of the broadcast is 20 megabits, and since we have 2 cameras and audio feedback from our operators, we will broadcast HD video with a bitrate of 5M. There should be enough bandwidth for everything with some wiggle room.
15. Now we’ll have to redo the same steps for the second camera, but create a new SRT Server in Callaba Cloud for it.
Finally, we got to vMix.
Now we will configure the reception of our streams in the vMix program.
16. Let’s make sure that the stream from the camera is coming to the server. To do this, we will receive it back to Vmix. You can pick up SRT stream by multiple devices using the same receiver parameters provided by Callaba Cloud. The number of streams is limited only by the efficiency of your server.
Go to Vmix.
Click “Add input”.
Go to Stream/SRT.
Change Stream Type to SRT (Caller).
(Note that when using a remote SRT server with a public hostname, you should use the SRT connection type (Caller) both when receiving and sending an SRT stream.)
17. To get receiver parameters, go back to Callaba Cloud.
Click Info to see your server’s parameters.
Please note that these parameters are listed here only for illustrative purposes. They will not work in real life setting.
Vmix requires the following parameters
Hostname : 12.34.56.78
Port : 1935
Receiver stream ID : output/mynewsrt/srt-stream-01
Important! Even if you are sending SRT Stream without Publisher StreamID (like we are in this case), you’ll still need Receiver StreamID to receive it from the server.
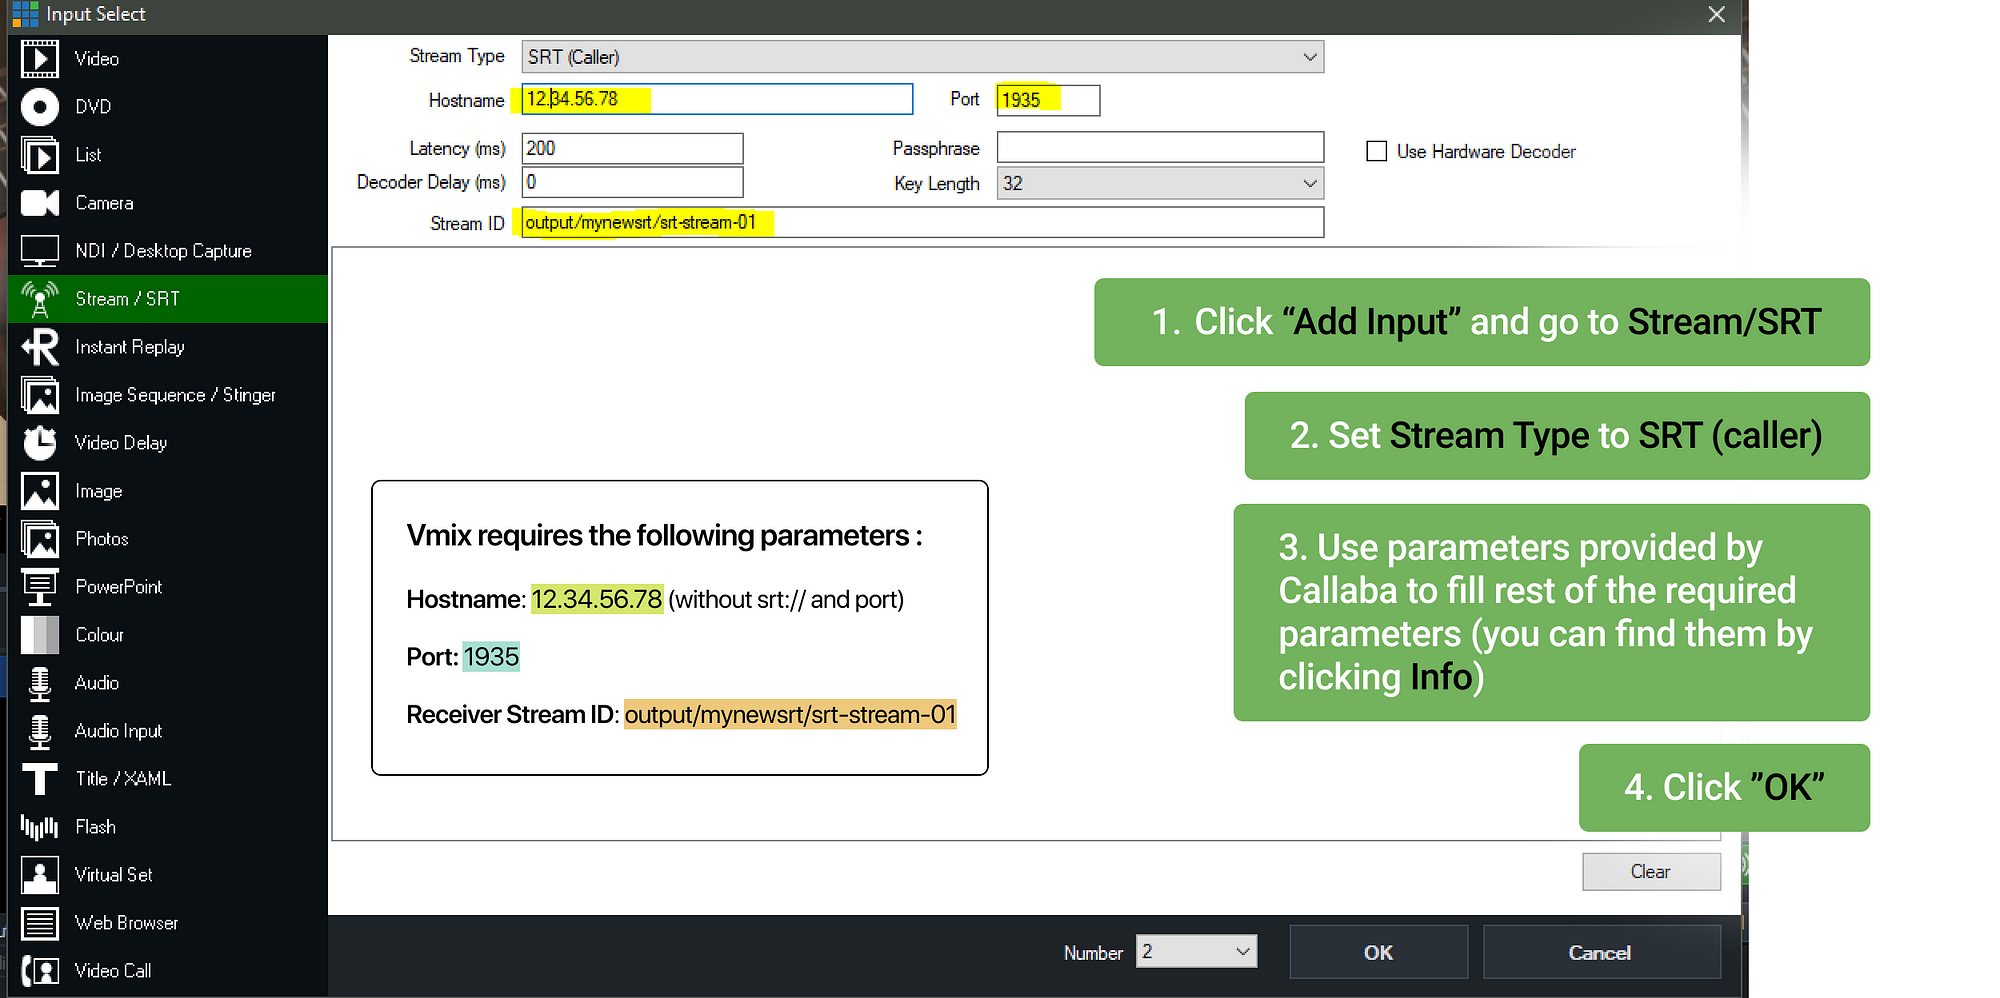
Click “OK”.
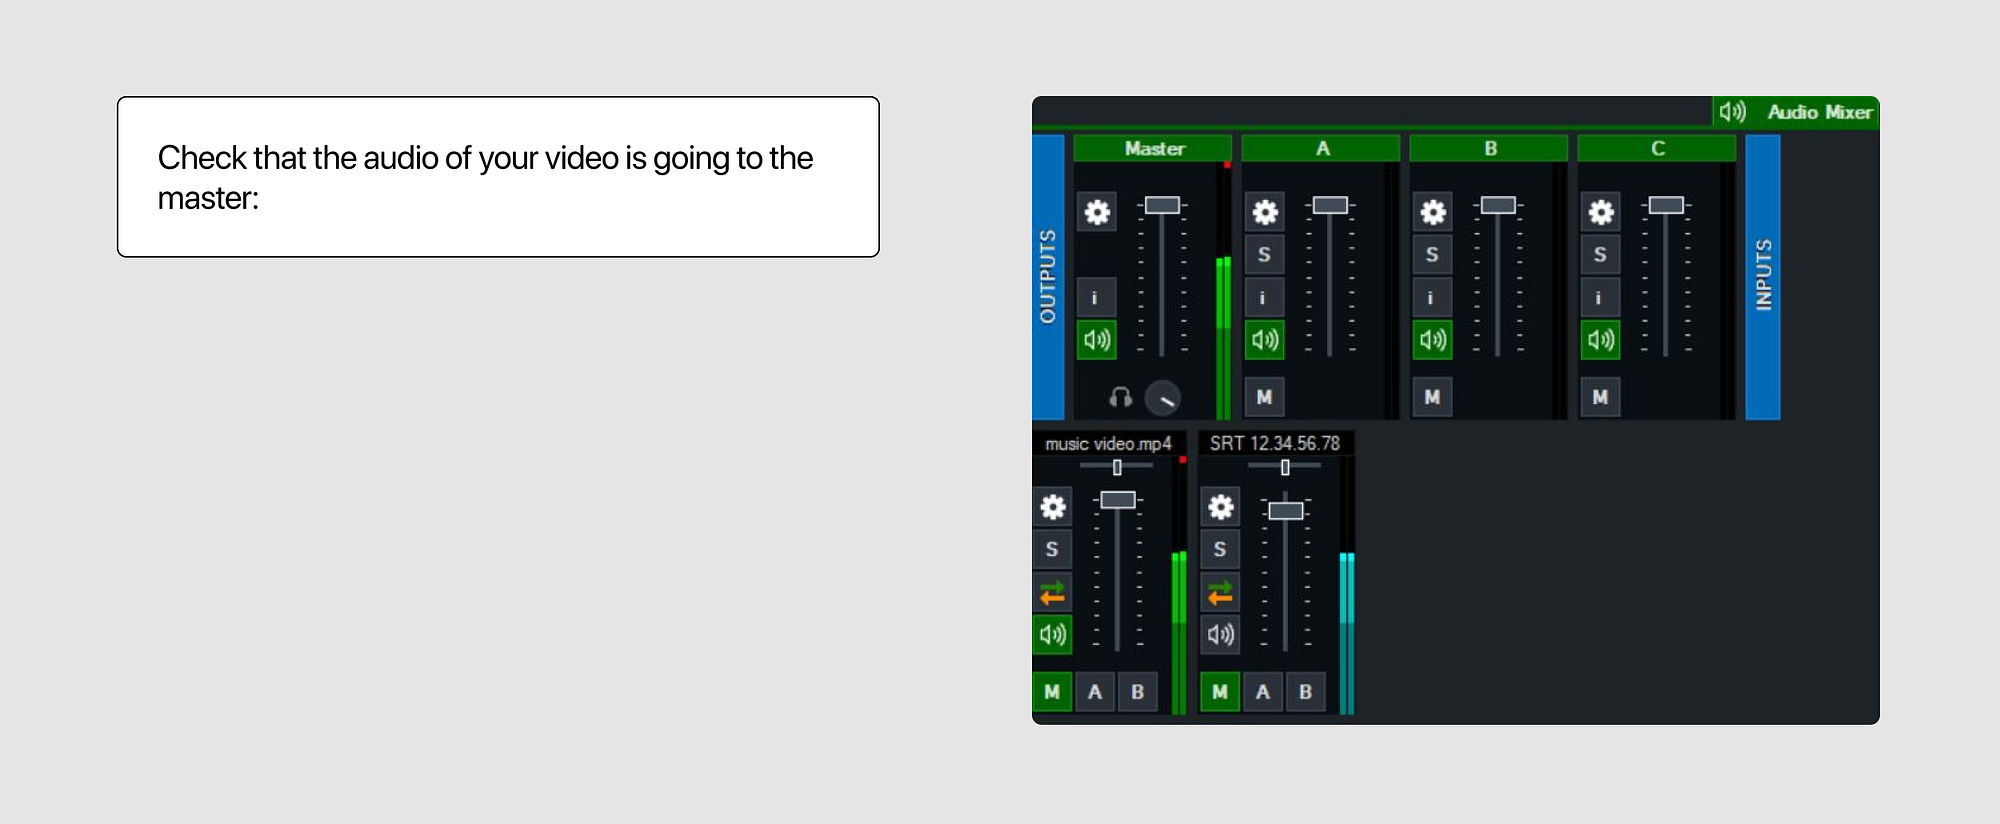
18. Let’s check that the audio of the video is going to the master.
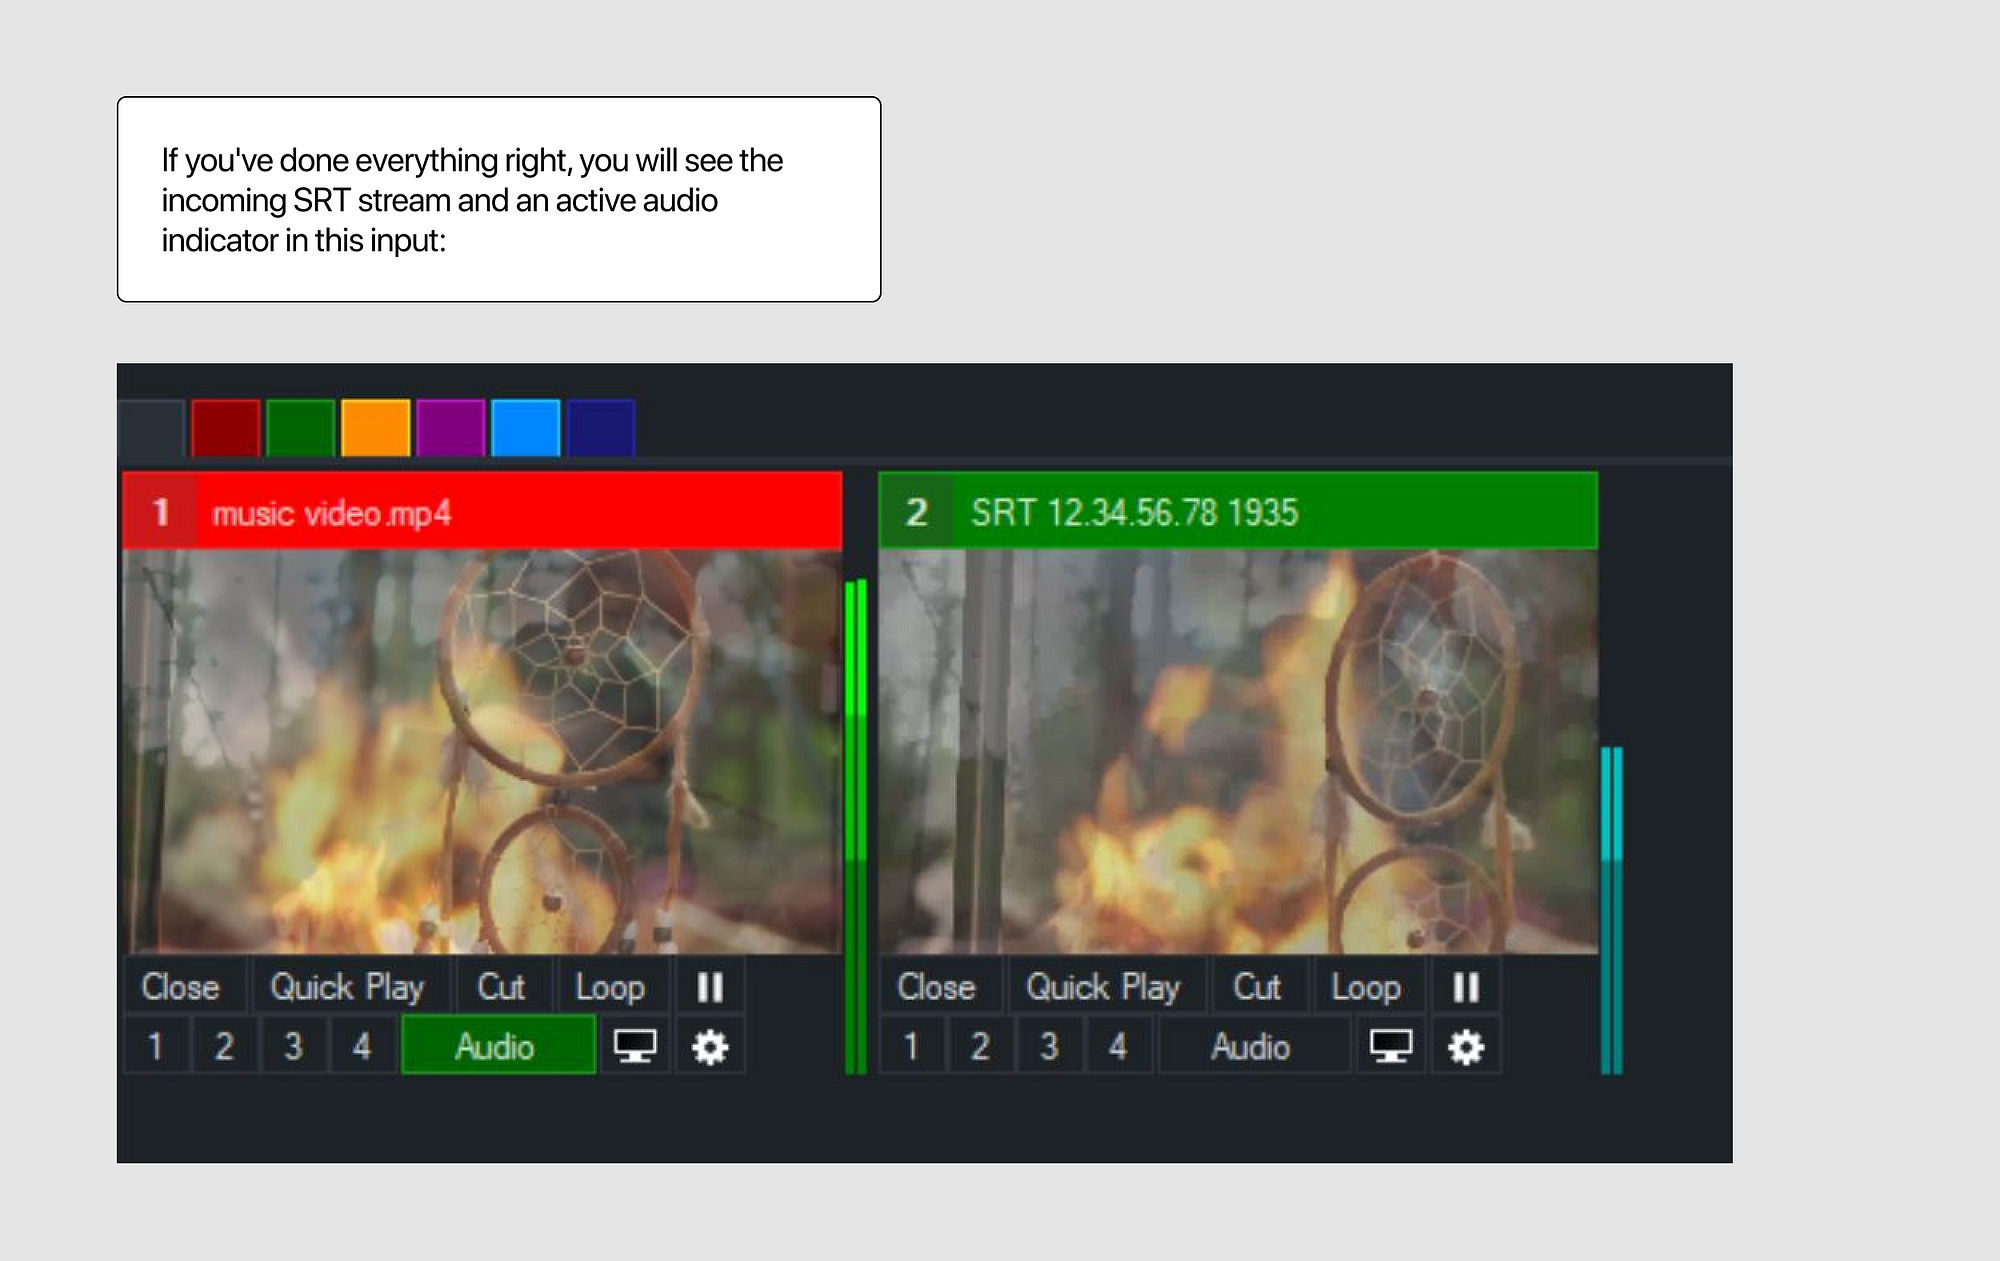
19. If you’ve done everything right, you will see the incoming SRT stream and an active audio indicator in this input :
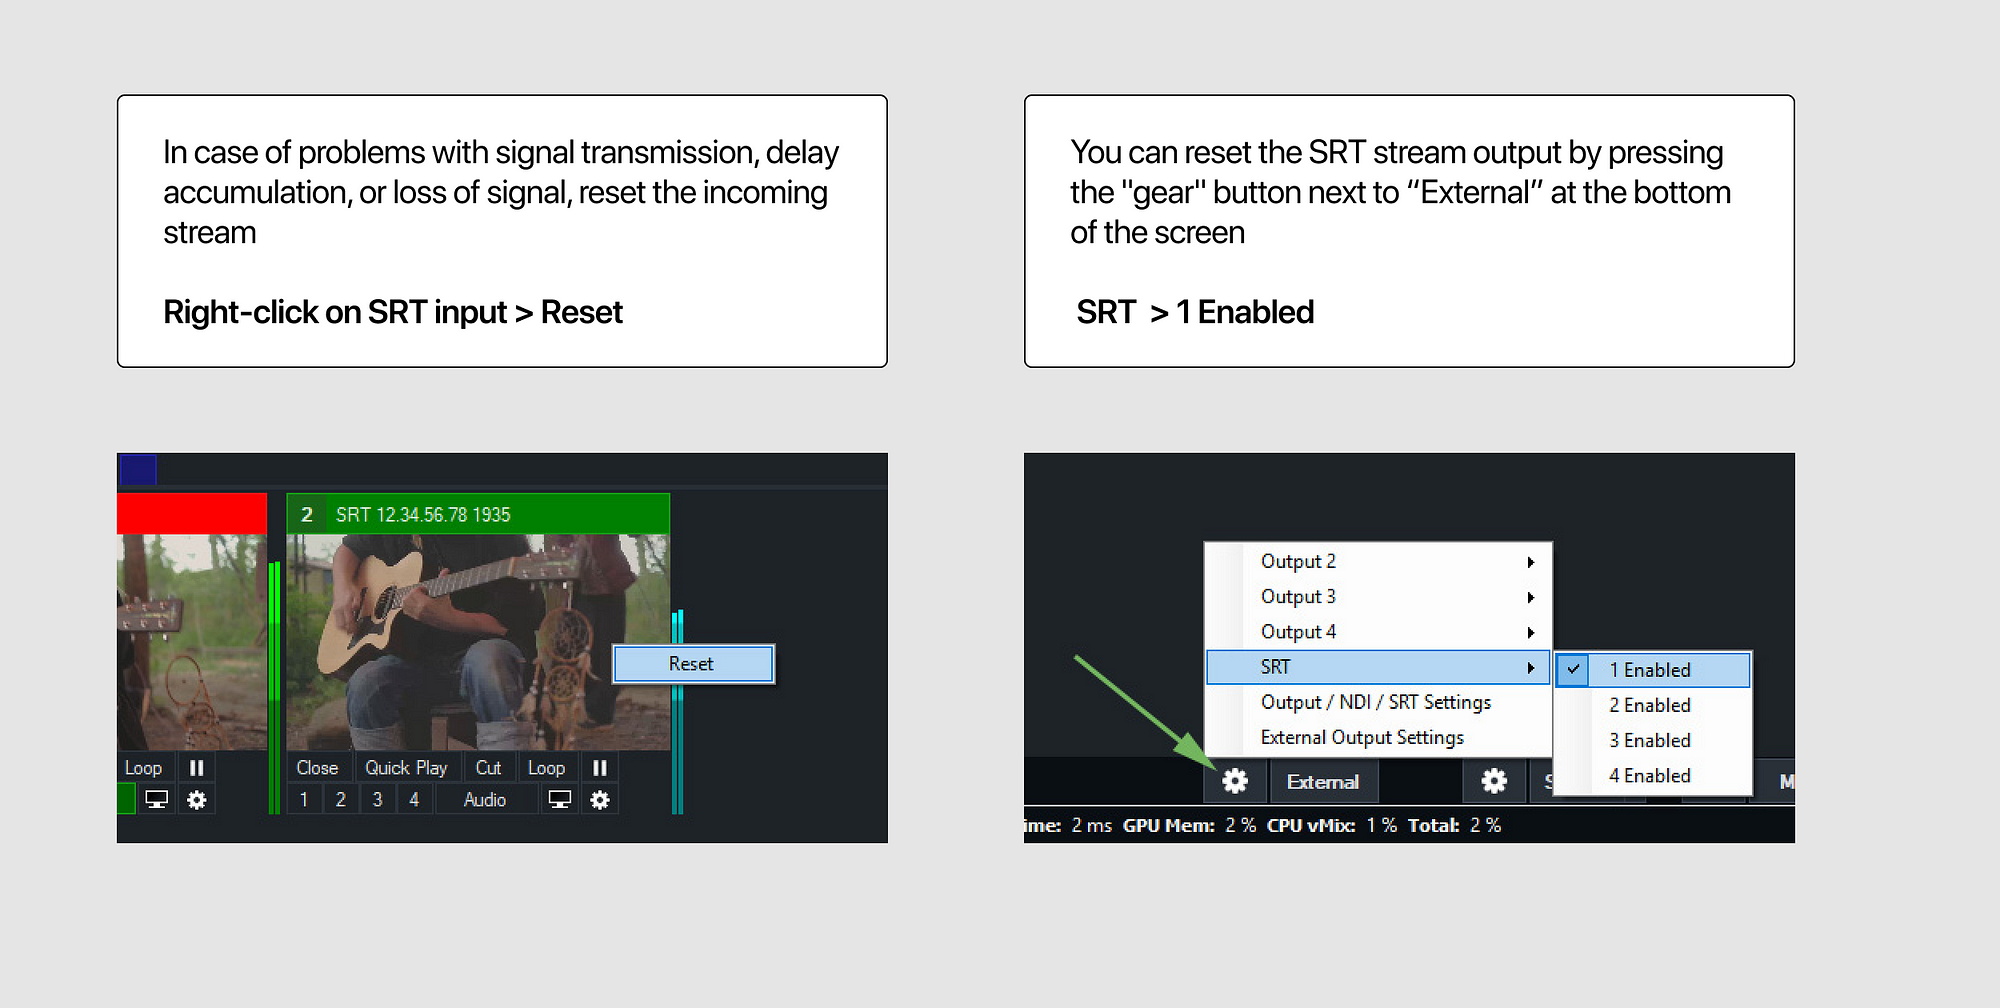
20. In case of problems with signal transmission, delay accumulation, or loss of signal, reset the incoming stream :
Right-click on SRT input — reset
You can reset the SRT stream output by pressing the “gear” button next to external at the bottom of the screen.
SRT — 1 enabled
That’s all! We wish you to have successful broadcasts, minimal latency and a wide channel.
Related articles :
• How to launch Callaba Cloud Live Streaming
• How to send and receive SRT Streams via vMix
• How to set up SRT stream from a mobile phone via Larix Broadcaster to Vmix
• How to stream from OBS studio to Twitch, Youtube and Facebook at the same time
• How to set up geo-distributed routing of video streams using SRT protocol and Callaba Cloud


