How to transform UDP feed from a CCTV camera into RTMP [Part 1]
Make sure that you have :
- Access to the web interface of the video camera.
In our example we are using UNV DC12V PoE IP camera.
2. Callaba Cloud Live Streaming: a streaming platform that can receive camera streams and perform all kinds of tasks with them.
Subscribing to Callaba Cloud will take no more than 5 minutes.
Read our step-by-step manual: How to Launch Callaba Cloud.
In the next steps we will establish the following configuration.
It might look intimidating, but in reality its way simpler than it looks.

Will start with the RTMP server. RTMP server will act as the final receiver. As a destination.
Creating an RTMP Server
0. Log into Callaba Cloud Live Streaming dashboard
To open it, go to http://YOUR PUBLIC IPV4.
By default, the dashboard address is the Public IPv4 address of your Amazon Web Services instance.
Login : admin
Password : your unique Instance ID
If you are having difficulties with this step, check out our step-by-step manual: How to launch Callaba Cloud Live Streaming.
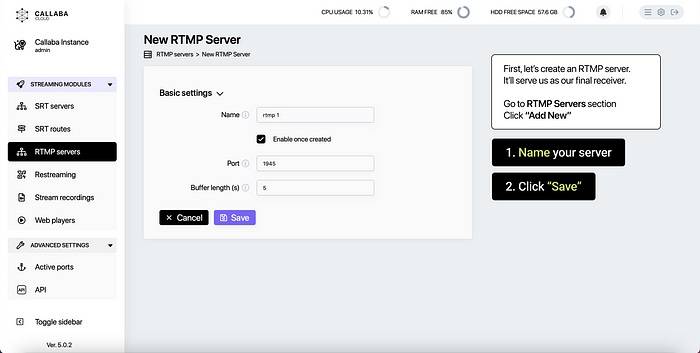
- Go to RTMP Servers section
Click “Add New” - Name your RTMP Server
Change other settings if needed
Click “Save”
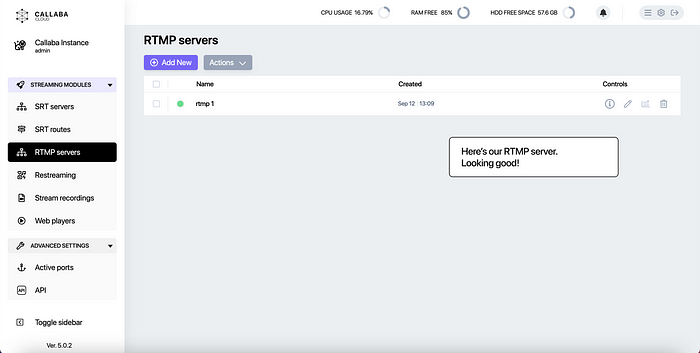
Great! Our RTMP Server is looking good. We’ll leave it alone for a while.
Next, we need a Restreamer that will listen on a UDP port and redirect the stream to our newly made RTMP Server.
3. Go to Restreaming section
Click “Add New”
4. In the form that opens
Name your Restream
Input type : select “Listen UDP Port”
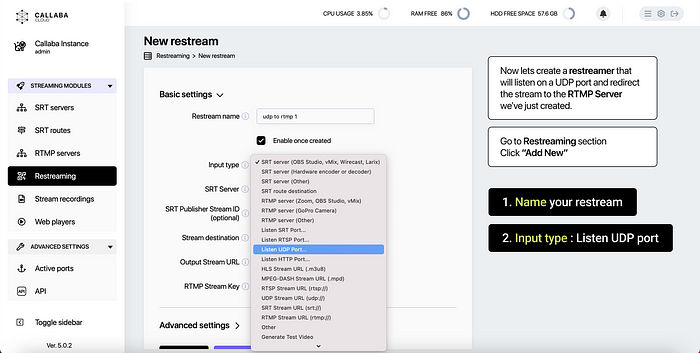
Stream destination : select “Local RTMP Server”

UDP Port : 2335 is the default port used by the system. You can specify another available port if you want to.
Output Stream URL : In our case we are going to send the stream to our local RTMP server. Hence why we use rtmp://127.0.0.1:1945/live
127.0.0.1 — is the address of the local host.
1945 — is the port that our RTMP Server is listening.
RTMP Stream Key : Copy the stream key from the RTMP Server you’ve created

Great! Our Restreamer is looking good. It’s now waiting for our stream to come.

5. Now let’s venture into our camera web interface.
In our example we are using UNV DC12V PoE IP camera.

You camera settings and general interface might look a little different.
But you need to create a new connection / media stream and specify your destination.
Add new Media Stream.
IP Address : specify IP Address of your Callaba instance
Port : specify the UDP port your Restreamer is listening to [in our case its 2335]

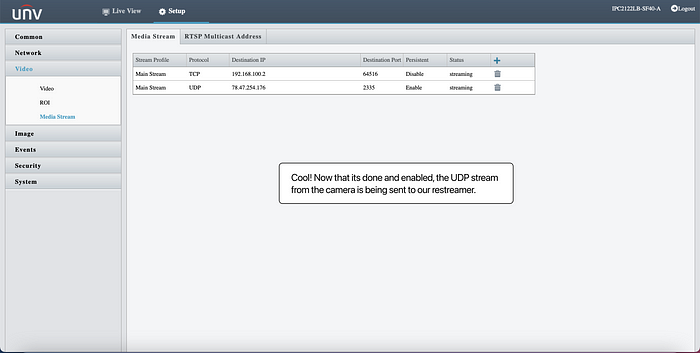
Done! Feed from the camera is being sent to our Restreamer.
Back to Callaba Cloud Dashboard.
Restream now shows incoming bitrate — which means that we can now create a player and actually watch our stream.

6. Go to Web Players section
Click “Add New”
In the form that opens :
Name your Player
Input type : select RTMP server
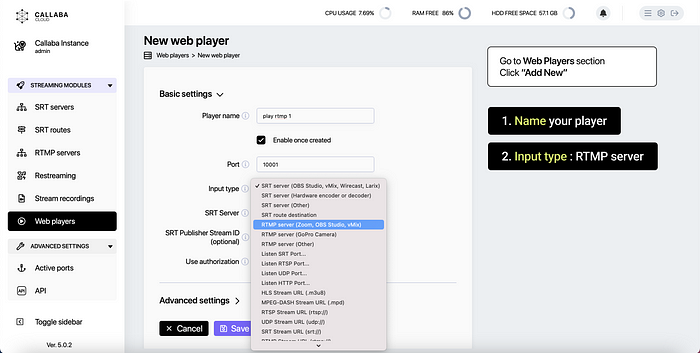
RTMP Server : select your newly created RTMP server from the list
RTMP stream key : Copy the stream key from the RTMP Server you’ve created
Click “Save”

Awesome. The bitrate starts coming to the player right away.
Click the “Preview” button to watch your stream.

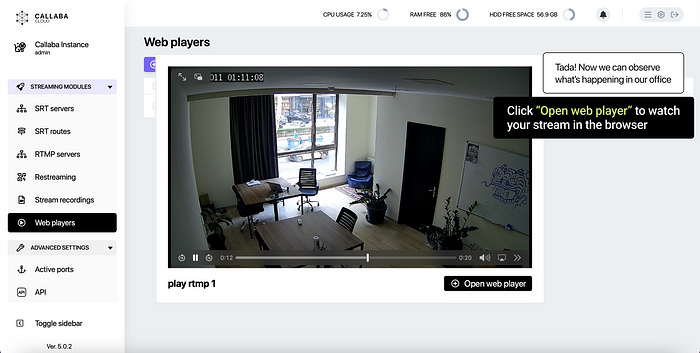
Tada! Now we can see what’s happening in our office.
You can also click “Open Web Player” to watch the stream in the browser.

This is the end of Part 1 of this tutorial.
If you have any questions, please contact us at: [email protected]
We will respond to you within 48 hours.
Happy streaming!
Related articles :
How to launch Callaba Cloud Live Streaming
How to start streaming in OBS Studio over the SRT Protocol
How to multi-stream from OBS Studio to Twitch, Youtube and Facebook
How to multi-stream from Wirecast to Twitch, Youtube & Facebook
How to set up geo-distributed routing of video streams using SRT protocol and Callaba Cloud


