How to launch Callaba Cloud on Microsoft Azure
More live video workflow notes and product updates.
Important Notice
Currently, we offer only version 6 on AWS platform.
Version 6 does not include :
- detailed statistics section;
- pay-per-view;
- multi-language streaming functionality
These features are available in version 7 as a self-hosted solution or on-premises service. Contact us to learn more.
Before you begin
First step is to register an account on Microsoft Azure platform, if you don’t have one already. This will take no more than 3–4 minutes.
1. Once you’ve registered and logged in successfully, click the LINK.
This link will take you to the Callaba Cloud’s product page on Azure Marketplace. For production ingest and monitoring, see continuous streaming. For playback integration and analytics, use video api. Recommended product path: Ingest & route, Player & embed. For this workflow, Player & embed is the most direct fit. For this workflow, Paywall & access is the most direct fit. Before full production rollout, run a Test and QA pass with Generate test videos and streaming quality check and video preview. Before full production rollout, run a Test and QA pass with a test app for end-to-end validation.
Then click “Get it now” button
Alternatively, simply type Callaba Cloud in the blue search bar at the top of the screen and click the suggested link.
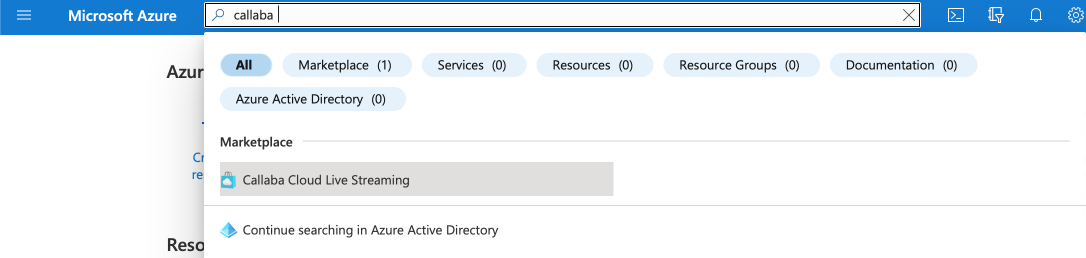
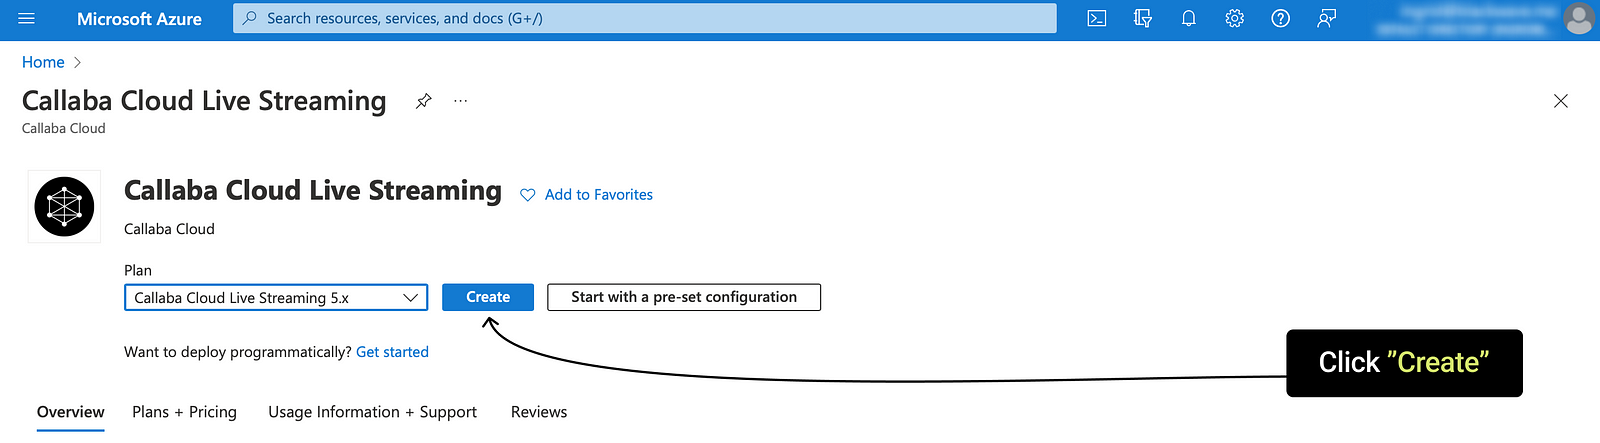
Either way, you will see a product page with a blue “Create” button
Click “Create”
Before we proceed, let’s briefly talk about what is going to happen.
In essence, Callaba Cloud is a software that needs hardware to run on. When you launch Callaba Cloud on Micrososft Azure, you are picking a server, an actual physical machine, and installing Callaba Cloud (the software) on it. It is a cool and flexible concept, you can do a lot of things with these servers. Like, deliver video content worldwide with low latency, for example.
Don’t worry, it sounds more complicated than it actually is.
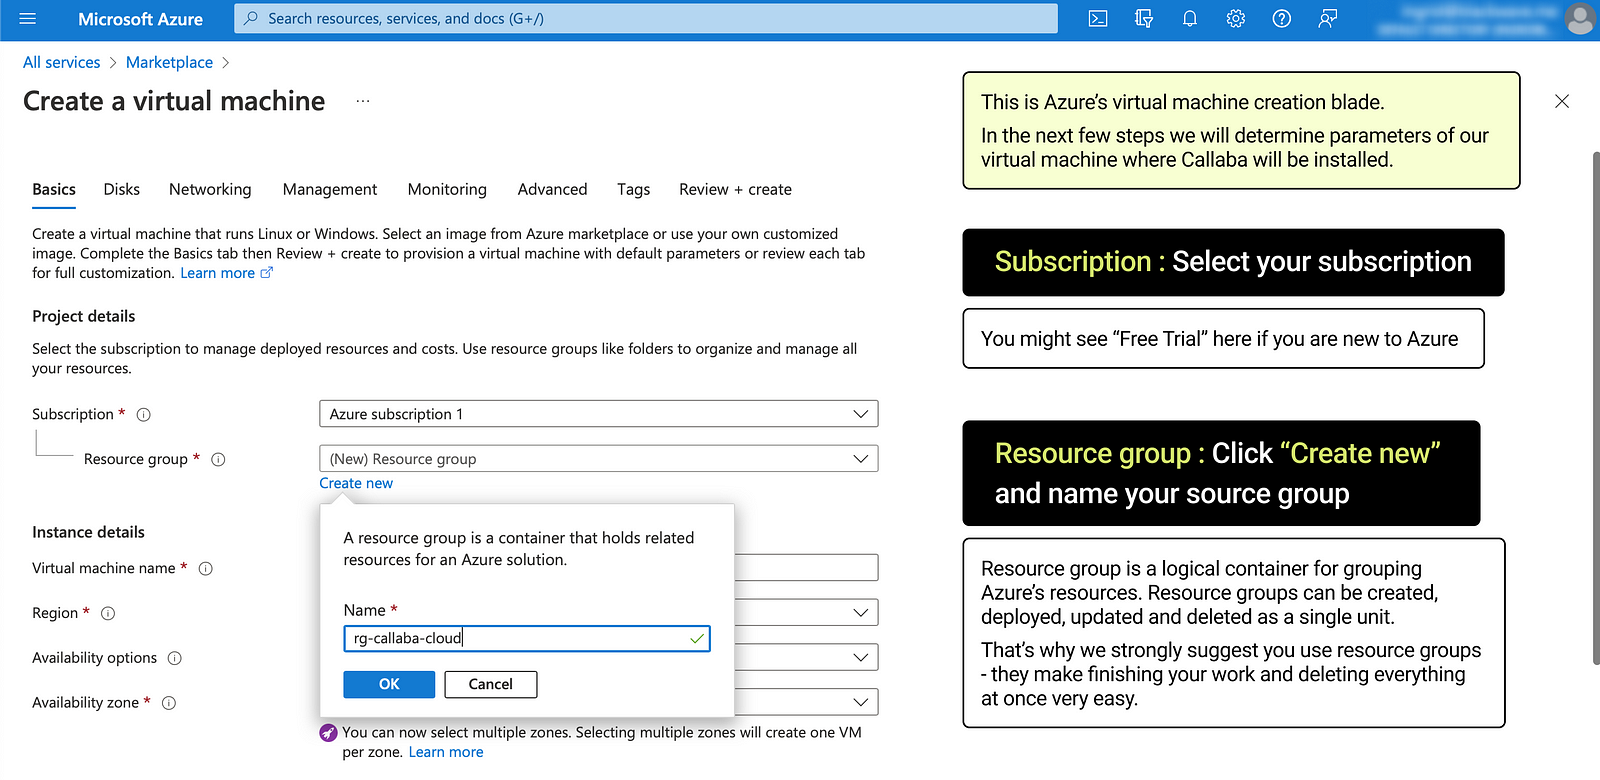
2. So now you’re looking at Azure’s virtual machine creation blade.
And in the next few steps we are going to be defining the settings of our virtual machine where Callaba will be installed.
Project details
Subscription : select your subscription
If you are new to Azure, you might see “Free Trial” there — that’s okay.
Resource group : click “Create new” and name your resource group
Resource group is a logical container for grouping related Azure’s resources. Resource groups can be created, deployed, updated and deleted as a single unit.
We strongly recommend creating a resource group, this will allow you to easily manage and delete everything related to this virtual machine later on.
In this case our resource group is named rg-callaba-cloud
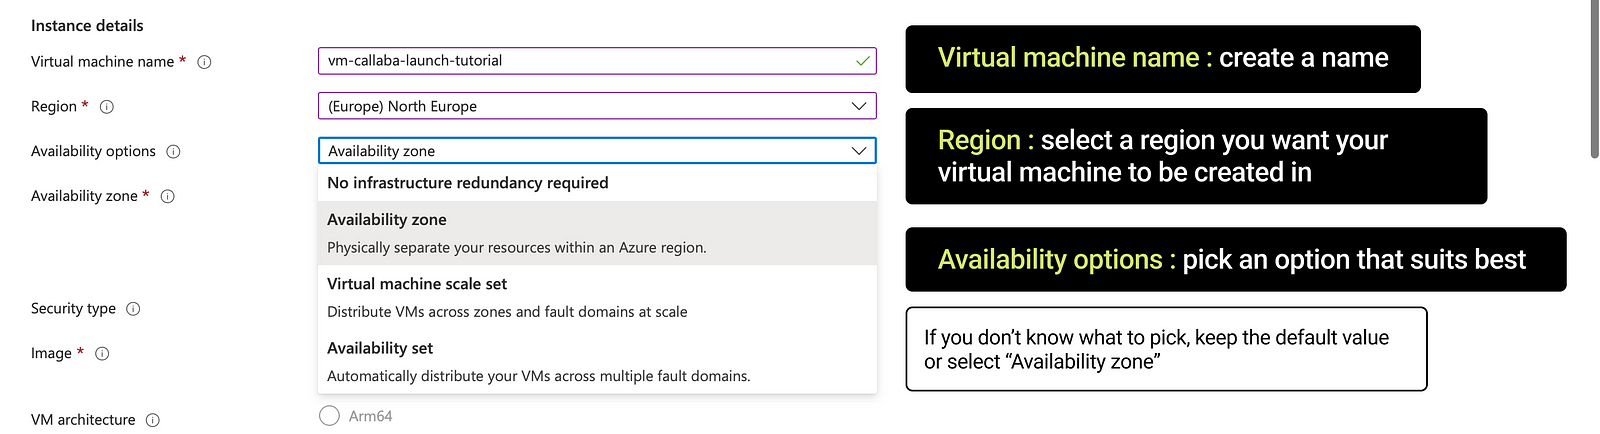
3. Instance details
Virtual machine name : create a name
Region : select a region you want your virtual machine to be created in
Availability options : leave the default setting or select “Availability zone” and pick a zone.
To sum it up, these are settings that allow to distribute your resources across actual physical Azure’s resources (data centres and groups of servers [so-called “Fault domains”] within data centres) in a way to reduce the possibility of failure. These settings mostly come into play when you have to deal with a number of virtual machines, and you need to make sure that if one fails, the rest of them keep working.
Size : pick a suitable vm size for your tasks
Click “See all sizes” to see a full list of all available options
Size determines processing power (number of vCPUs), memory (RAM) and storage capacity of the virtual machine.
For most cases we recommend using 4 vCPUs, 8 Gib RAM.
Minimal possible option has to have at least 2 vCPUs and 4 Gib RAM.
Use the bitrate calculator to size the workload, or build your own licence with Callaba Self-Hosted if the workflow needs more flexibility and infrastructure control. Managed launch is also available through AWS Marketplace.
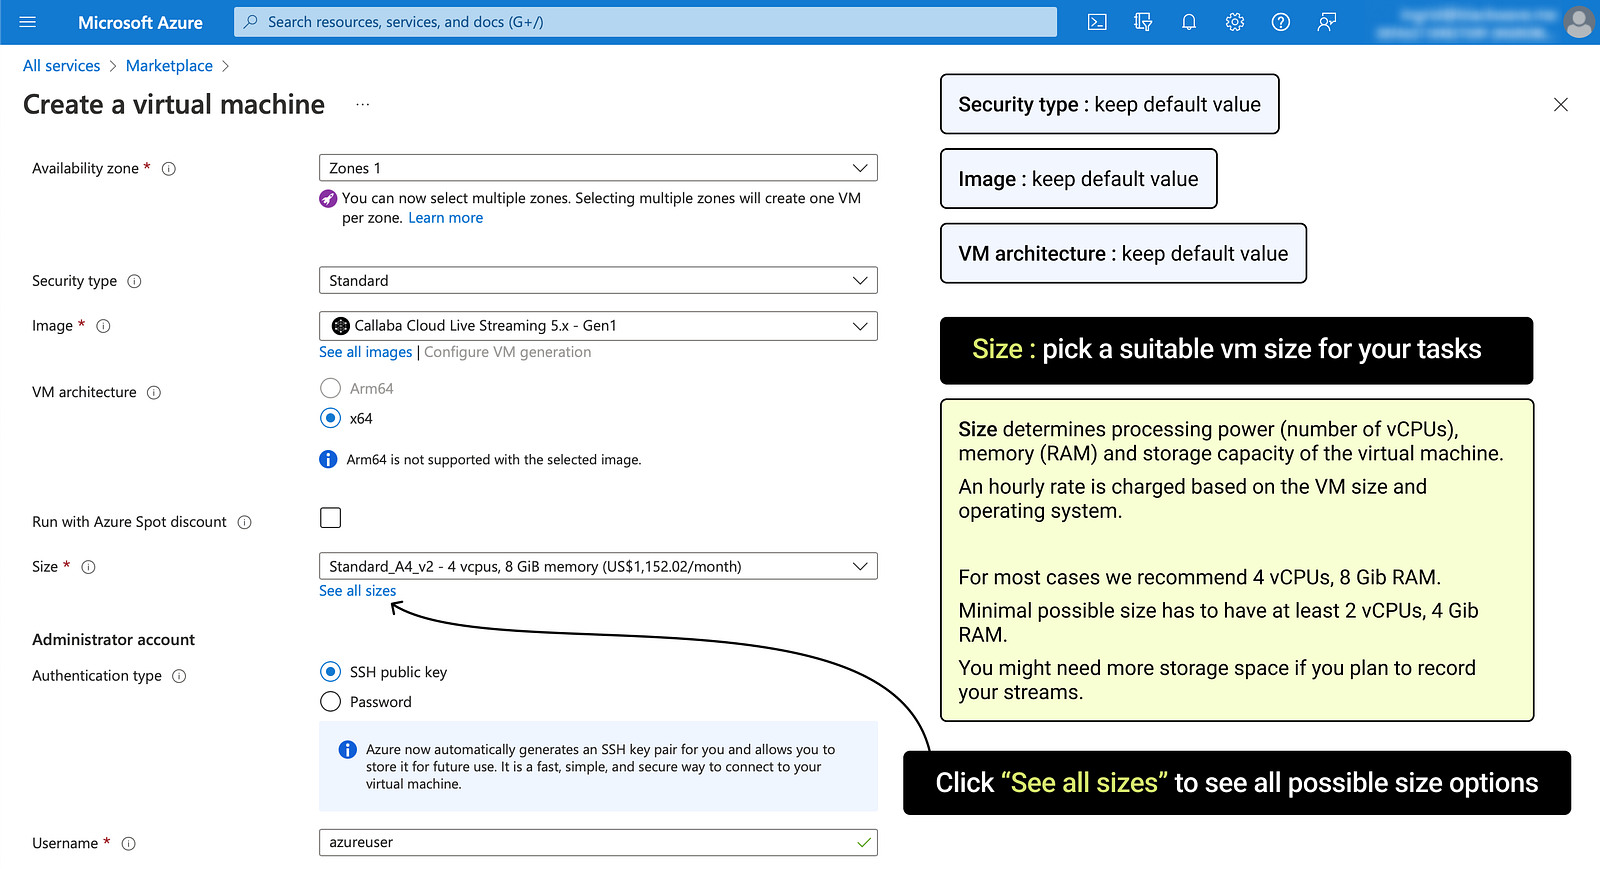
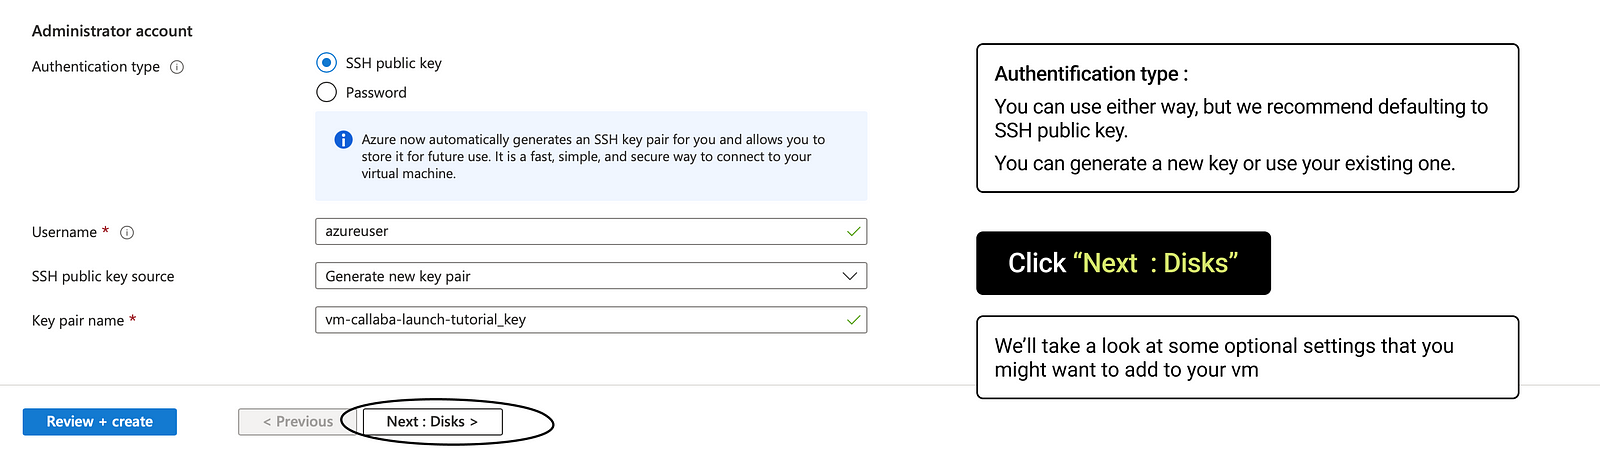
4. Administrator account
Authentification type :
You can use either way, but we recommend defaulting to SSH public key.
You can generate a new key or use your existing one.
You can stop right here and launch your virtual machine, but we’d like to suggest some optional settings that you might find useful.
Click “Next : Disks”
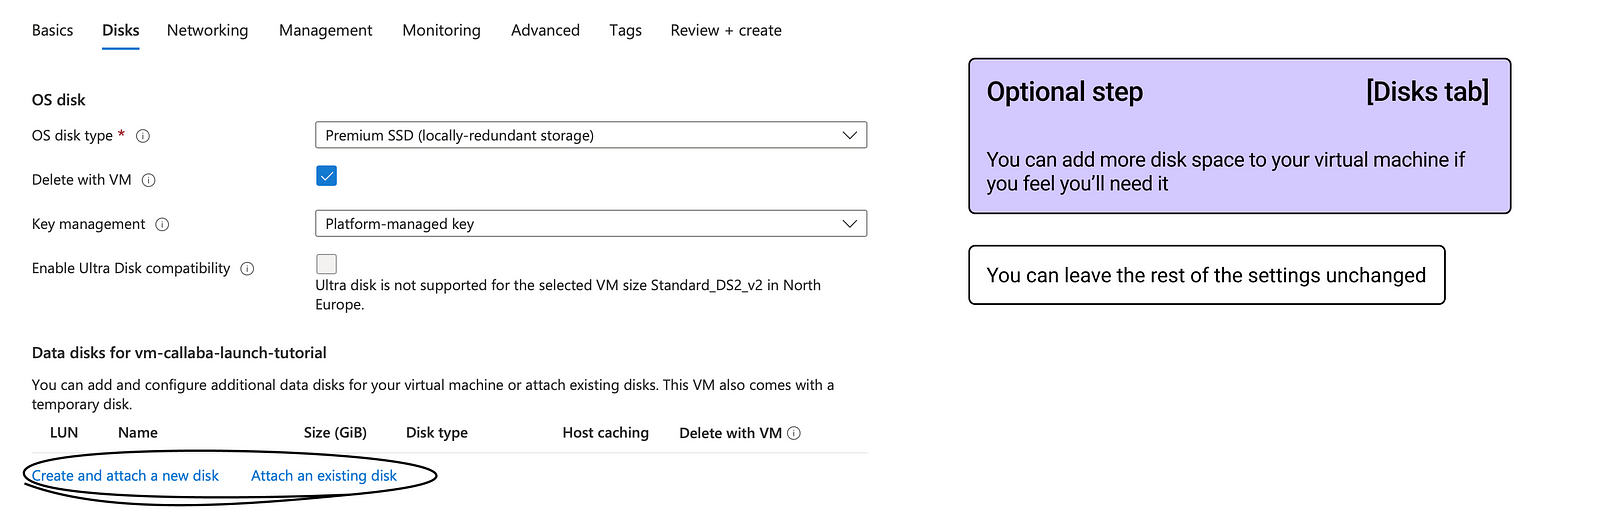
Optional step [Disks tab]
You can add more disk space to your virtual machine if you need it.
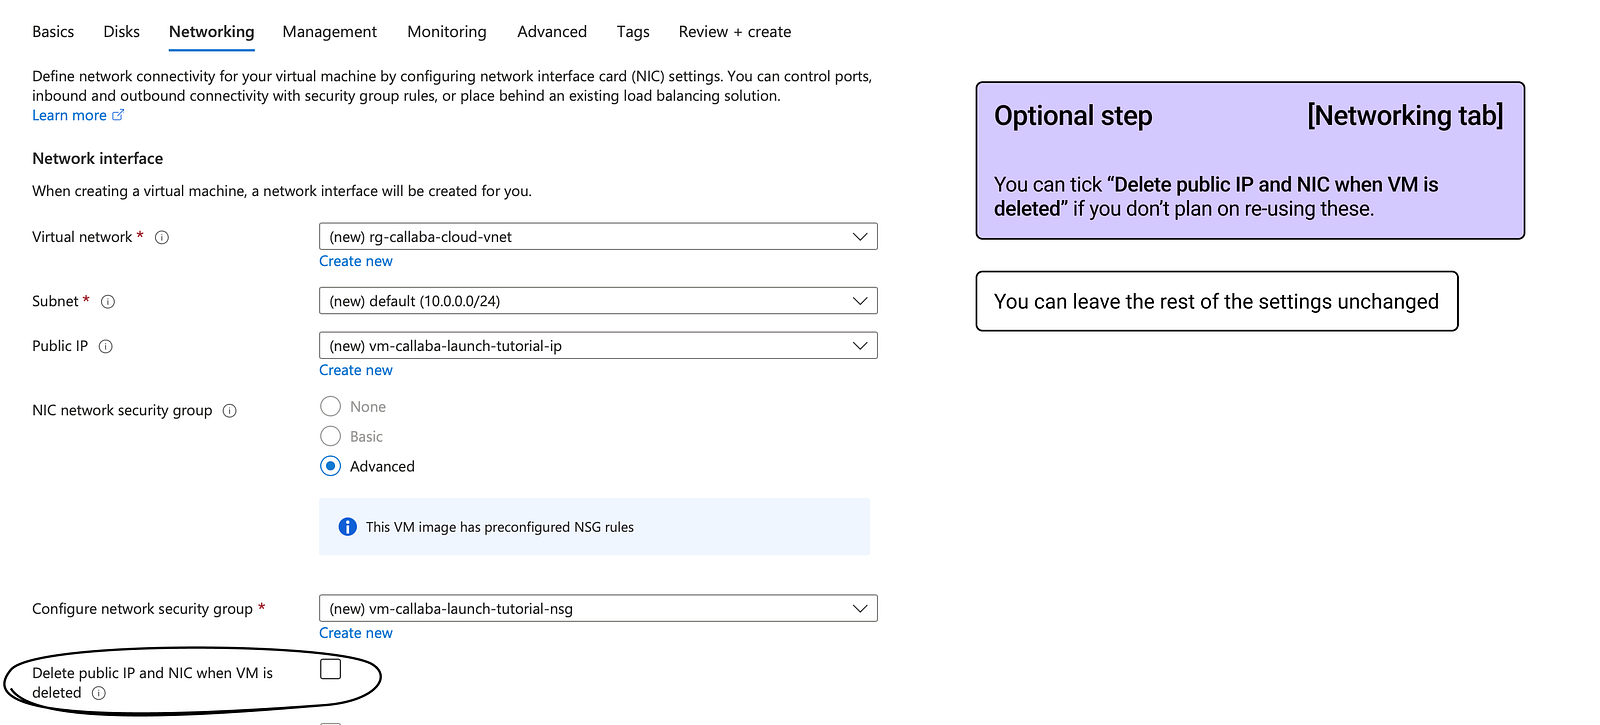
Optional step [Networking tab]
You can tick “Delete public IP and NIC when VM is deleted” if you don’t plan on re-using these.
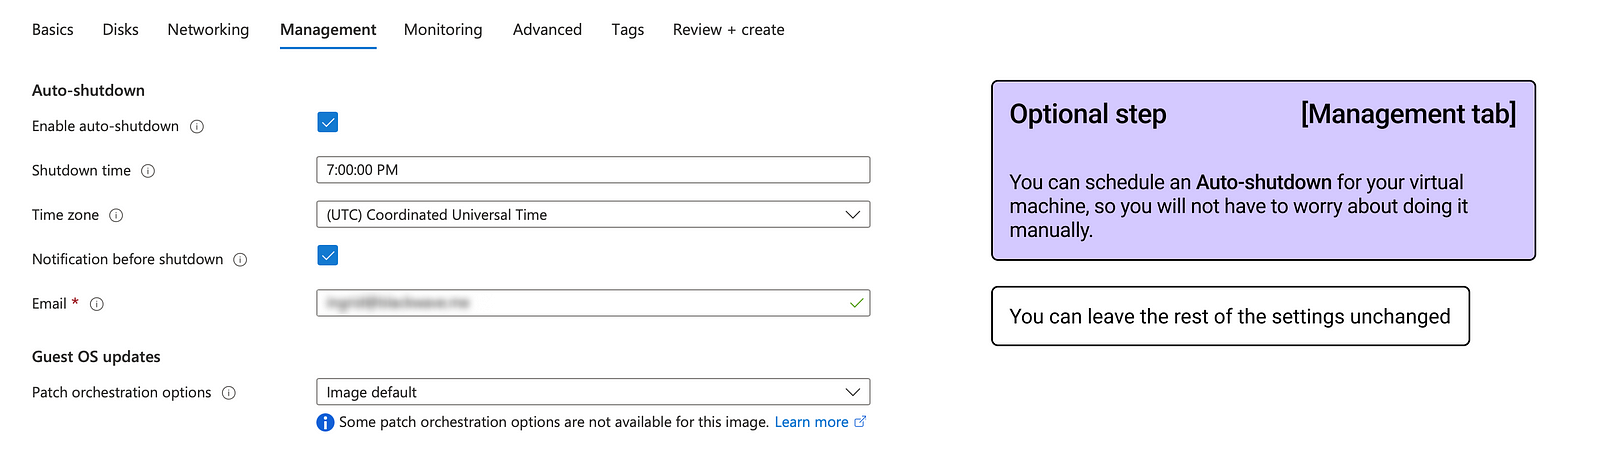
Optional step [Management tab]
You can schedule an Auto-shutdown for your virtual machine, so you will not have to worry about doing it manually. A useful option, considering Azure charges an hourly rate.
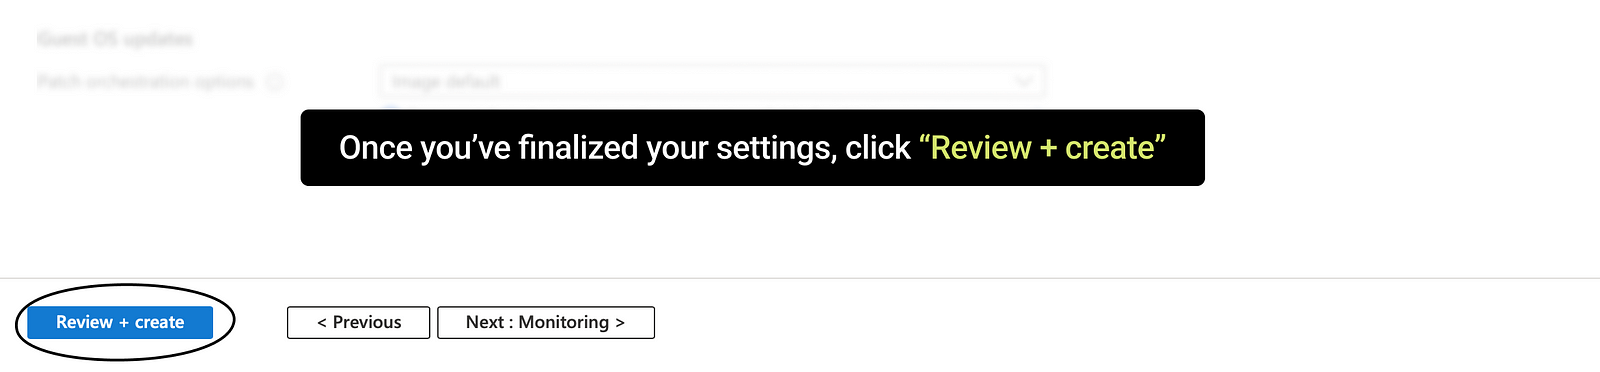
5. Once you’ve finalized your settings, click “Review + create”
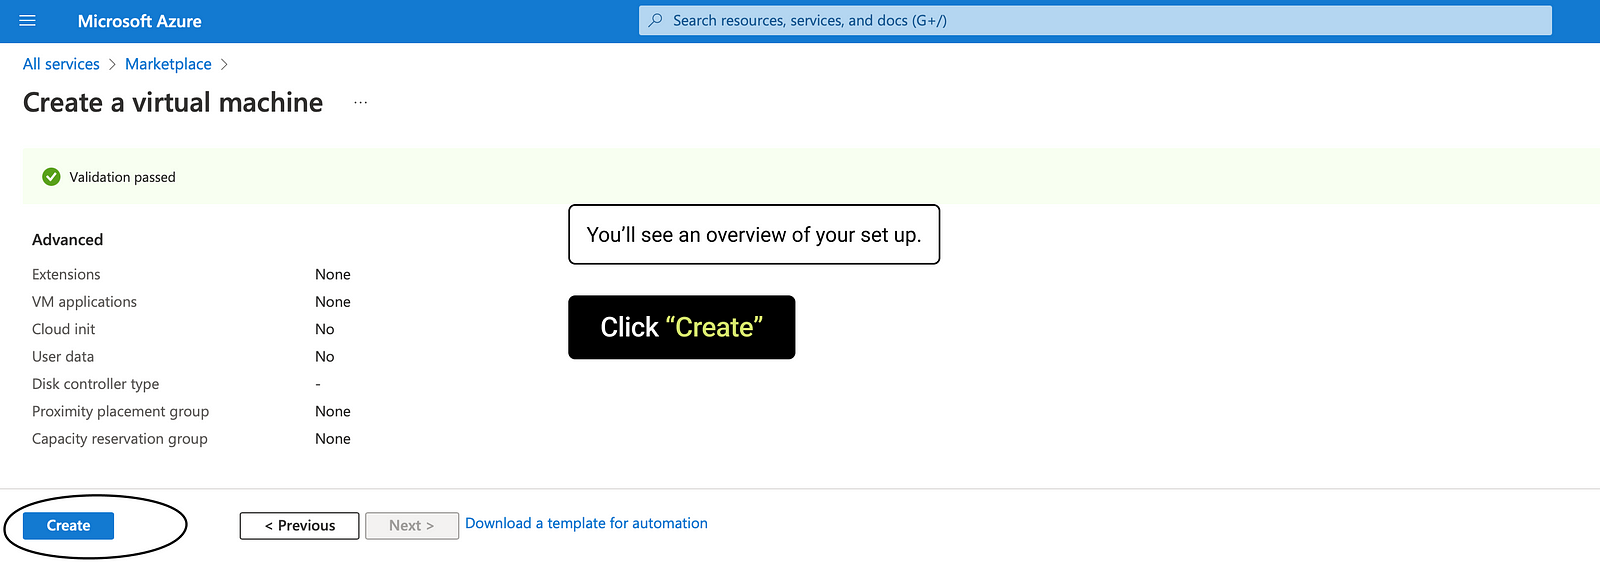
You’ll see an overview of your set up.
If everything is correct, click “Create”
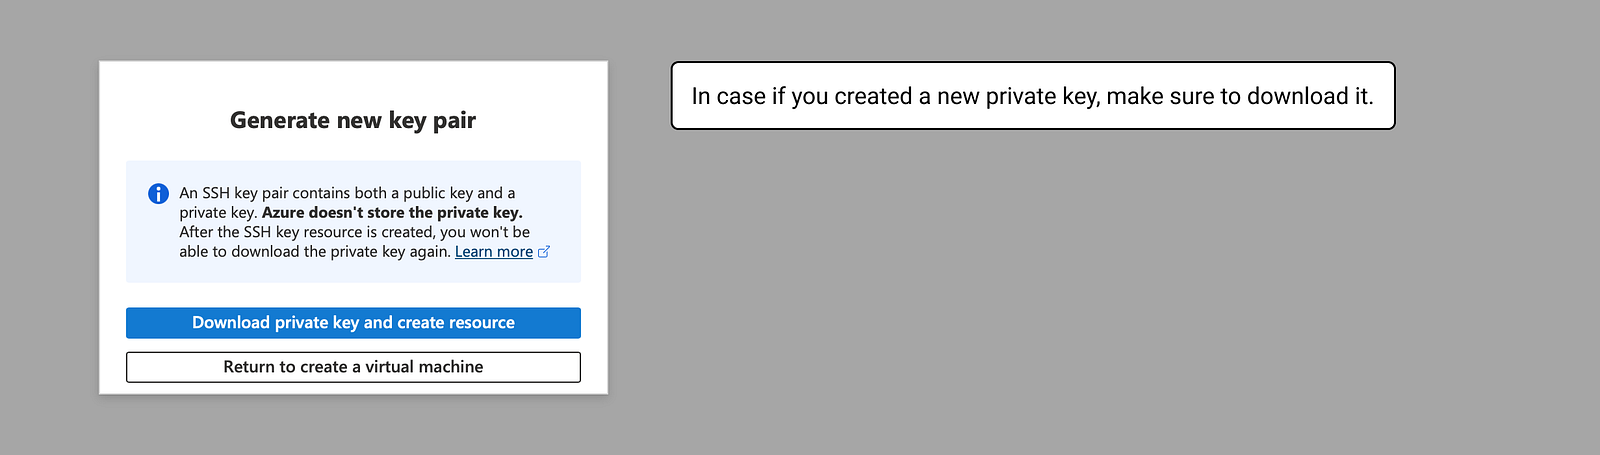
In case if you created a new private key, make sure to download it.
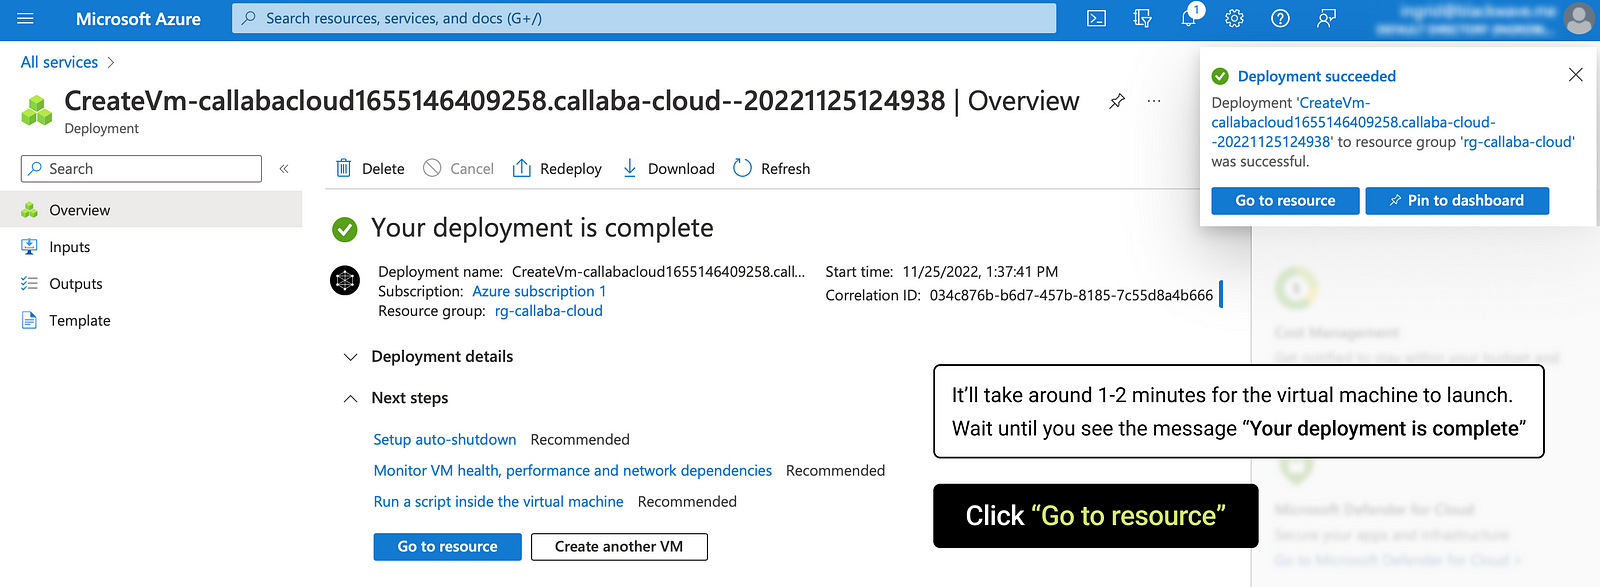
6. Now the virtual machine is being deployed. It’ll take around 2 minutes for the virtual machine to get all set up and ready.
Wait until you see a message “Your deployment is complete” or “Deployment successful”.
Then click “Go to resource”
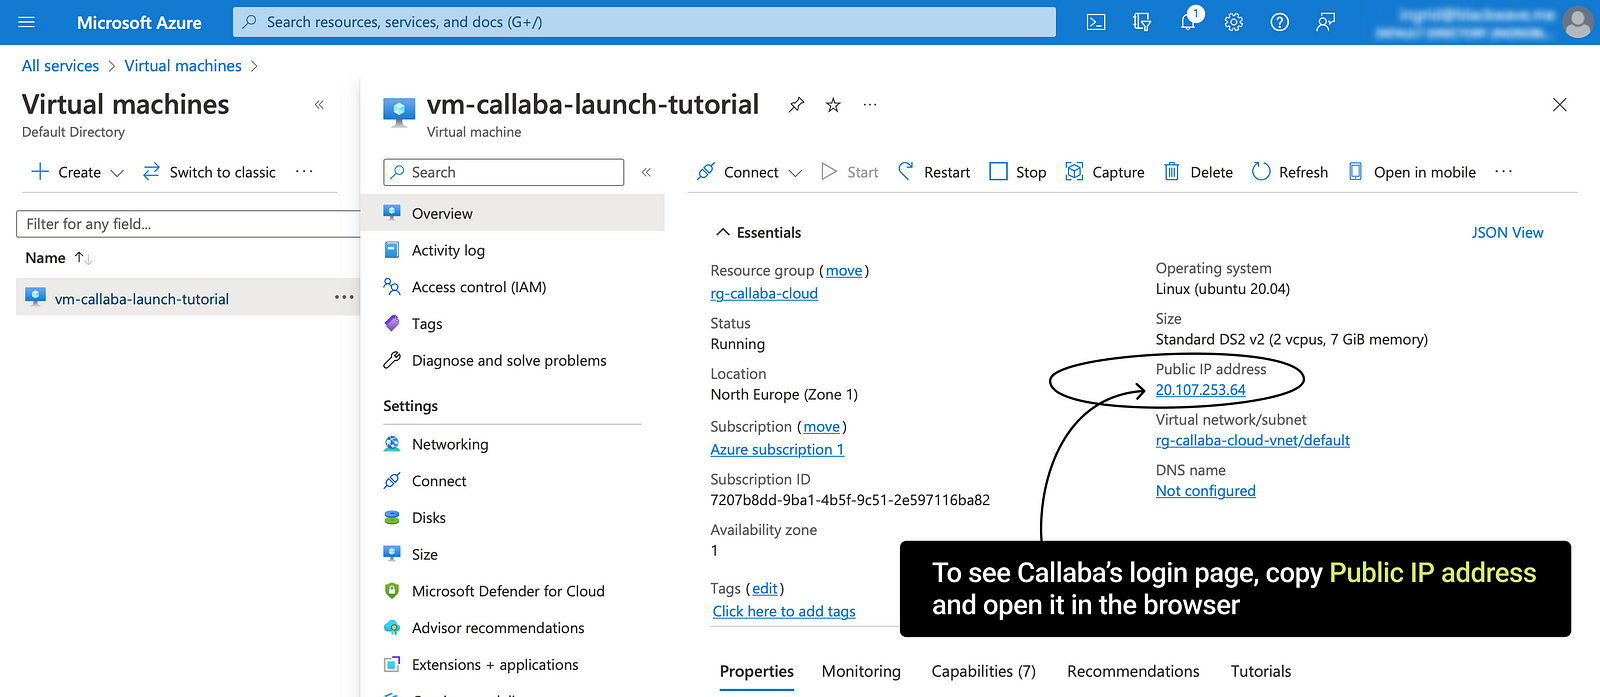
7. Open Callaba Cloud dashboard login page.
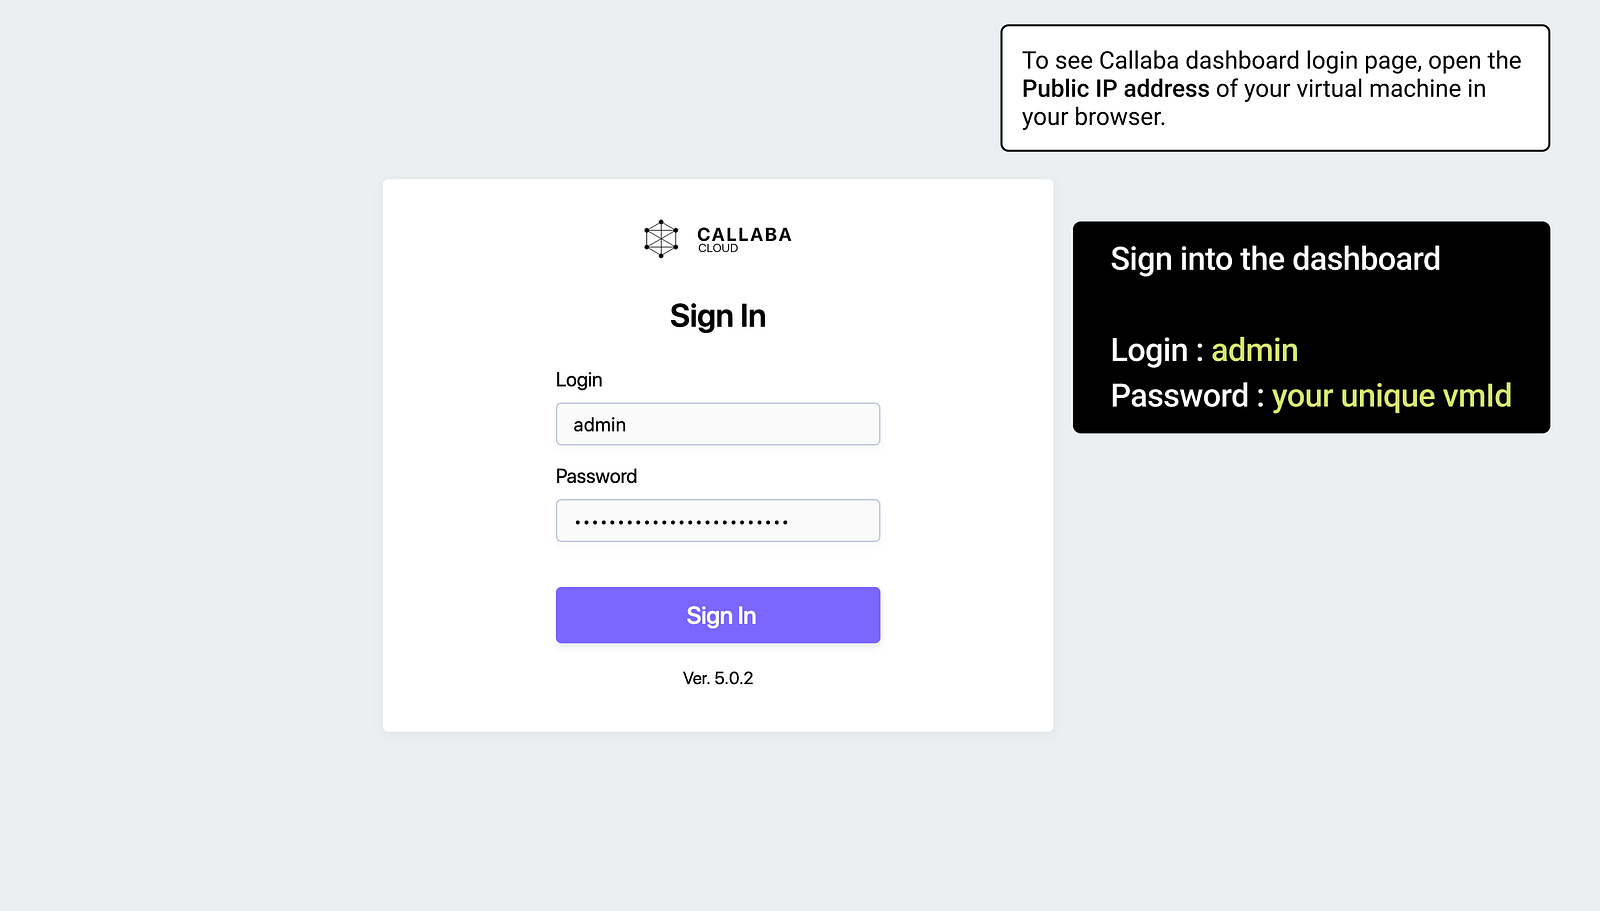
To see the dashboard, open your virtual machine’s Public IP address in the browser.
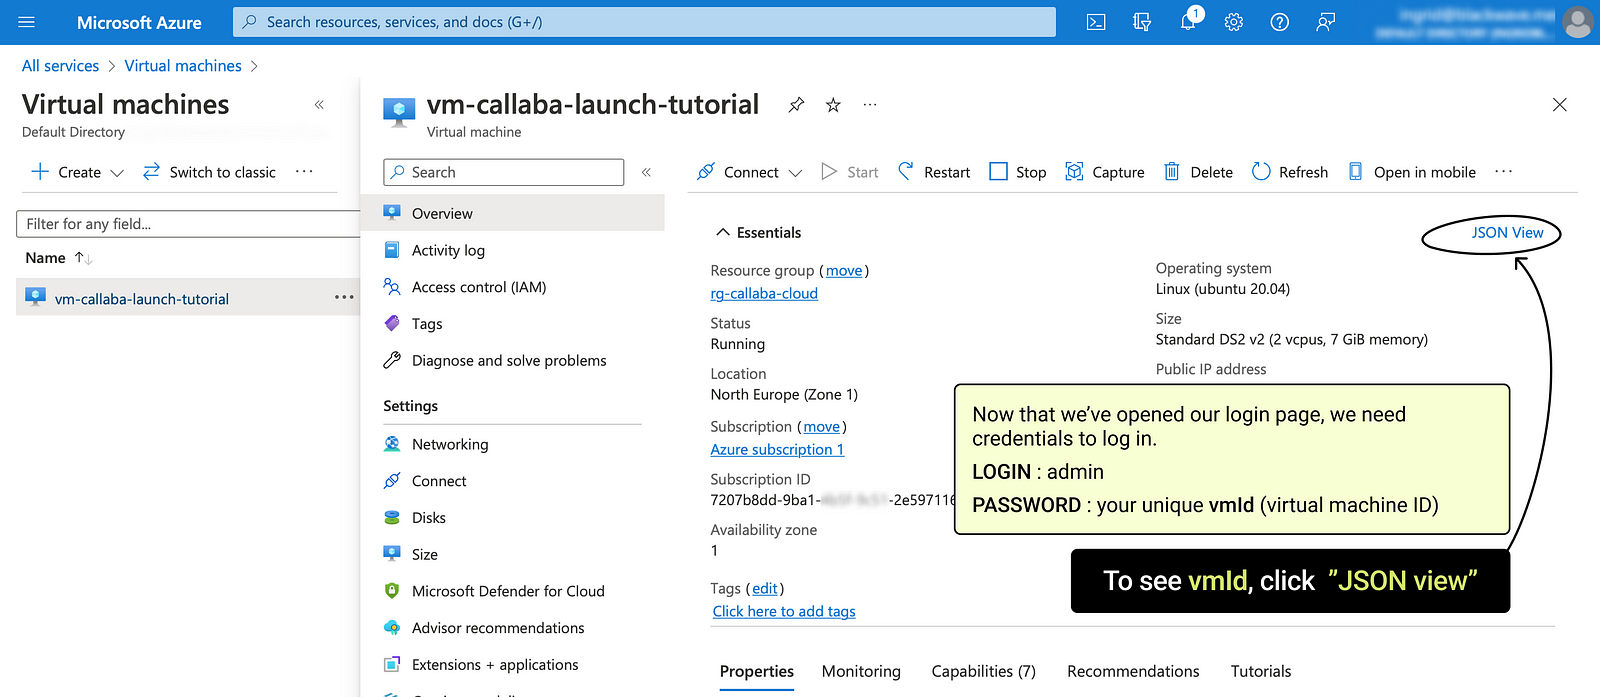
Great, now we need credentials to log in.
LOGIN : admin
PASSWORD : your unique vmId (virtual machine ID)
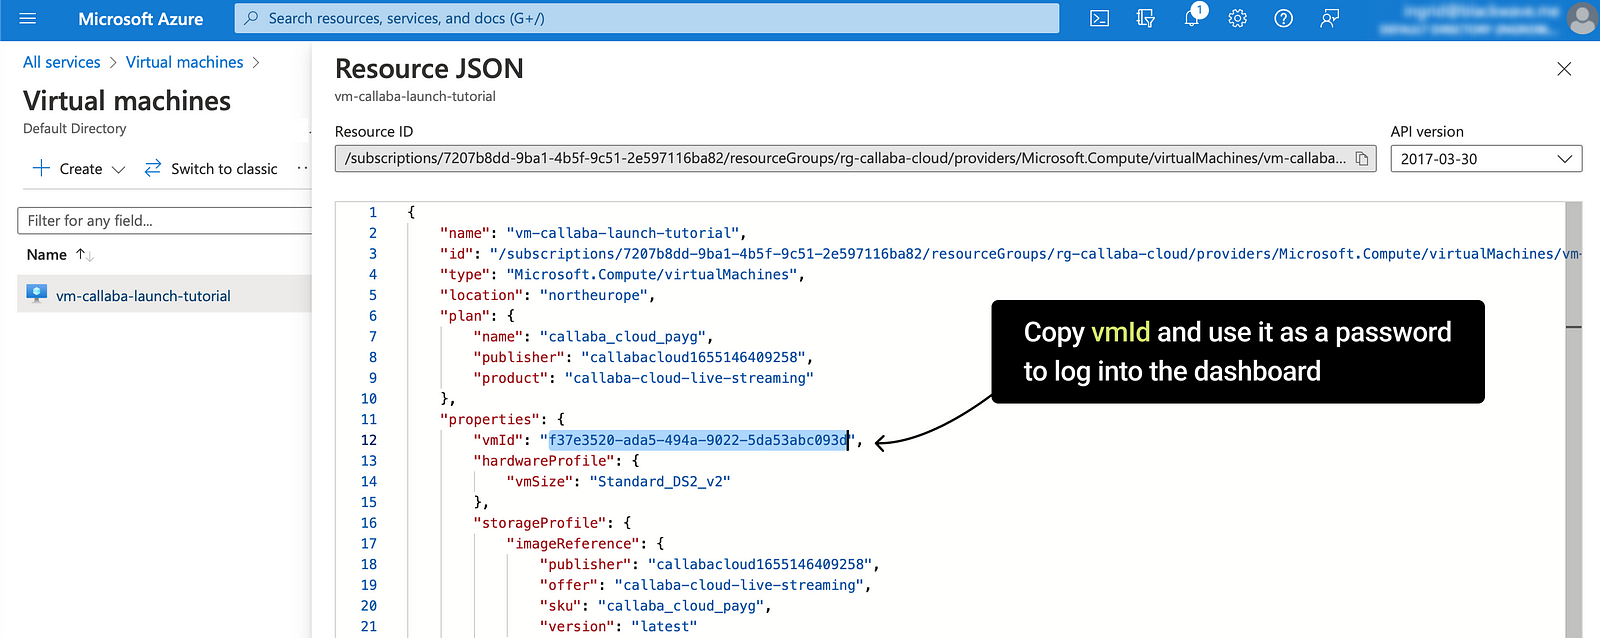
To see vmId (the password) click “JSON View”
Copy vmId and use it as a password to log into the dashboard
Sign into the dashboard.
Tada! Welcome to the dashboard. Now you can create SRT or RTMP servers, set up transcoding and so on and so forth.
However, before you do that, please make sure that you know how to finish your work with Azure, so that you will not get charged for something you have not actually used.
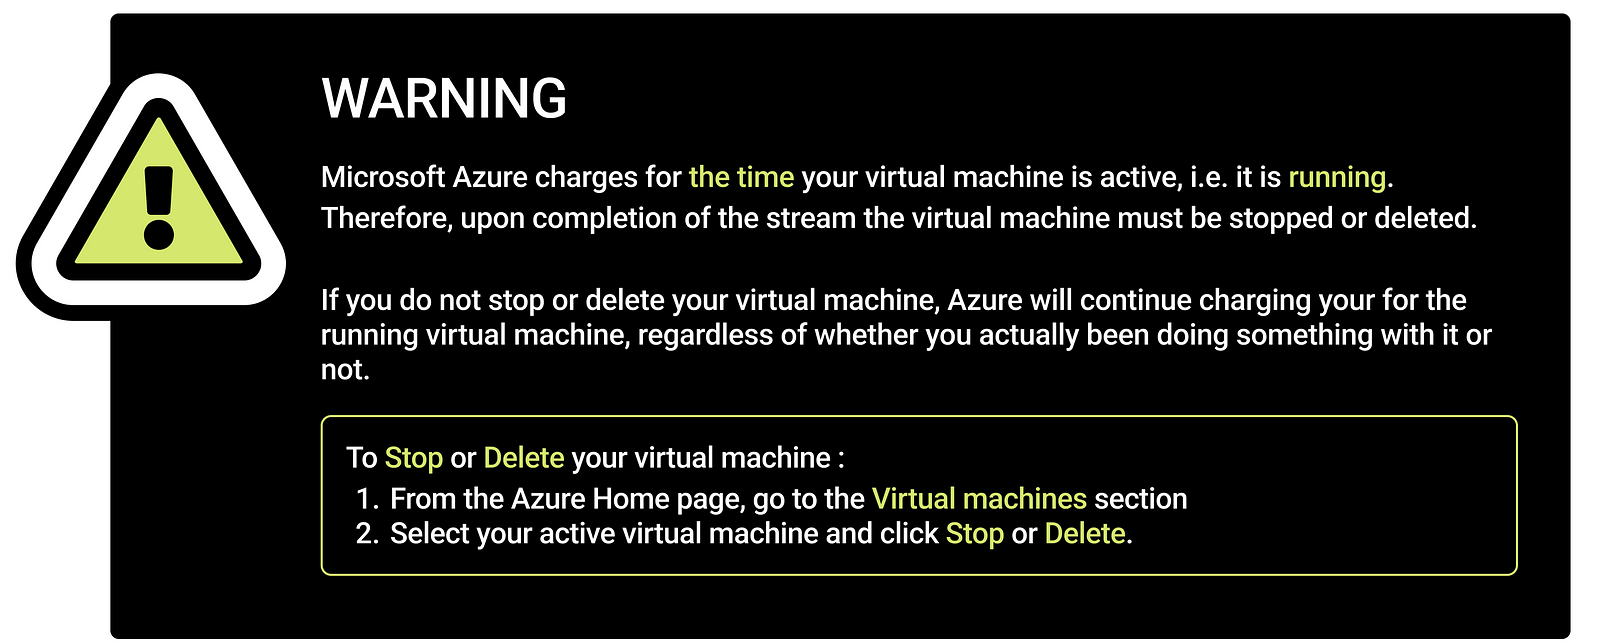
Microsoft Azure charges for the time a resource is active/running. And they do not check if you are actually doing something with it.
That means that upon completion of your work, you need to either Stop or Delete the resources you’ve been using.
Stop the resources if you plan to re-use them again later.
Delete them otherwise.
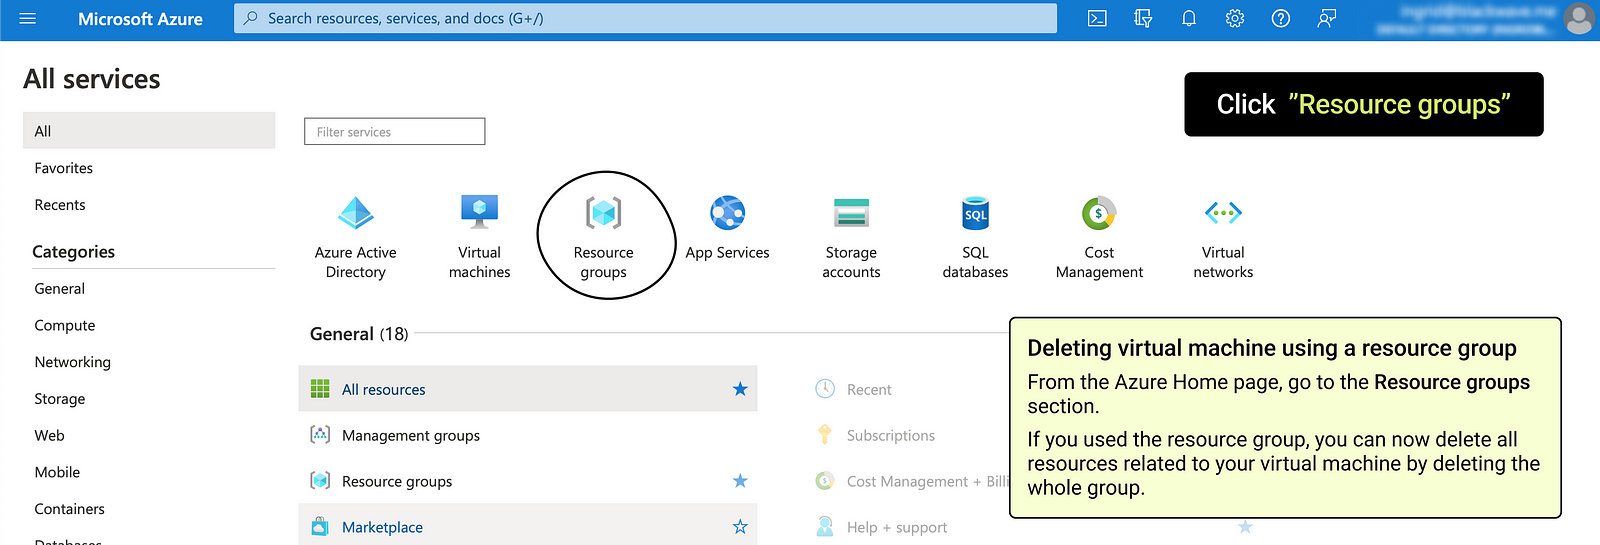
Deleting resources via a Resource group
The thing with Azure is that to run a virtual machine it also allocates additional small resources (like an IP address) that cost some bits of money too.
The easiest way to Delete everything at once is by using the Resource group.
That’s why we strongly recommended creating one.
- Go to Azure’s Home page.
Click “Resource groups”
- Click onto your resource group’s name
Click “Delete resource group”

System will ask you to type in the name of your resource group.
Type in the name and then click “Delete”
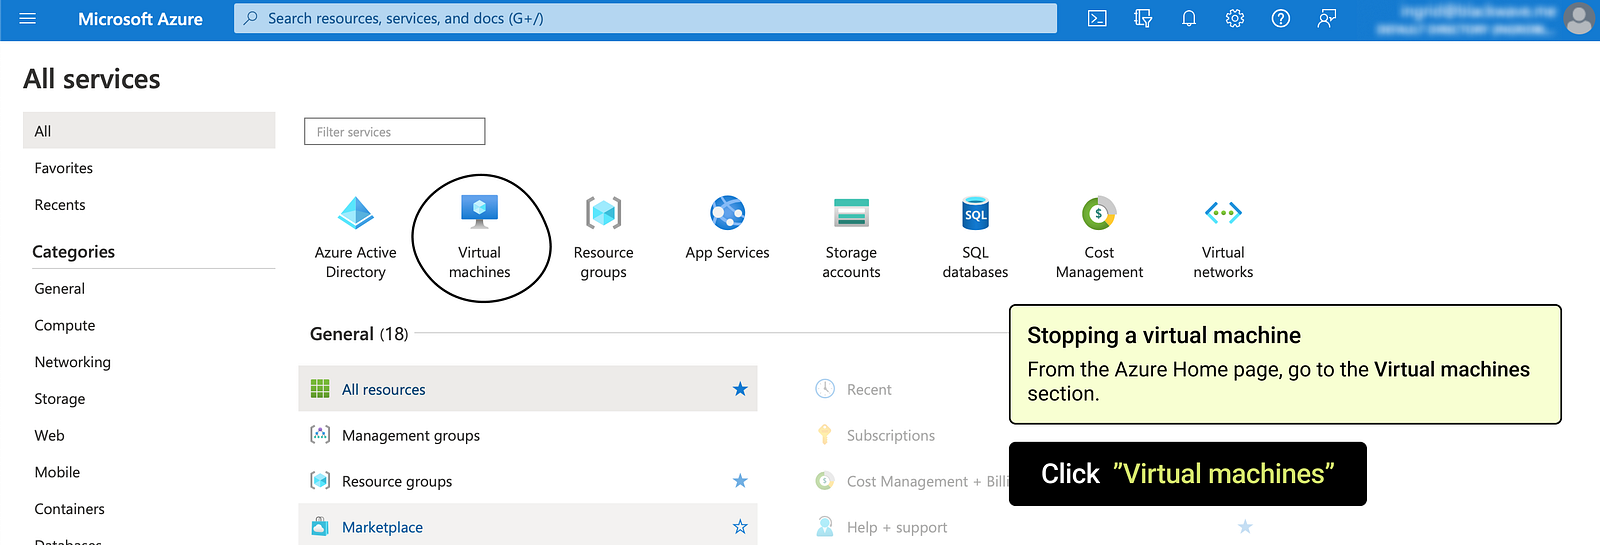
Stopping a virtual machine
- Go to Azure’s Home page.
Click “Virtual machines”
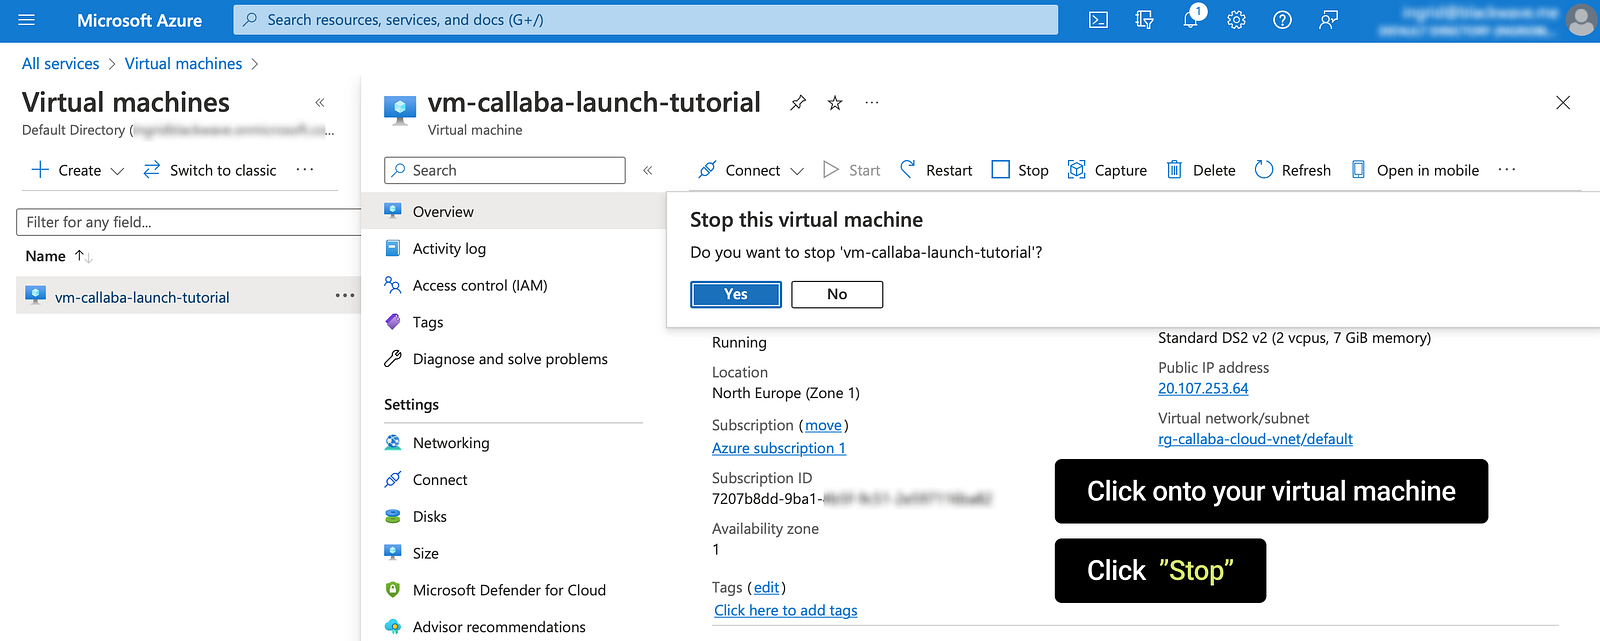
2. Click onto your virtual machine
Then click “Stop”
This is the end of this tutorial.
If you have any questions, please contact us at: [email protected]
We will respond to you within 48 hours.
Happy streaming!