Create, edit, start and delete SRT Server or Gateway using Callaba Cloud

In this tutorial, we’ll take a closer look at the REST methods that enable SRT streaming.
For the sake of this tutorial we assume that you are familiar with SRT and RESTful methods in your development environment, and you have basic administration skills as well.
Before we start, let’s clarify the terminology that we’ll be using to make this section easier to understand.
SRT Gateway is a simple gateway that can receive your SRT streams. For example, for the subsequent re-stream to the social platforms or recording on the server.
SRT Server is a server that is capable of routing, redirecting, and also sending streams to several clients at the same time.
SRT technology is implemented in Callaba Cloud via these two modes: SRT Gateway and SRT Server.
UDP is a transport layer protocol that uses SRT. We only need to know that we will occupy and release UDP ports of the system.
Restful API is a set of methods or “doorknobs” that you will pull to get the desired result. For example, /start will start the SRT server, and /stop will stop, etc.
Swagger is a graphical tool for making API requests.
JWT Token is an API authorization token that allows accessing methods. By default, all methods are protected from public use and are not accessible from the outside without authorization, with the exception of some methods that provide metadata.
API Queue — task execution queue. All actions in the API are performed through the queue mechanism and first go to the API Queue. This tool is also available in the general API and allows you to manage your own tasks, regardless of the streaming modules.
Now that we are familiar with the basic concepts, we can start integrating the SRT protocol into our application.
SRT Server/Gateway creation
We will need:
- Running instance with Callaba Cloud.
If this is your first time with AWS, you can register here (it will take no more than 5 minutes) : https://aws.amazon.com/marketplace/pp/prodview-npubds4oydmku - Test video to make sure we sent and received the stream to the server
- The program to send our test video. We’ll be using the wonderful FFmpeg. If you don’t have it on your computer, you can download and install it here : https://ffmpeg.org/download.html
Looks like now everything is ready and we can start. Let’s go!
First, open the Callaba Cloud dashboard (if you are new to this, here is a step-by-step guide on how to launch Callaba Cloud).
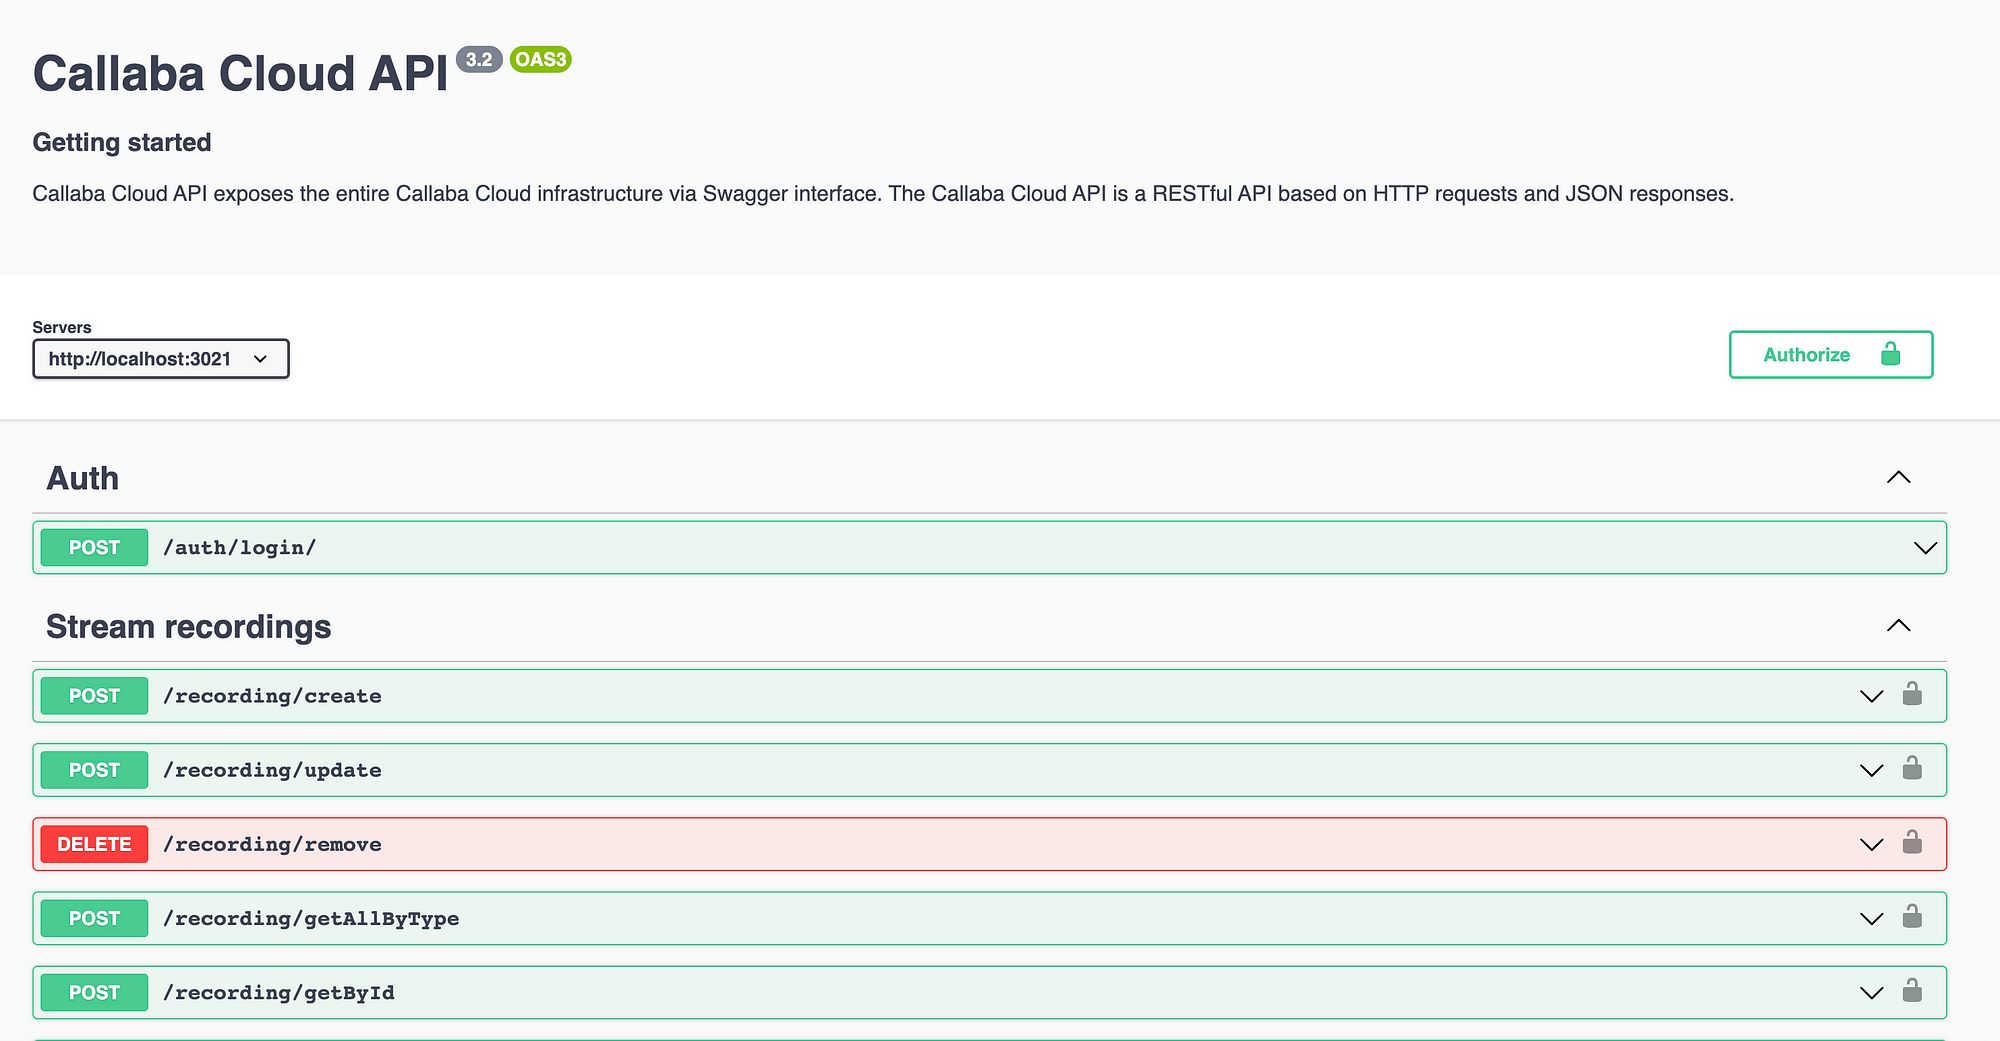
Go to the API Docs section.
Now you need to log in to Swagger.
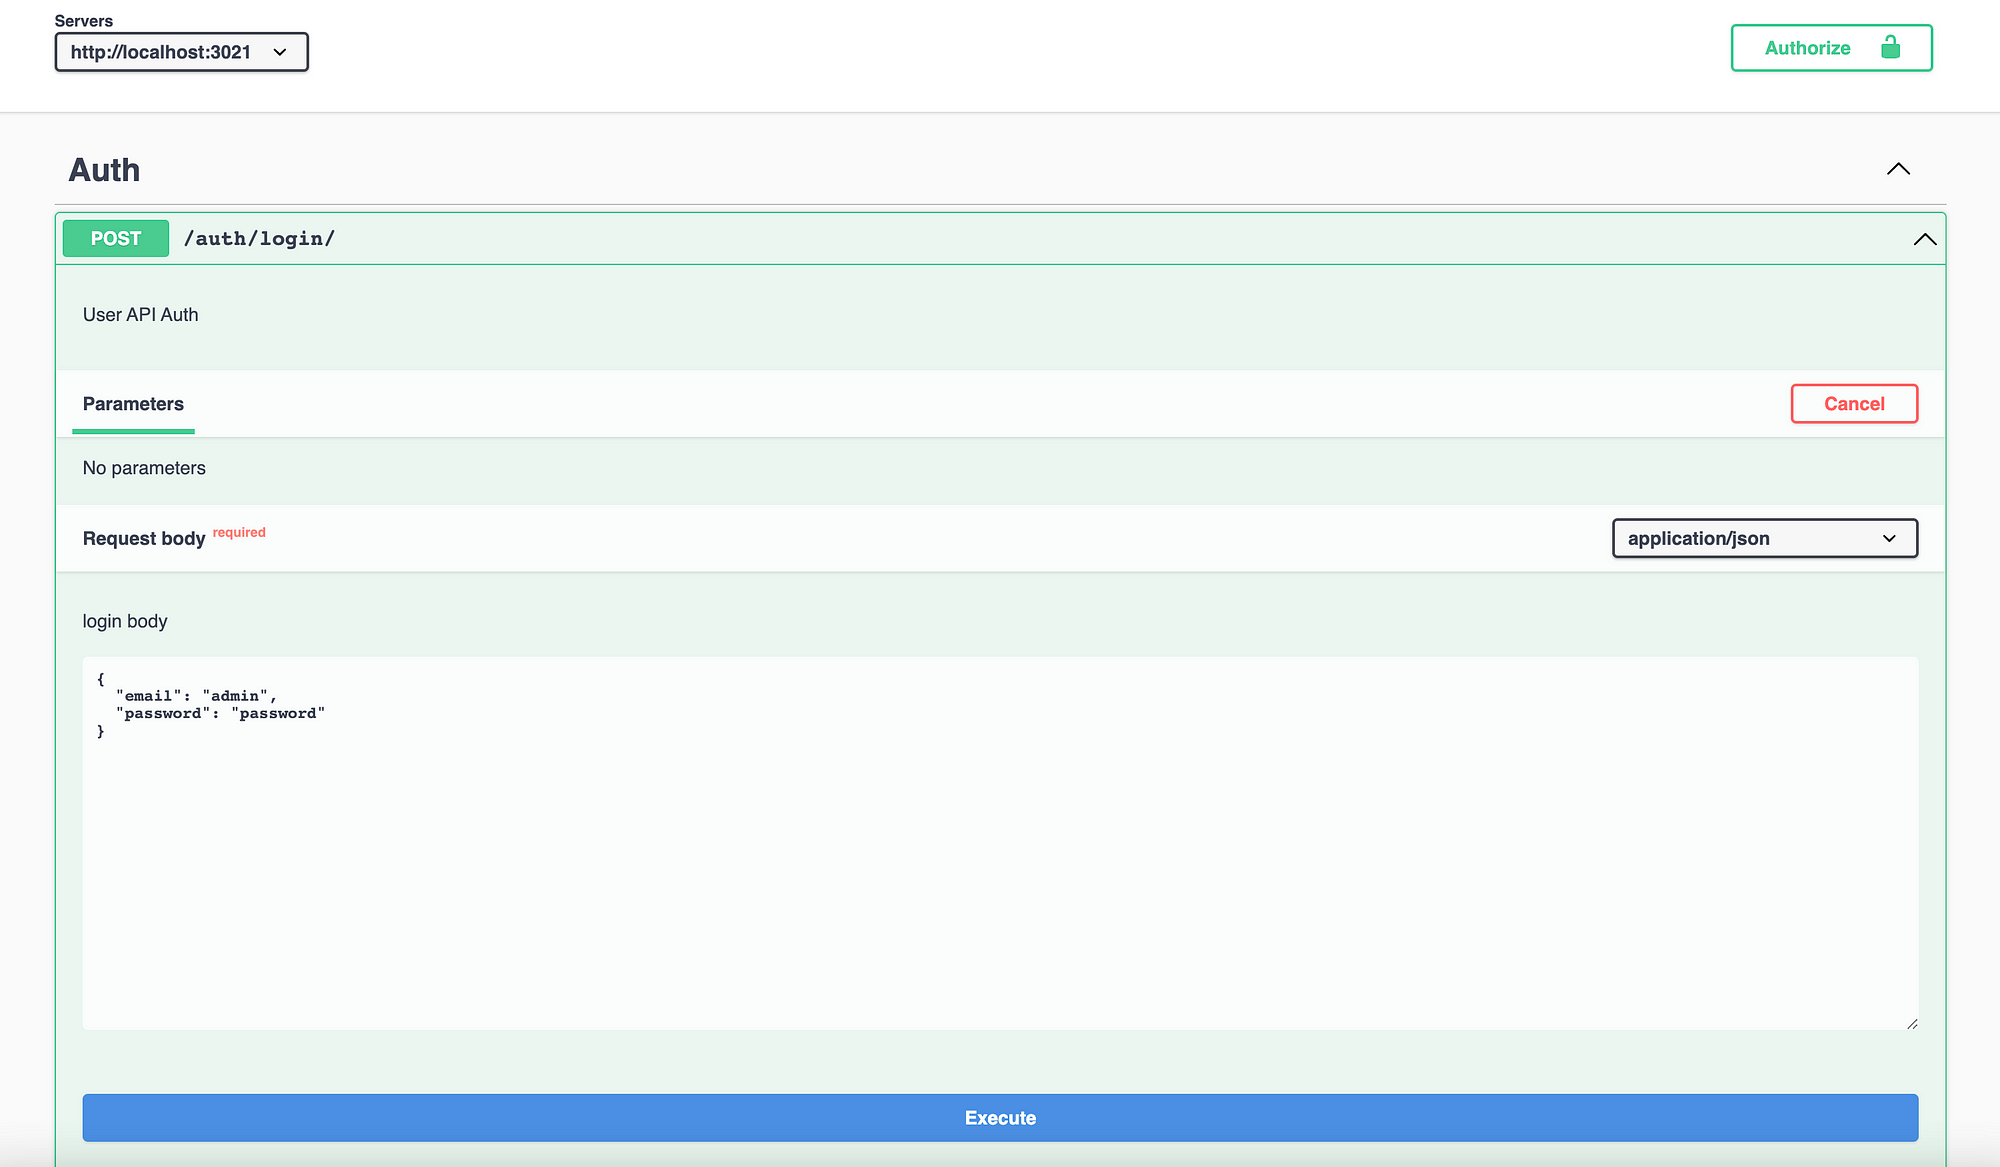
Swagger authorization
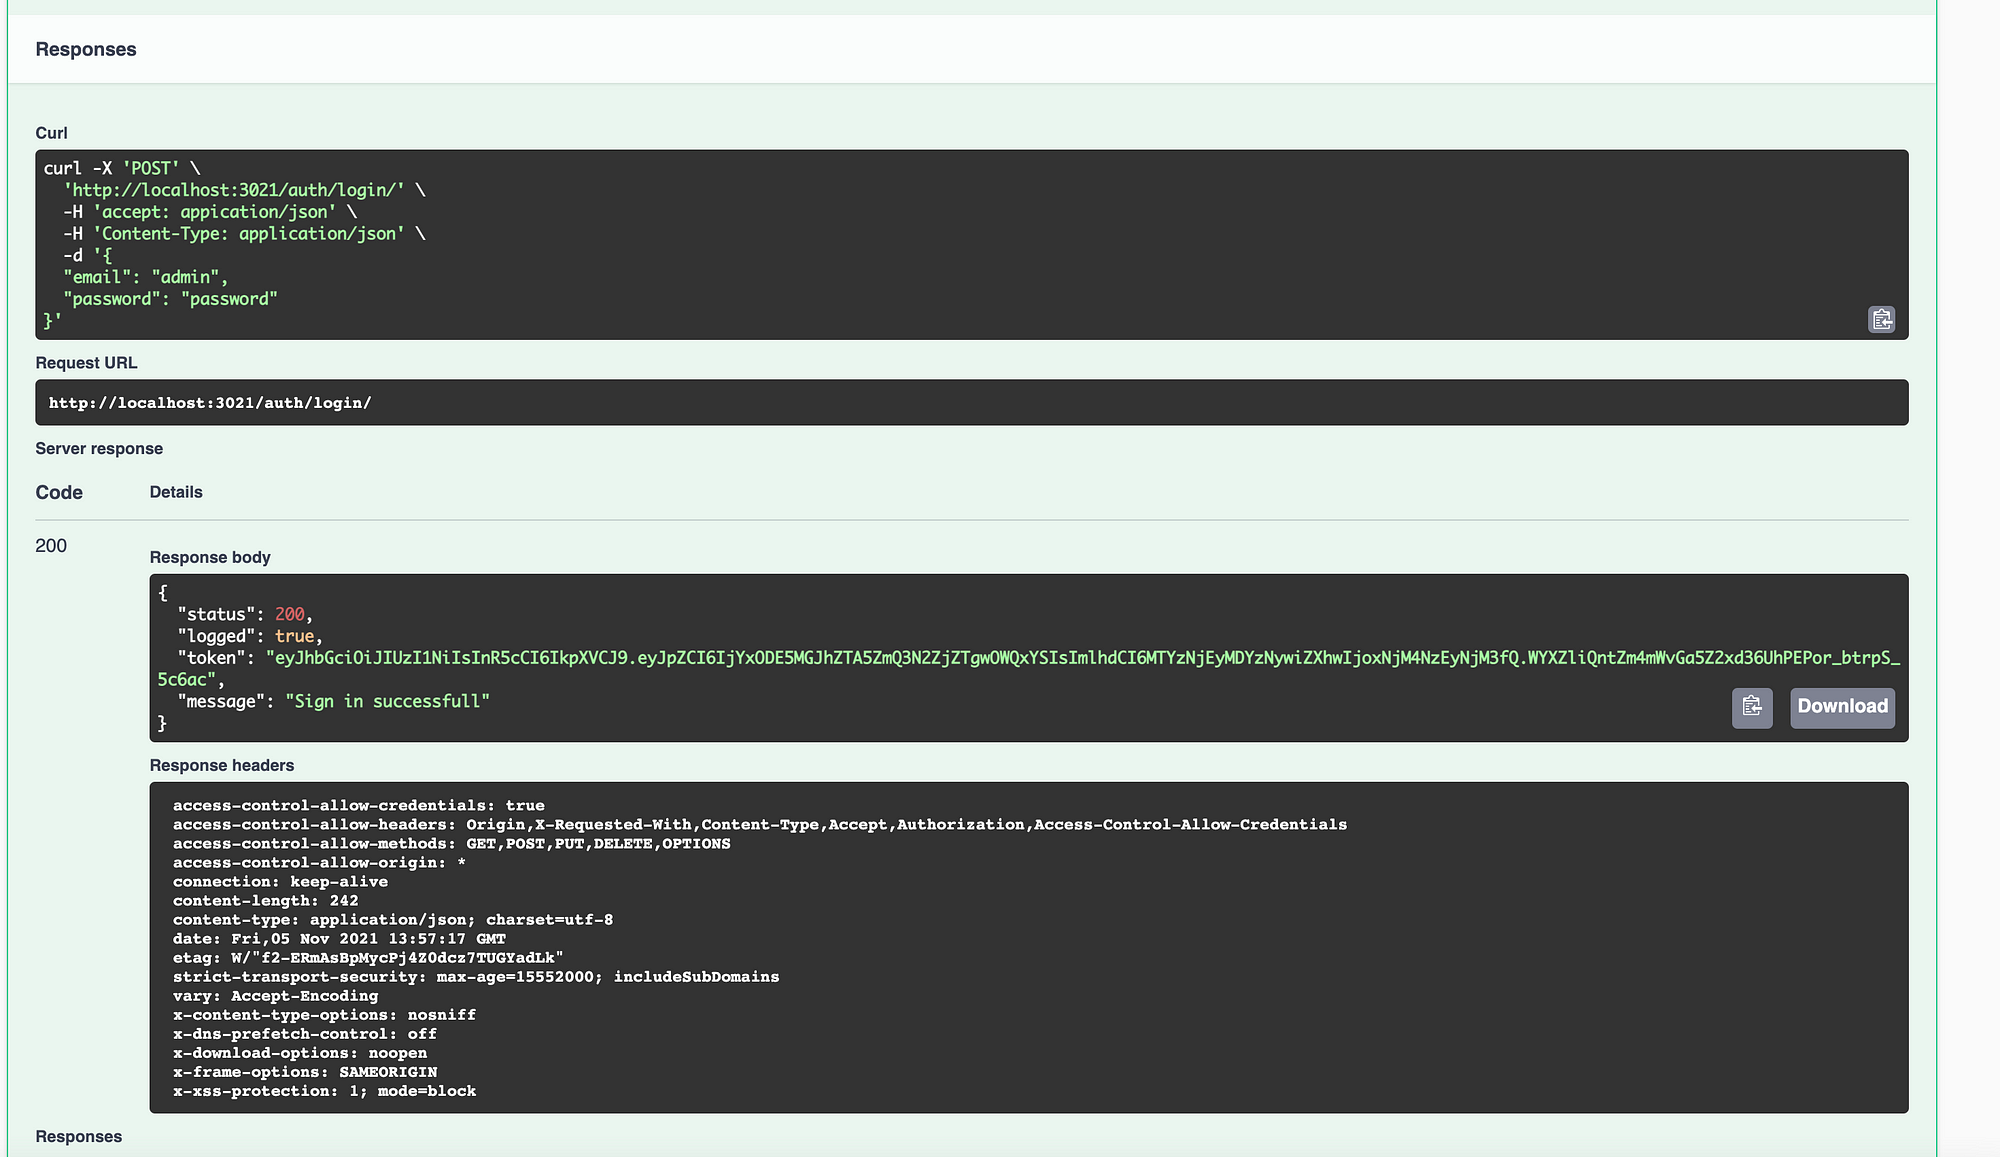
1 . Run the first /auth/login method. If you are using AWS, use your instance ID as your password.
2. Copy the token to the clipboard
3. Then in the upper right corner of Swagger click Authorize
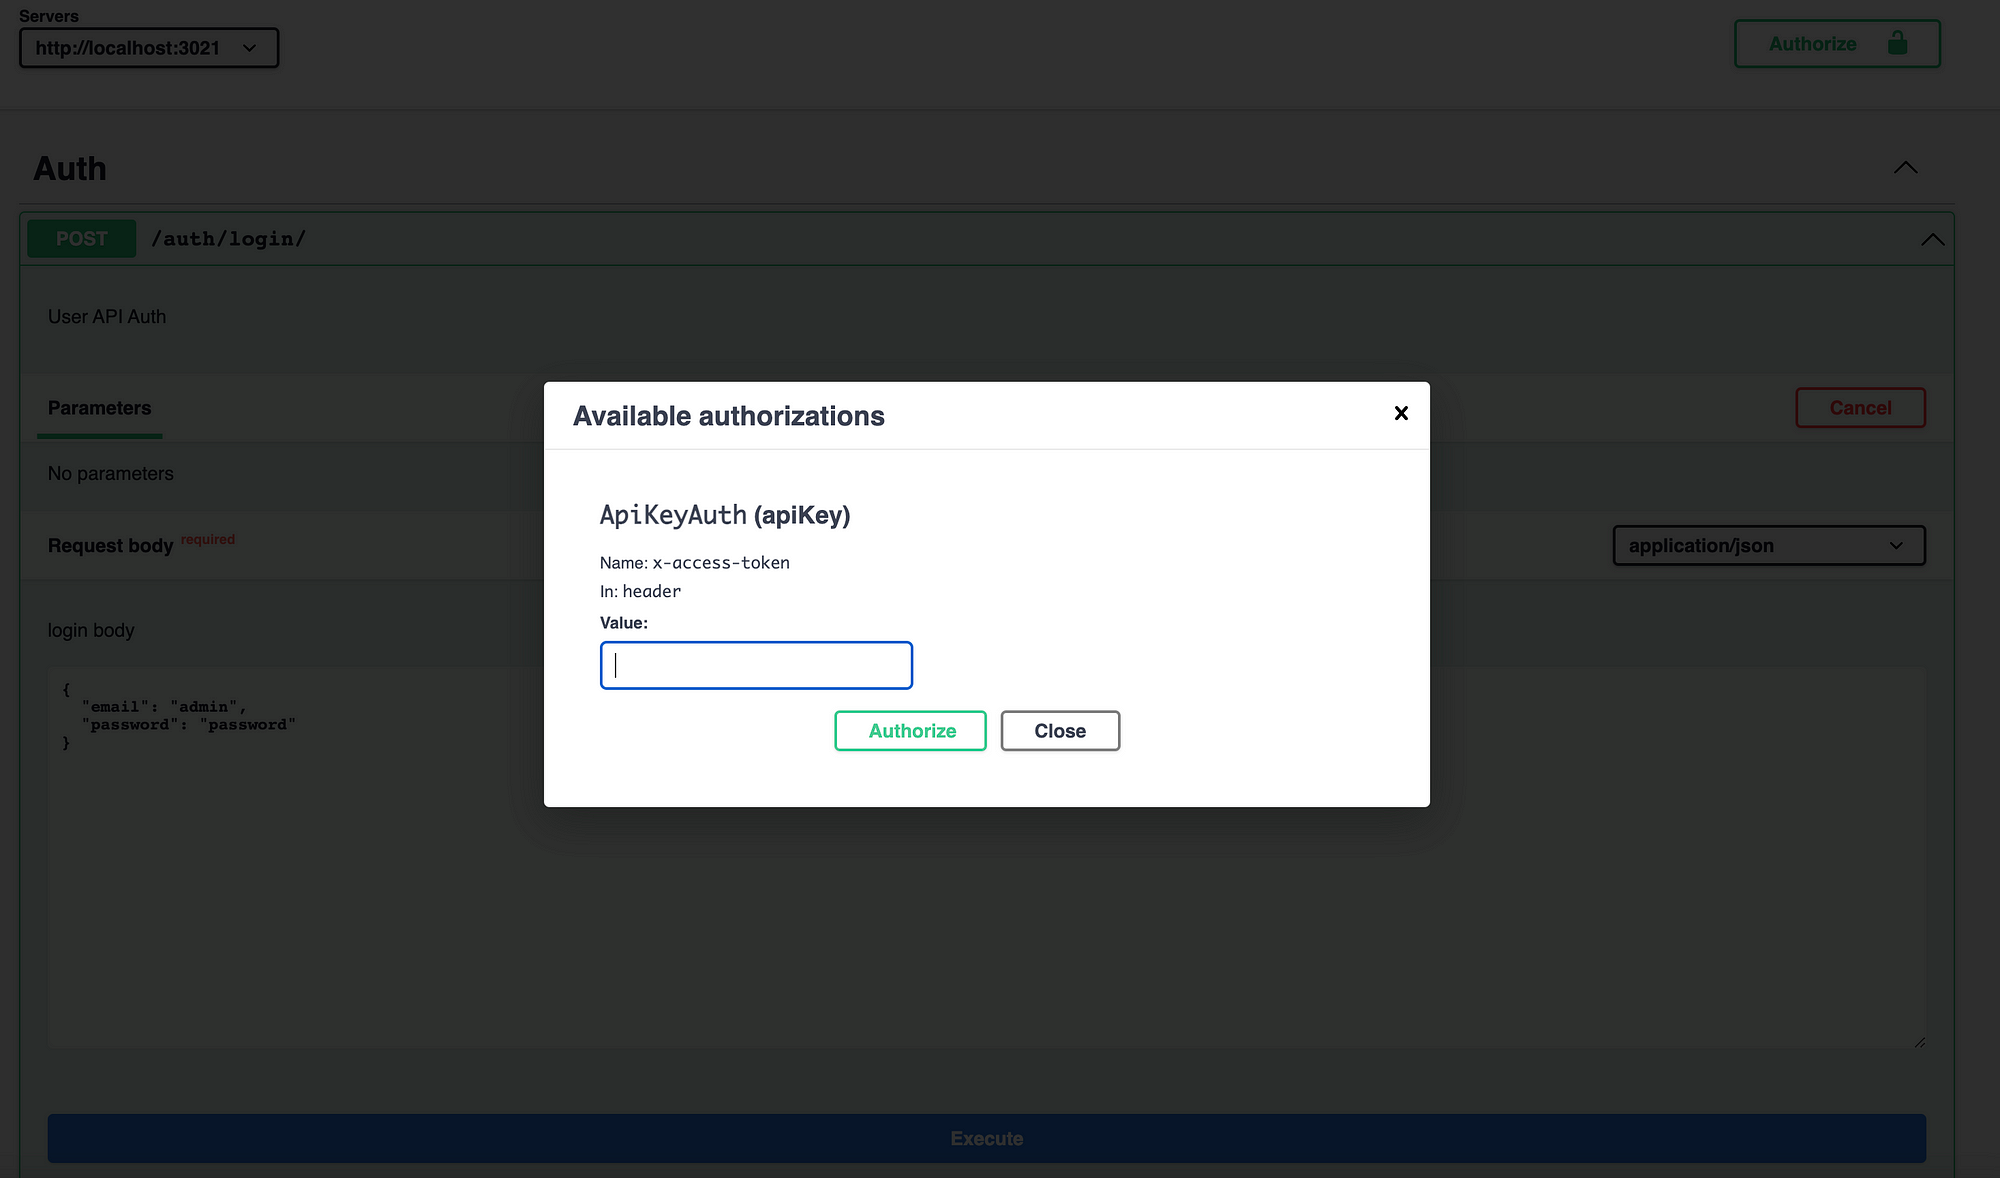
4. In the window that appears, insert the token and click Authorize
Now you are ready to create your first SRT server or SRT Gateway.
Scroll down on the Swagger page to SRT-Servers methods:
Basic methods:
/servers/create : Create SRT server
/servers/update : Edit SRT server
/servers/remove : Remove and stop SRT server
/servers/start : Start SRT server
/servers/stop : Stop SRT server
/getAllByType : Get the list of SRT servers
/getById : Get a specific SRT server by ID
Now let’s take a closer look at how to work with these methods.
Let’s create our first server using the API and put a stream into it.
SRT Server creation
1 . In the expanded tab of the create method, find the Try it out button (it’s on the right) and click on it
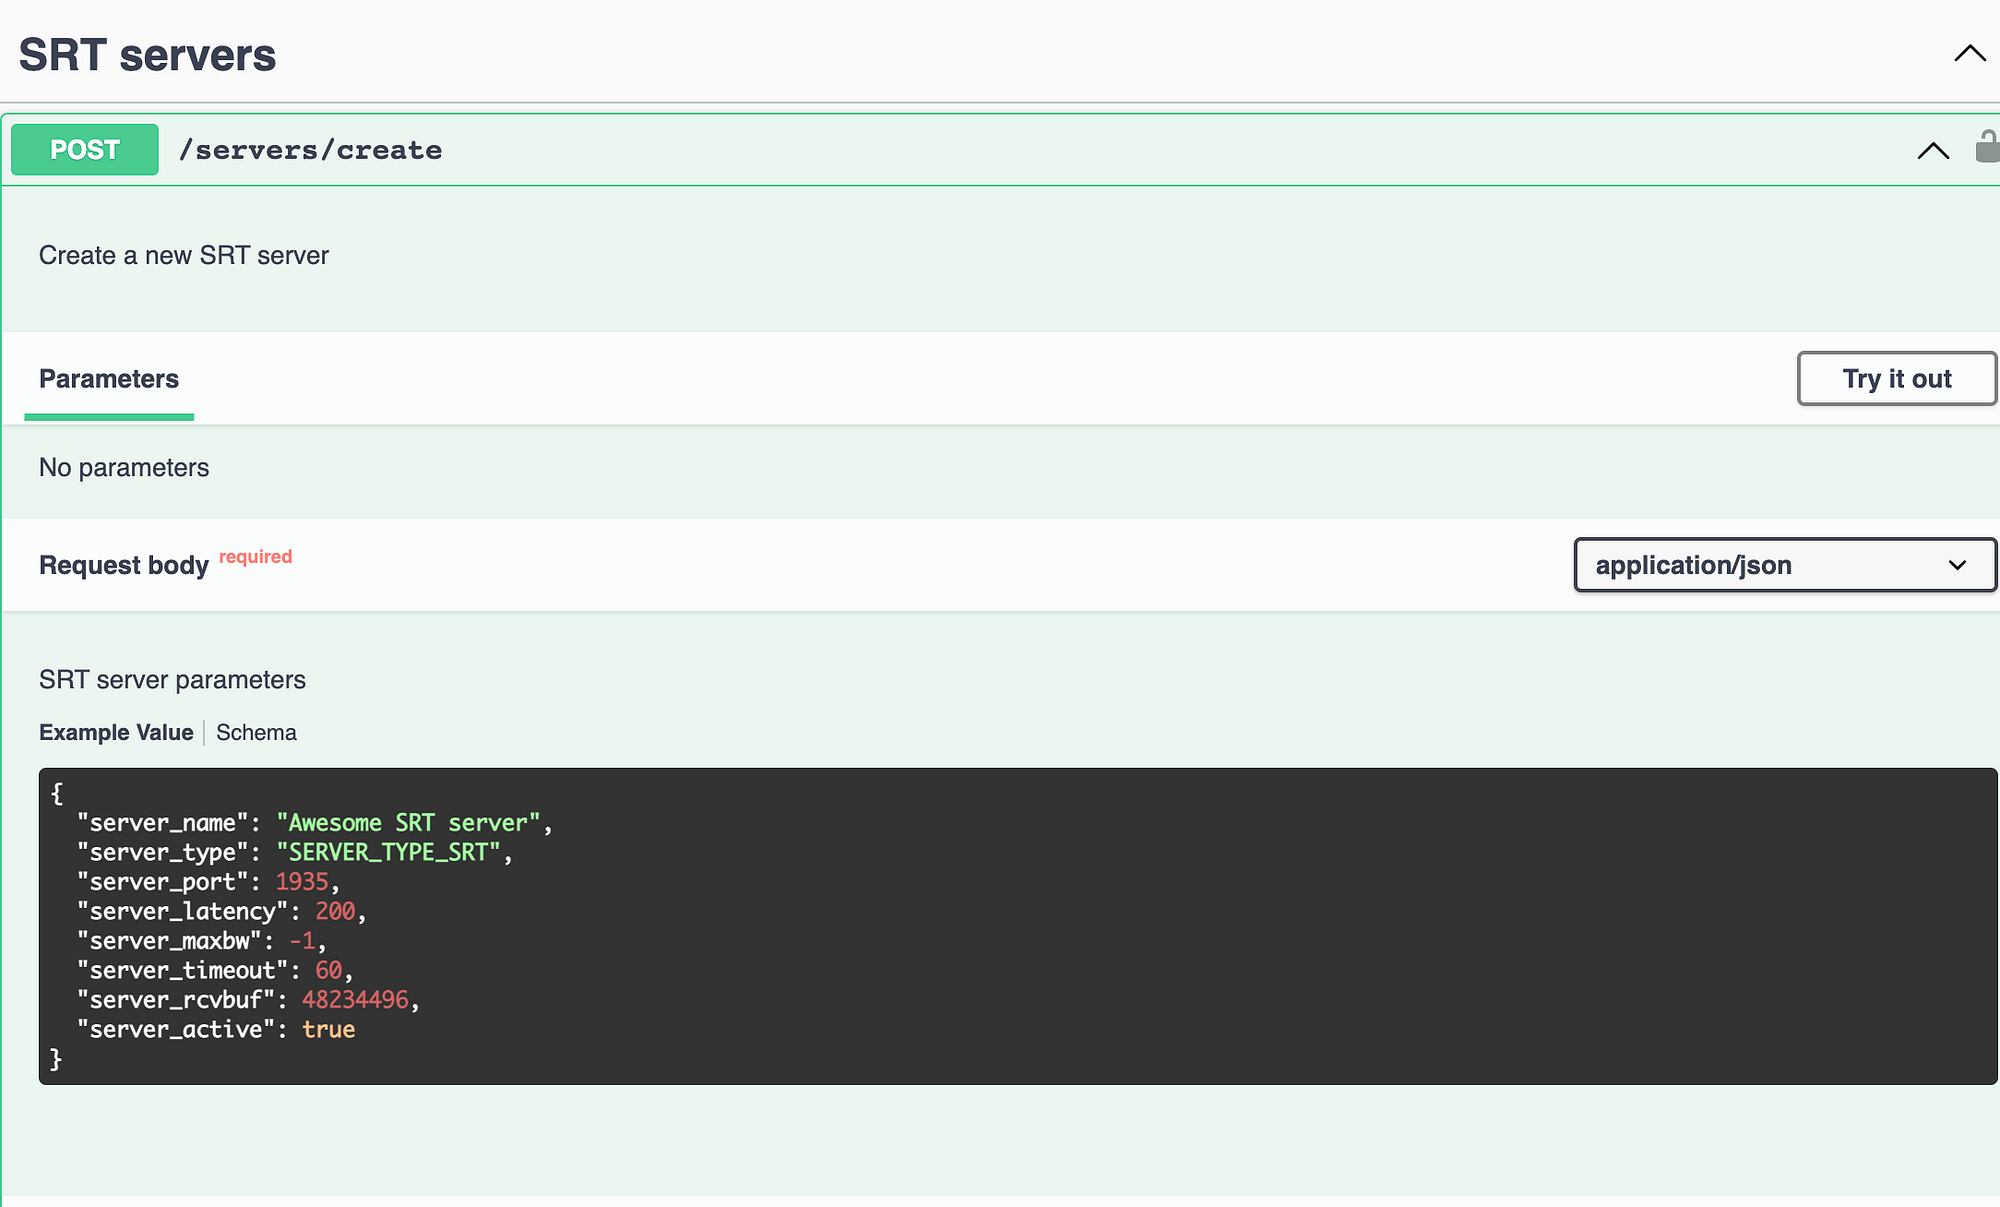
2. Next, you will see that the Request body has become active and contains request parameters. All of these parameters are required.
In fact, there are many more parameters, but in this example we will look at the main ones. Let’s see what each of them means:
Snippet of code :
{

“server_name”: “Awesome SRT server”,
“server_type”: “SERVER_TYPE_SRT”,
“server_port”: 1935,
“server_latency”: 200,
“server_maxbw”: -1,
“server_timeout”: 60,
“server_rcvbuf”: 48234496,
“server_active”: true
}
Server_name is the name of the server. The value must be unique, only Latin letters and numbers can be used. Use it in your applications for unified human-readable metadata.
Server_type — the type of the SRT server being created.
Use SERVER_TYPE_SRT as a passed string constant if you need to bring up an SRT Server or Gateway. Other types of SRT will be covered in other examples.
Server_port — SRT uses UDP as transport, so specify the port that your server will use for UDP. Although UDP and TCP use independent controls, try to avoid using the same ports. If you want to use the same port numbers for SRT and RTMP anyway, then test the behavior thoroughly.
Server_latency — SRT latency. We recommend setting the delay equal to RTT * 4, but not less than 120 ms. (RTT — round-trip time)
If you do not have information about your network, use the /utils /speedtest metadata method from this API:
curl -X ‘POST’ http://PUBLIC-IP-v4:3021/utils/speedtest
The result of executing this request will be json containing the latency field. This is RTT.
Server_maxbw — Maximum network bandwidth. The value is indicated in bytes. Here you should consider all sections of the network, from your computer to your router, from your router to your AWS instance. Specify the maximum allowed value in bytes. Or use the upload value from /utils/speedtest .
Keep in mind, that this method provides information about the throughput of the AWS instance and does not take into account possible limitations, for example, of your router. Use the minimum value.
IMPORTANT! If you do not specify this value, there is a chance that the channel will sooner or later get clogged with packet recovery attempts.
For best results, consider using an average value that takes into account the majority of your users. Be sure to test this with different per channel quotas.
Server_timeout — Thread timeout in seconds. If the timer expires, and the data has not appeared, the connection will be considered dropped.
Server_rcvbuf — Server receiver buffer. For 4K video and higher, we recommend a value of 48234496 bytes. For smaller streams, the value can be gradually decreased until network errors occur. There is a /utils/getStat method for this and it returns network diagnostic signals.
The receiver buffer parameter is no less important than the delay, and in case of insufficient buffer, it allows diagnosing the following errors:
- When the application on the server is not fast enough to read and release the receiver buffer. For example, if the disk cannot make it in time when writing to the HDD, or the processor is busy with other tasks. Consider analyzing the characteristics and corresponding responses in your instrumentation
- When the decoder on the server is not fast enough to free and decompress the frames. Consider using more powerful instances if you see these errors frequently in the /utils/getStat statistics log.
Now that we have covered each parameter, let’s execute this request and try to send and receive video from this SRT server.
curl -X ‘POST’ \ ‘http://localhost:3021/servers/create' \ -H ‘accept: application/json’ \ -H ‘x-access-token: eyJhbGciOiJIUzI1NiIsInR5cCI6IkpXVCJ9.eyJpZCI6IjYxODE5MGJhZTA5ZmQ3N2ZjZTgwOWQxYSIsImlhdCI6MTYzNjI5NjIwMCwiZXhwIjoxNjM4ODg4MjAwfQ.JVePwlRf9GC5cneHy92eAnIl9KkhhjCvxS6Wk3o3q2g’ \ -H ‘Content-Type: application/json’ \ -d ‘{ “server_name”: “Awesome SRT server”, “server_type”: “SERVER_TYPE_SRT”, “server_port”: 1935, “server_latency”: 200, “server_maxbw”: -1, “server_timeout”: 60, “server_rcvbuf”: 48234496, “server_active”: true }’
To test the SRT server we created, let’s send a video stream to it using Ffmpeg.
The syntax for generating stream-id is as follows:
srt://HOST:PORT?streamid={publisher | receiver}/{server_name_code}/{unique string}
{publisher | receiver} — use publisher to send the stream and receiver to receive the stream
{server_name_code} — this parameter will be returned to you by the server
{unique string} — use a unique arbitrary string
ffmpeg -re -i “/Volumes/MY_MAC/1080.mp4” -c copy -f mpegts “srt://PUBLIC-IP-v4:1935?streamid=publisher/awesome-srt-server/srt-stream-01”

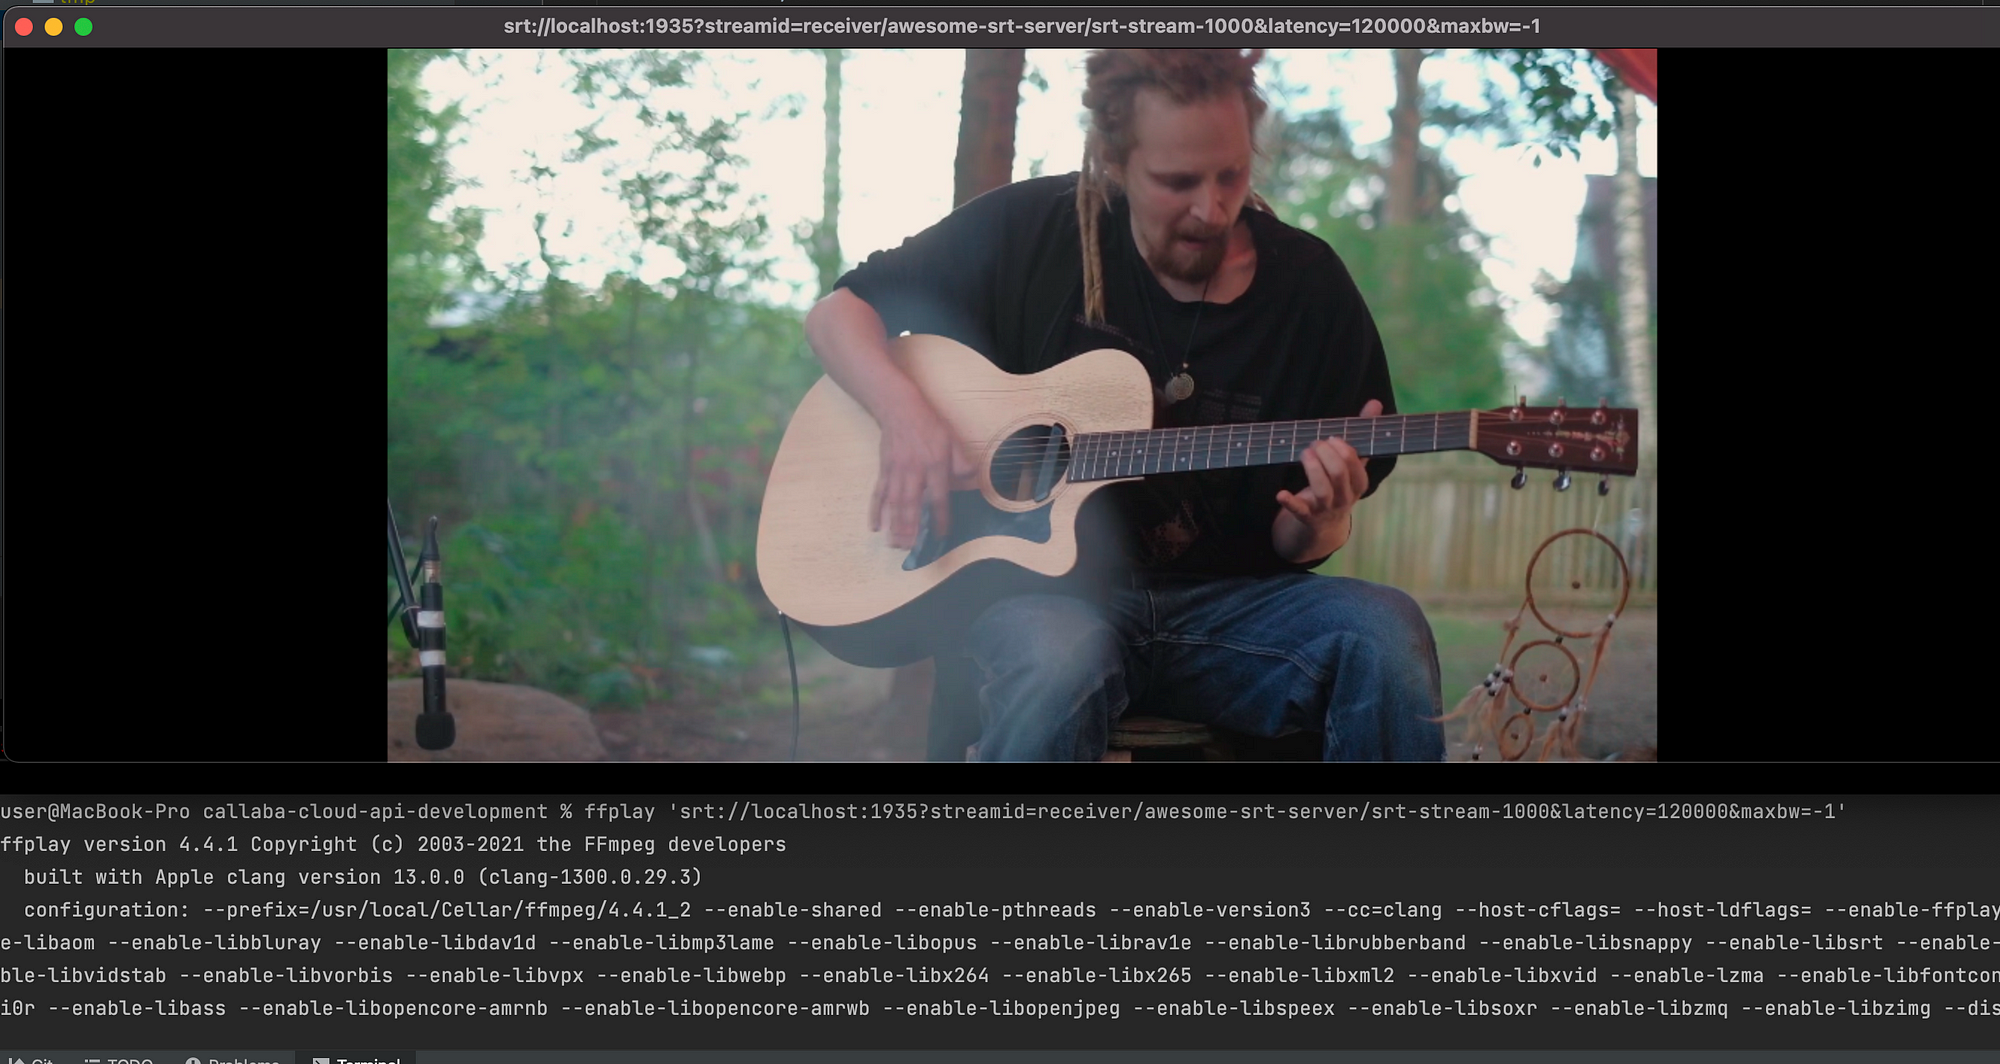
Next, let’s check the playback of the stream, replace in the stream-id publisher with receiver
ffplay “srt://PUBLIC-IP-v4:1935?streamid=receiver/awesome-srt-server/srt-stream-01”
So we created an SRT server using REST, and were also able to send and receive video using ffmpeg. This completes the main part of the tutorial.
Now let’s take a look at some of the other methods available in the API.
Server SRT editing
/servers/update
To change the SRT server parameters, use the /servers/update method. When executing this method, the existing server will be stopped, and all streamers connected to it will be disconnected. Please keep this in mind when developing your application.
Removing SRT Server
/servers/remove
Use the /servers/remove method to stop streams and remove a server by id. The child processes, such as re-streaming or recording, will also be deleted. Please keep this in mind when developing your application.
Retrieving server data by identifier
/servers/getById
Use /servers/getById if you need to get information about the previously created SRT server.
Getting a list of all SRT servers
/servers/getAllByType
Use /servers/getAllByType if you need to get a list of all servers.
Stopping SRT Server
/servers/stop
Use /servers/stop to stop the server from running. The method disconnects the streams connected to it, then releases the port allocated to it.
Starting SRT Server
/servers/start
Use /servers/start to start the server. The method opens a socket for an SRT connection and allocates the corresponding UDP port.
That’s all.
In this tutorial, we have covered the basic methods of working with SRT in Callaba Streaming Engine.
If you have any questions, write to us ([email protected]), we will be happy to answer them.
