How to Set Up an AWS Load Balancer for Streaming and Media Workflows
More live video workflow notes and product updates.
A load balancer on AWS helps when one streaming instance is no longer enough. Instead of sending viewers, API traffic, or application requests to a single node, you place a balancing layer in front and let AWS distribute the load across multiple instances.
This matters when the system needs more resilience, more viewer-facing capacity, or cleaner traffic separation between several Callaba nodes. This page keeps the setup practical: create the target group, register the instances, configure the load balancer, and verify that traffic now reaches the backend correctly. If you are still on a single AWS node, start with Callaba Cloud on AWS first.
When a load balancer makes sense
- you have more than one instance serving the same workflow
- you want a stable front door instead of exposing each node directly
- you need cleaner growth and better traffic distribution
- you are designing for higher availability than a single instance can give
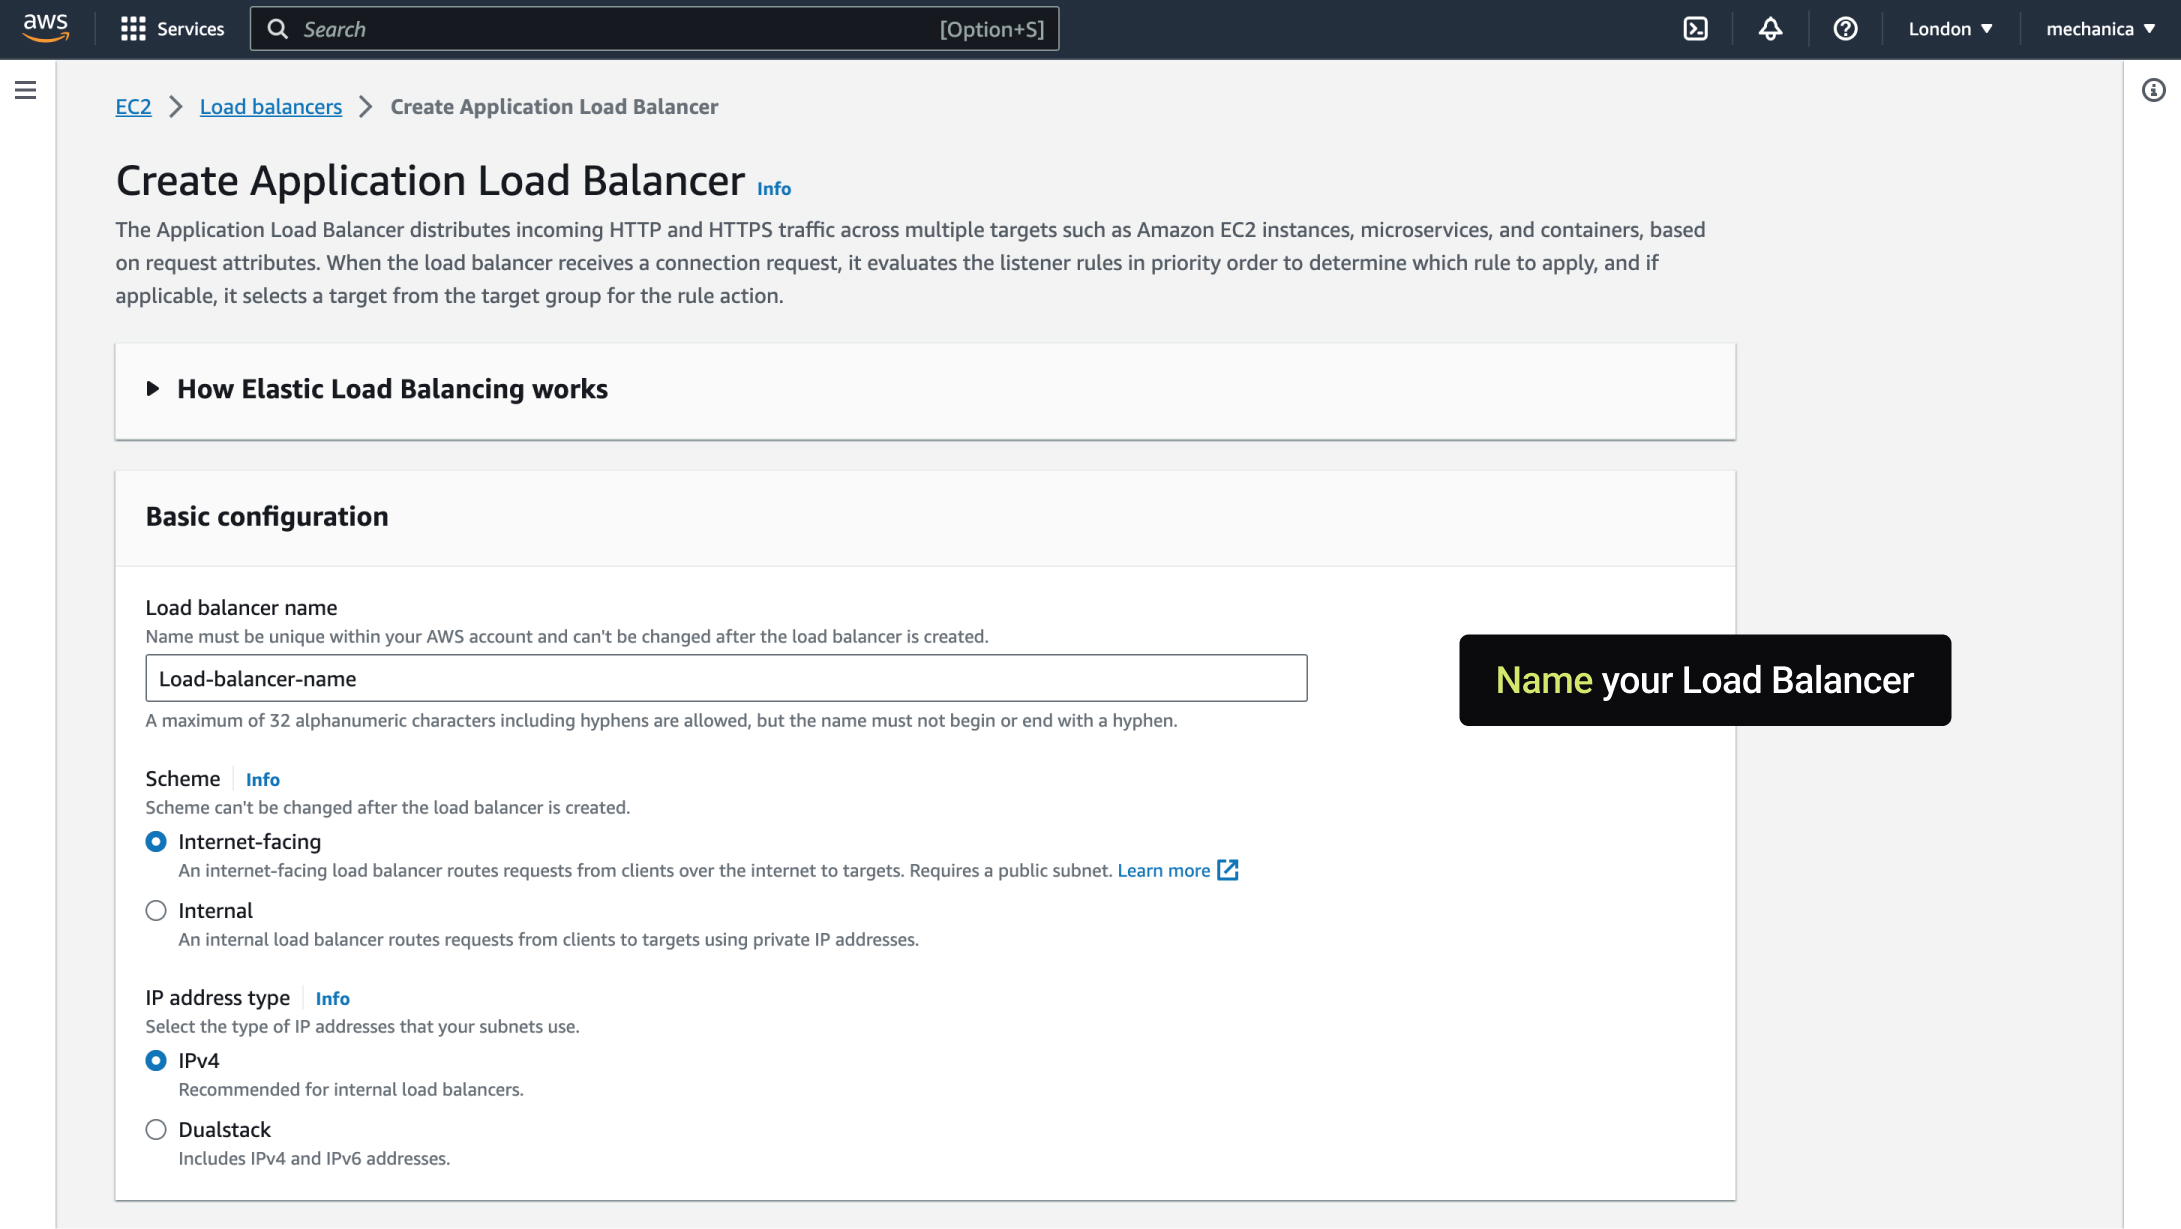
Step 1. Open the AWS load balancer flow
Start in the EC2 or load balancing section of AWS and begin the creation flow for the load balancer that will sit in front of your streaming instances.


Step 2. Choose the load balancer type
Select the load balancer type that fits the workflow you are exposing. The important point is to match the traffic pattern and protocol expectations rather than clicking through defaults mechanically.
Step 3. Define the listener and network placement
Set up the listener, subnets, and related networking placement so the load balancer sits where the application traffic is expected to enter.


Step 4. Create the target group
The target group defines where the load balancer sends traffic. This is the bridge between the public entry point and the Callaba instances behind it.


Step 5. Register the backend instances
Add the instances that should receive the traffic. Make sure they are the right nodes for this workload and that their own security groups and local services are already healthy.


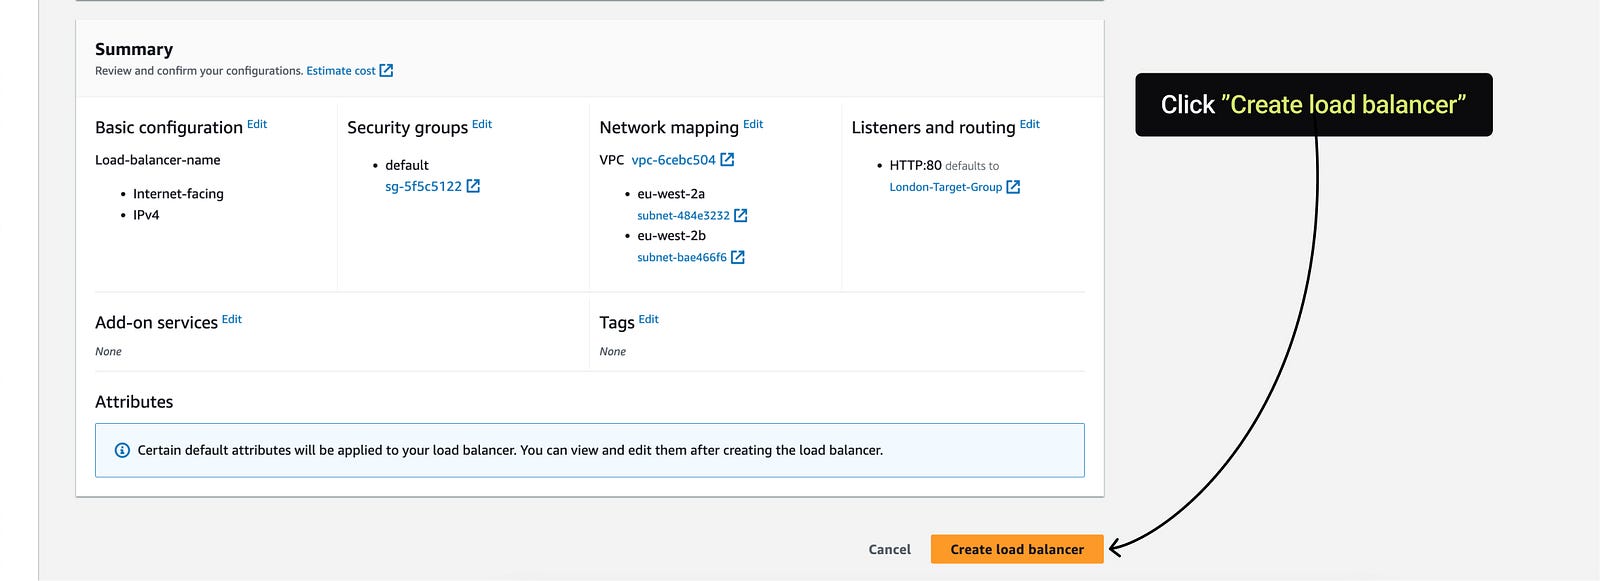
Step 6. Review health checks and finalize
Health checks matter because the load balancer can only route cleanly if it can tell healthy nodes from unhealthy ones. Review the checks carefully before finishing the setup.


Step 7. Verify the balanced path
After creation, test the new front door and confirm that traffic is being distributed to the backend as expected.


Common mistakes
- healthy instances are never registered in the target group
- health checks point to the wrong path or port
- the instances behind the load balancer are not actually ready to serve traffic
- teams expect the load balancer to solve backend media failures on its own
A load balancer improves traffic distribution. It does not replace contribution failover, healthy media design, or backend observability. If your bigger risk is source or network instability, look at main and backup SRT failover as well.
Final practical rule
Use an AWS load balancer when the workflow has grown beyond one node and needs a cleaner public entry point. Make sure the backend instances are already healthy first; otherwise the load balancer only spreads the problem faster.