

If Callaba support needs temporary access to help troubleshoot your AWS-based setup, the safest path is to create a dedicated IAM user with only the permissions that are actually needed. This is far better than sharing the root account or handing over a long-lived admin credential with no boundary.
This page walks through the practical path: create the IAM user, assign the right access model, share the credentials safely, and remove or disable access after the support task is done.
Why use an IAM user instead of the root account
- you keep control of what the support user can do
- you can remove or disable access cleanly later
- you avoid exposing the root account to troubleshooting work
- you create a traceable support access path instead of an informal shortcut
Step 1. Open IAM in AWS
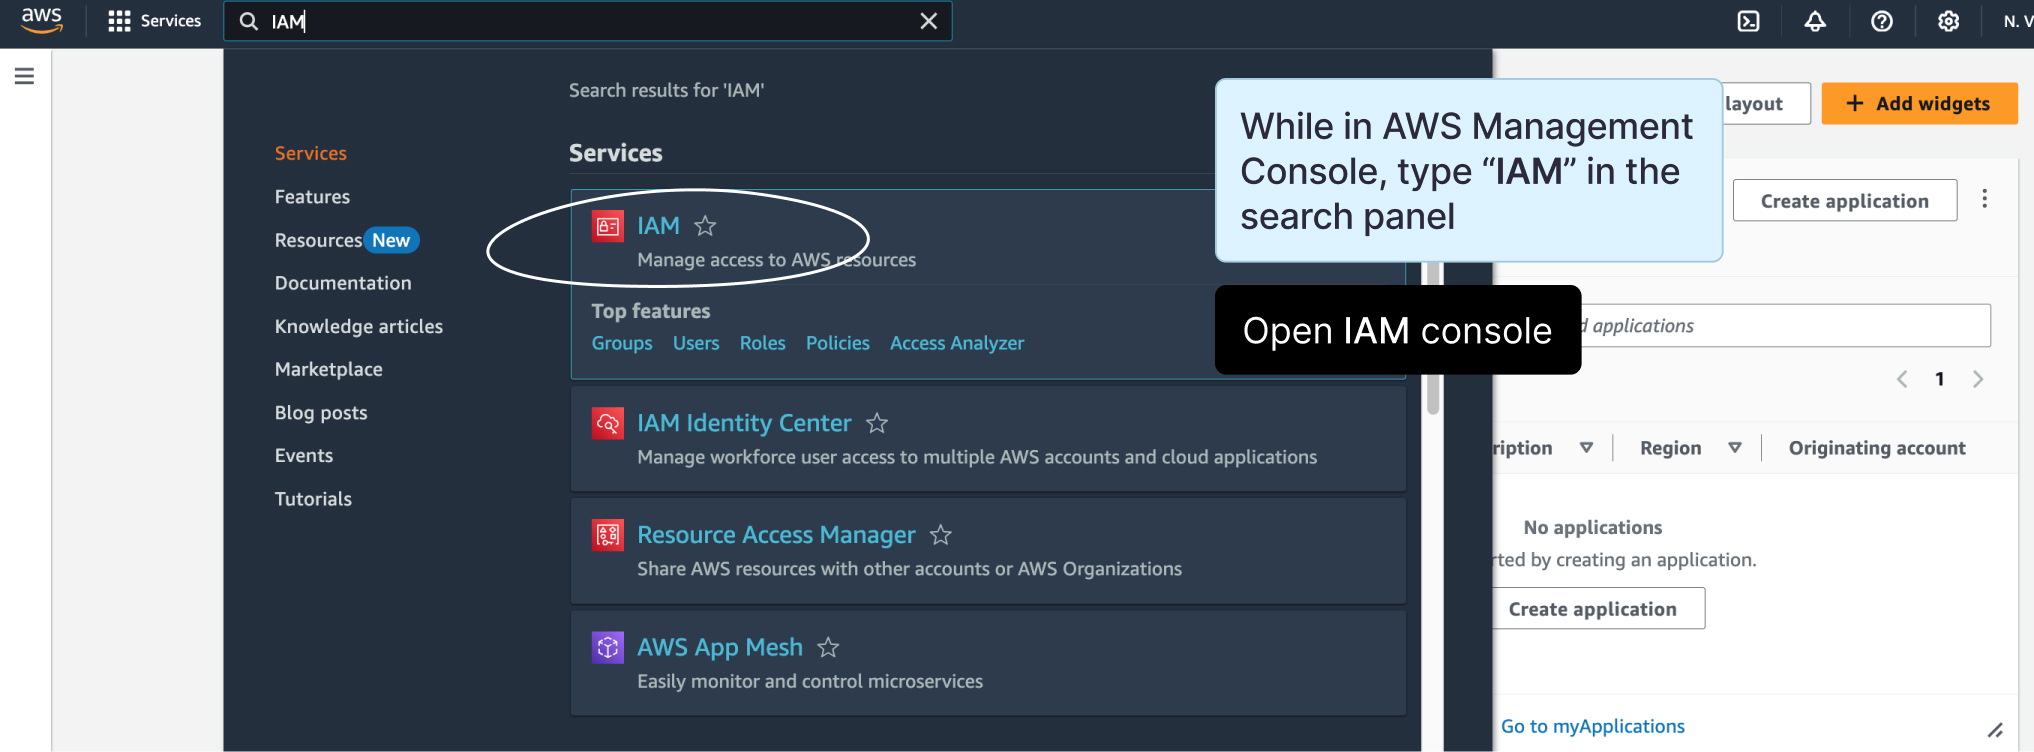
Go to the AWS Console and open the IAM service.
Step 2. Start the user creation flow
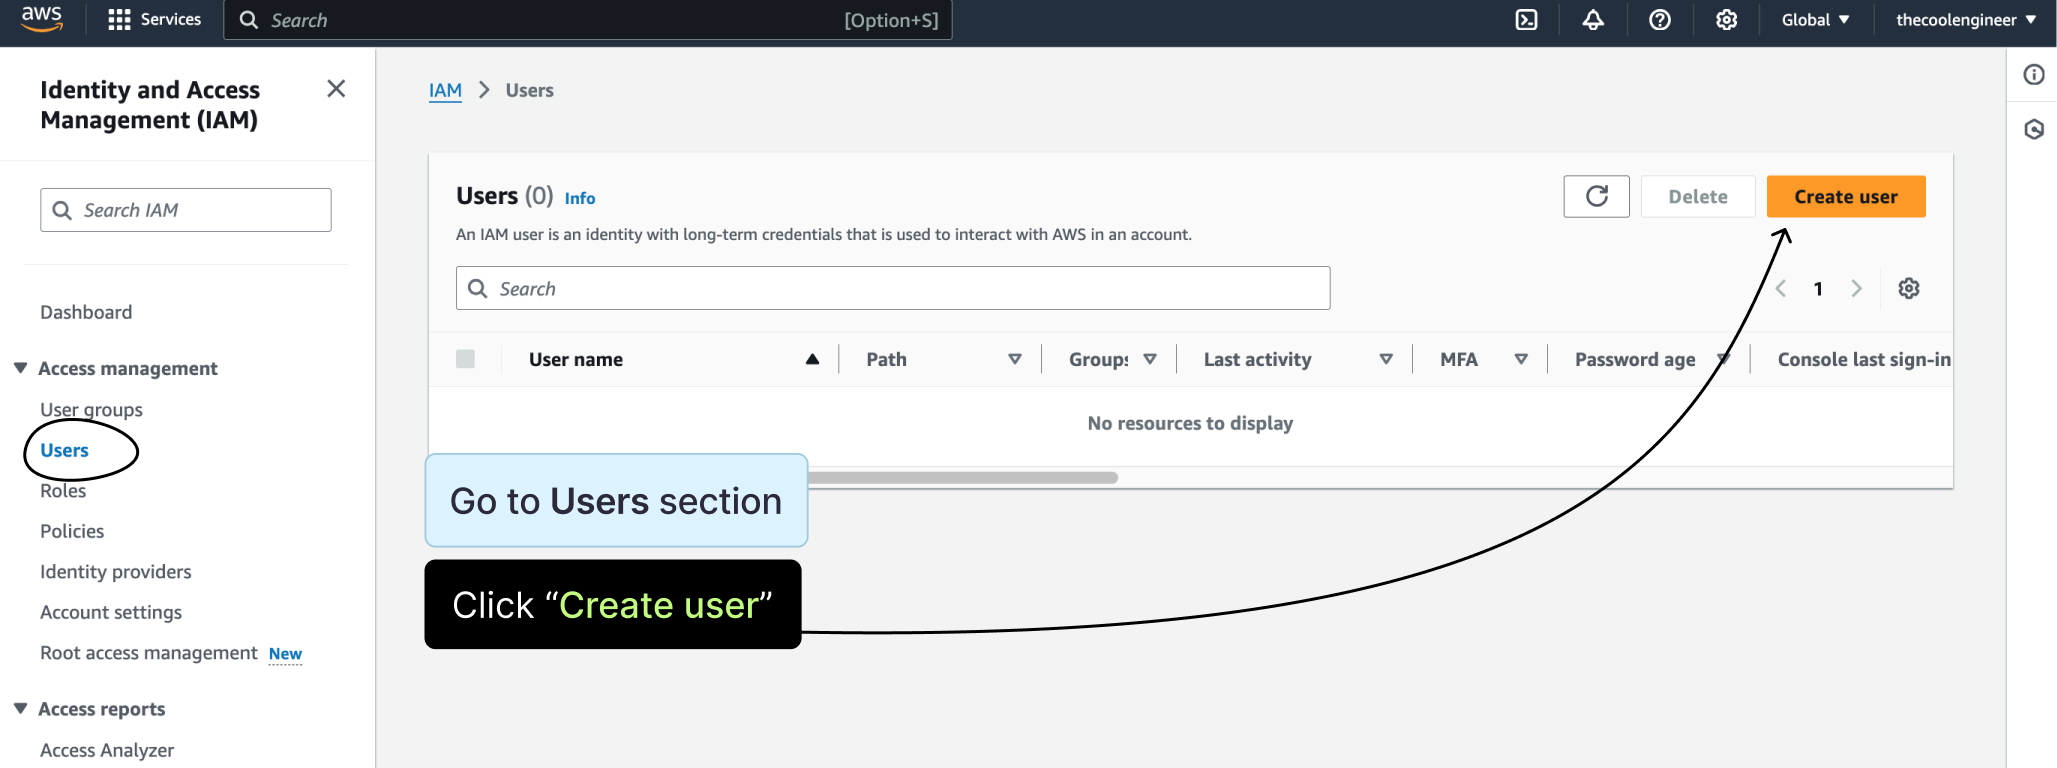
Open the user creation path and create a dedicated support user rather than reusing an existing shared credential.
Step 3. Choose the access model
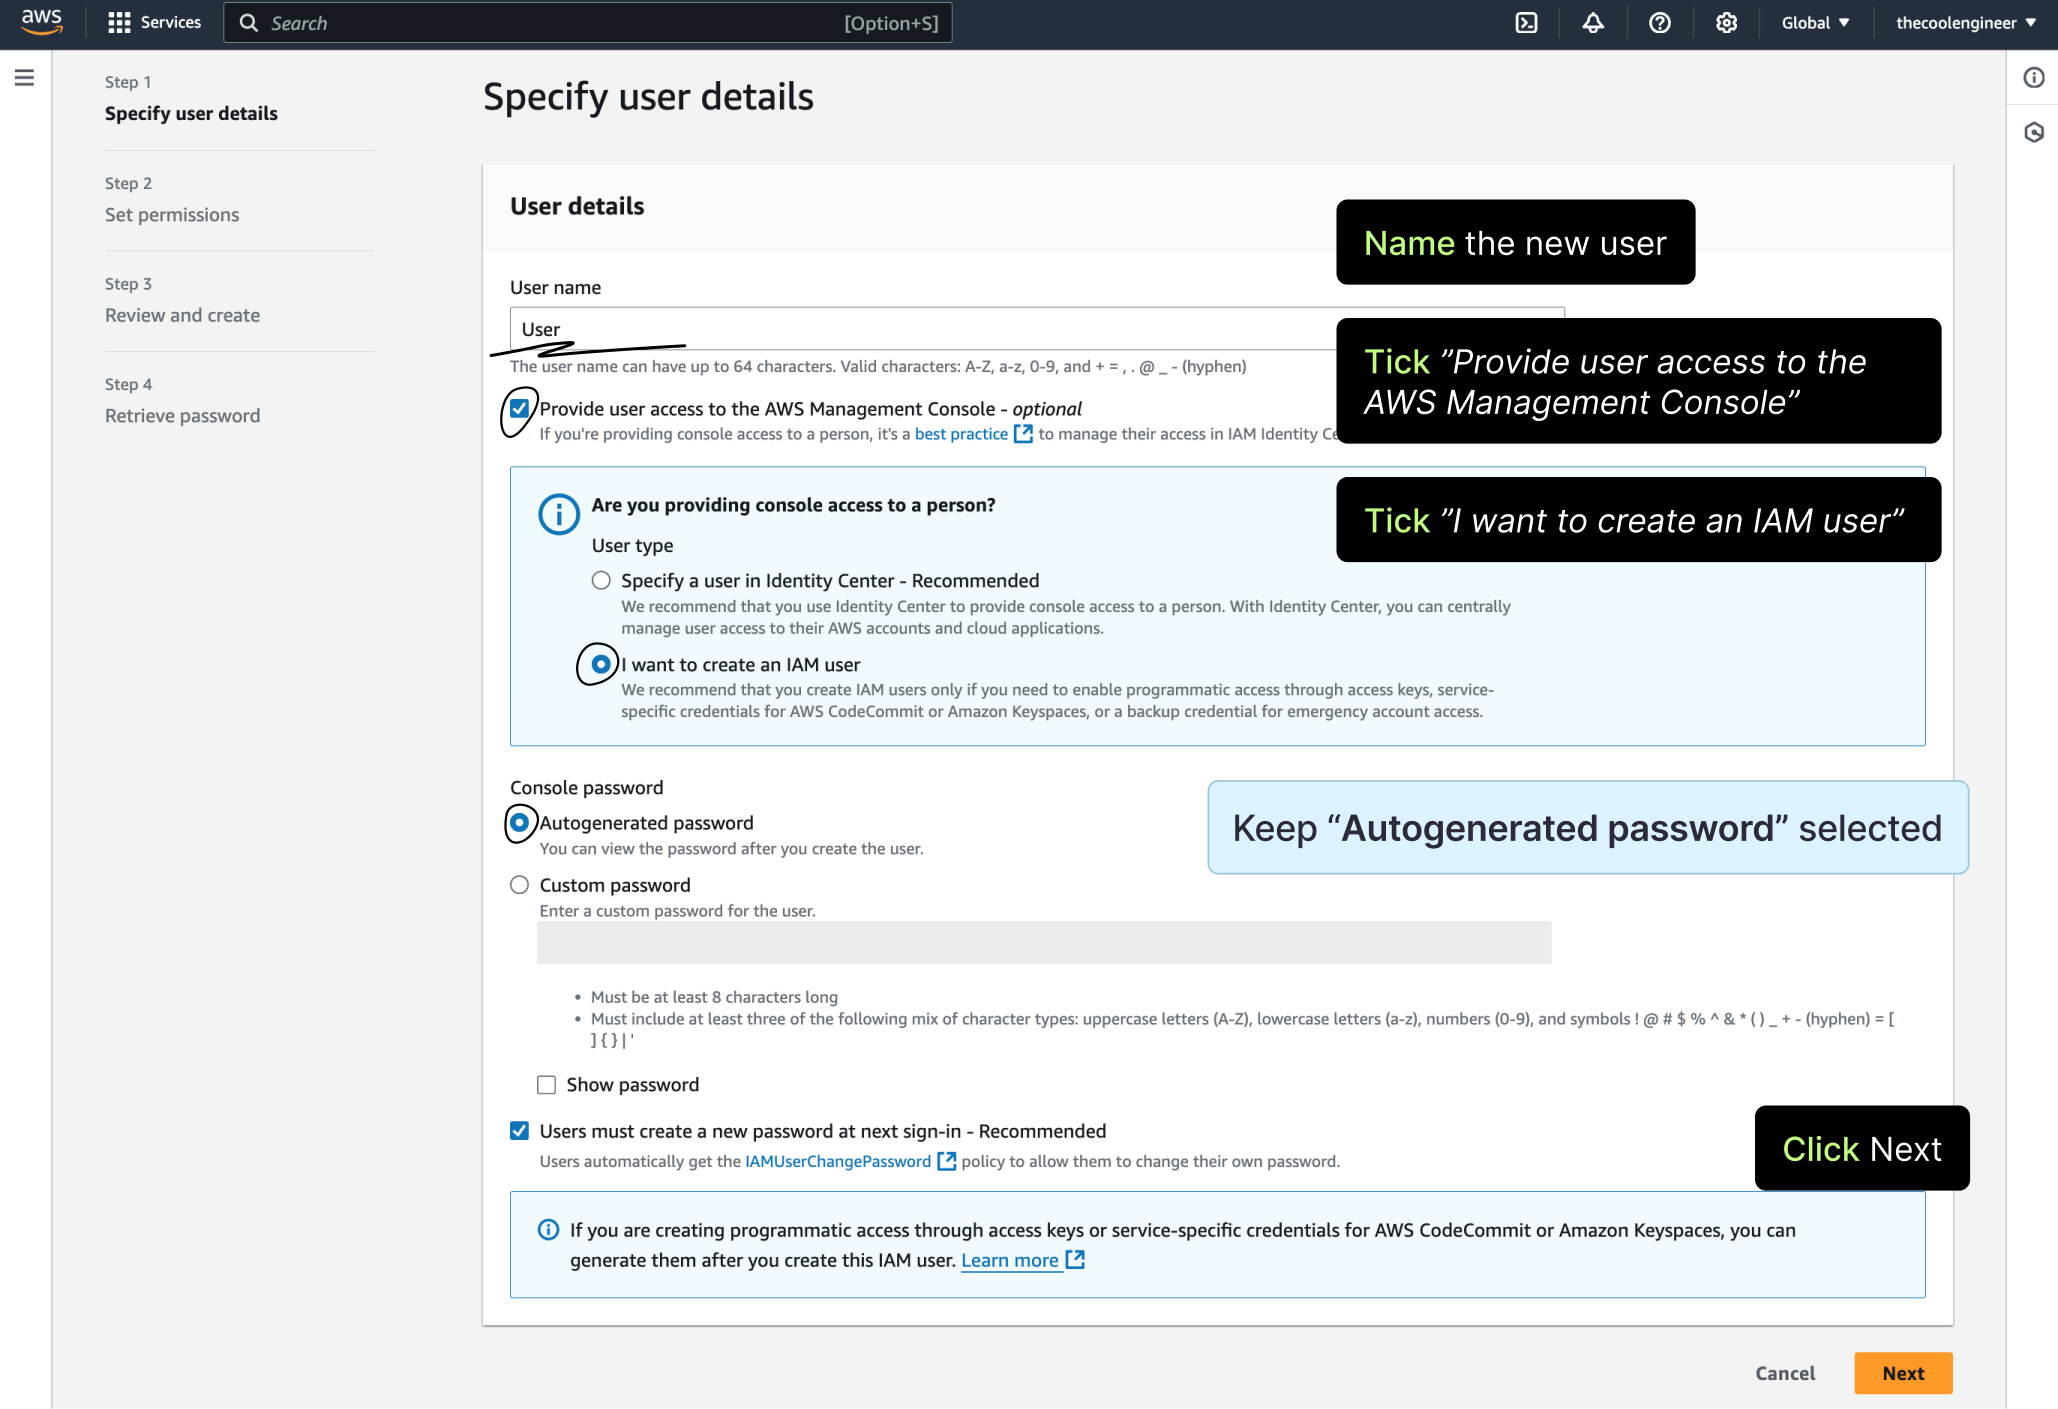
Decide whether support needs console access, programmatic access, or both. Keep this aligned with the actual troubleshooting task instead of enabling everything by default.
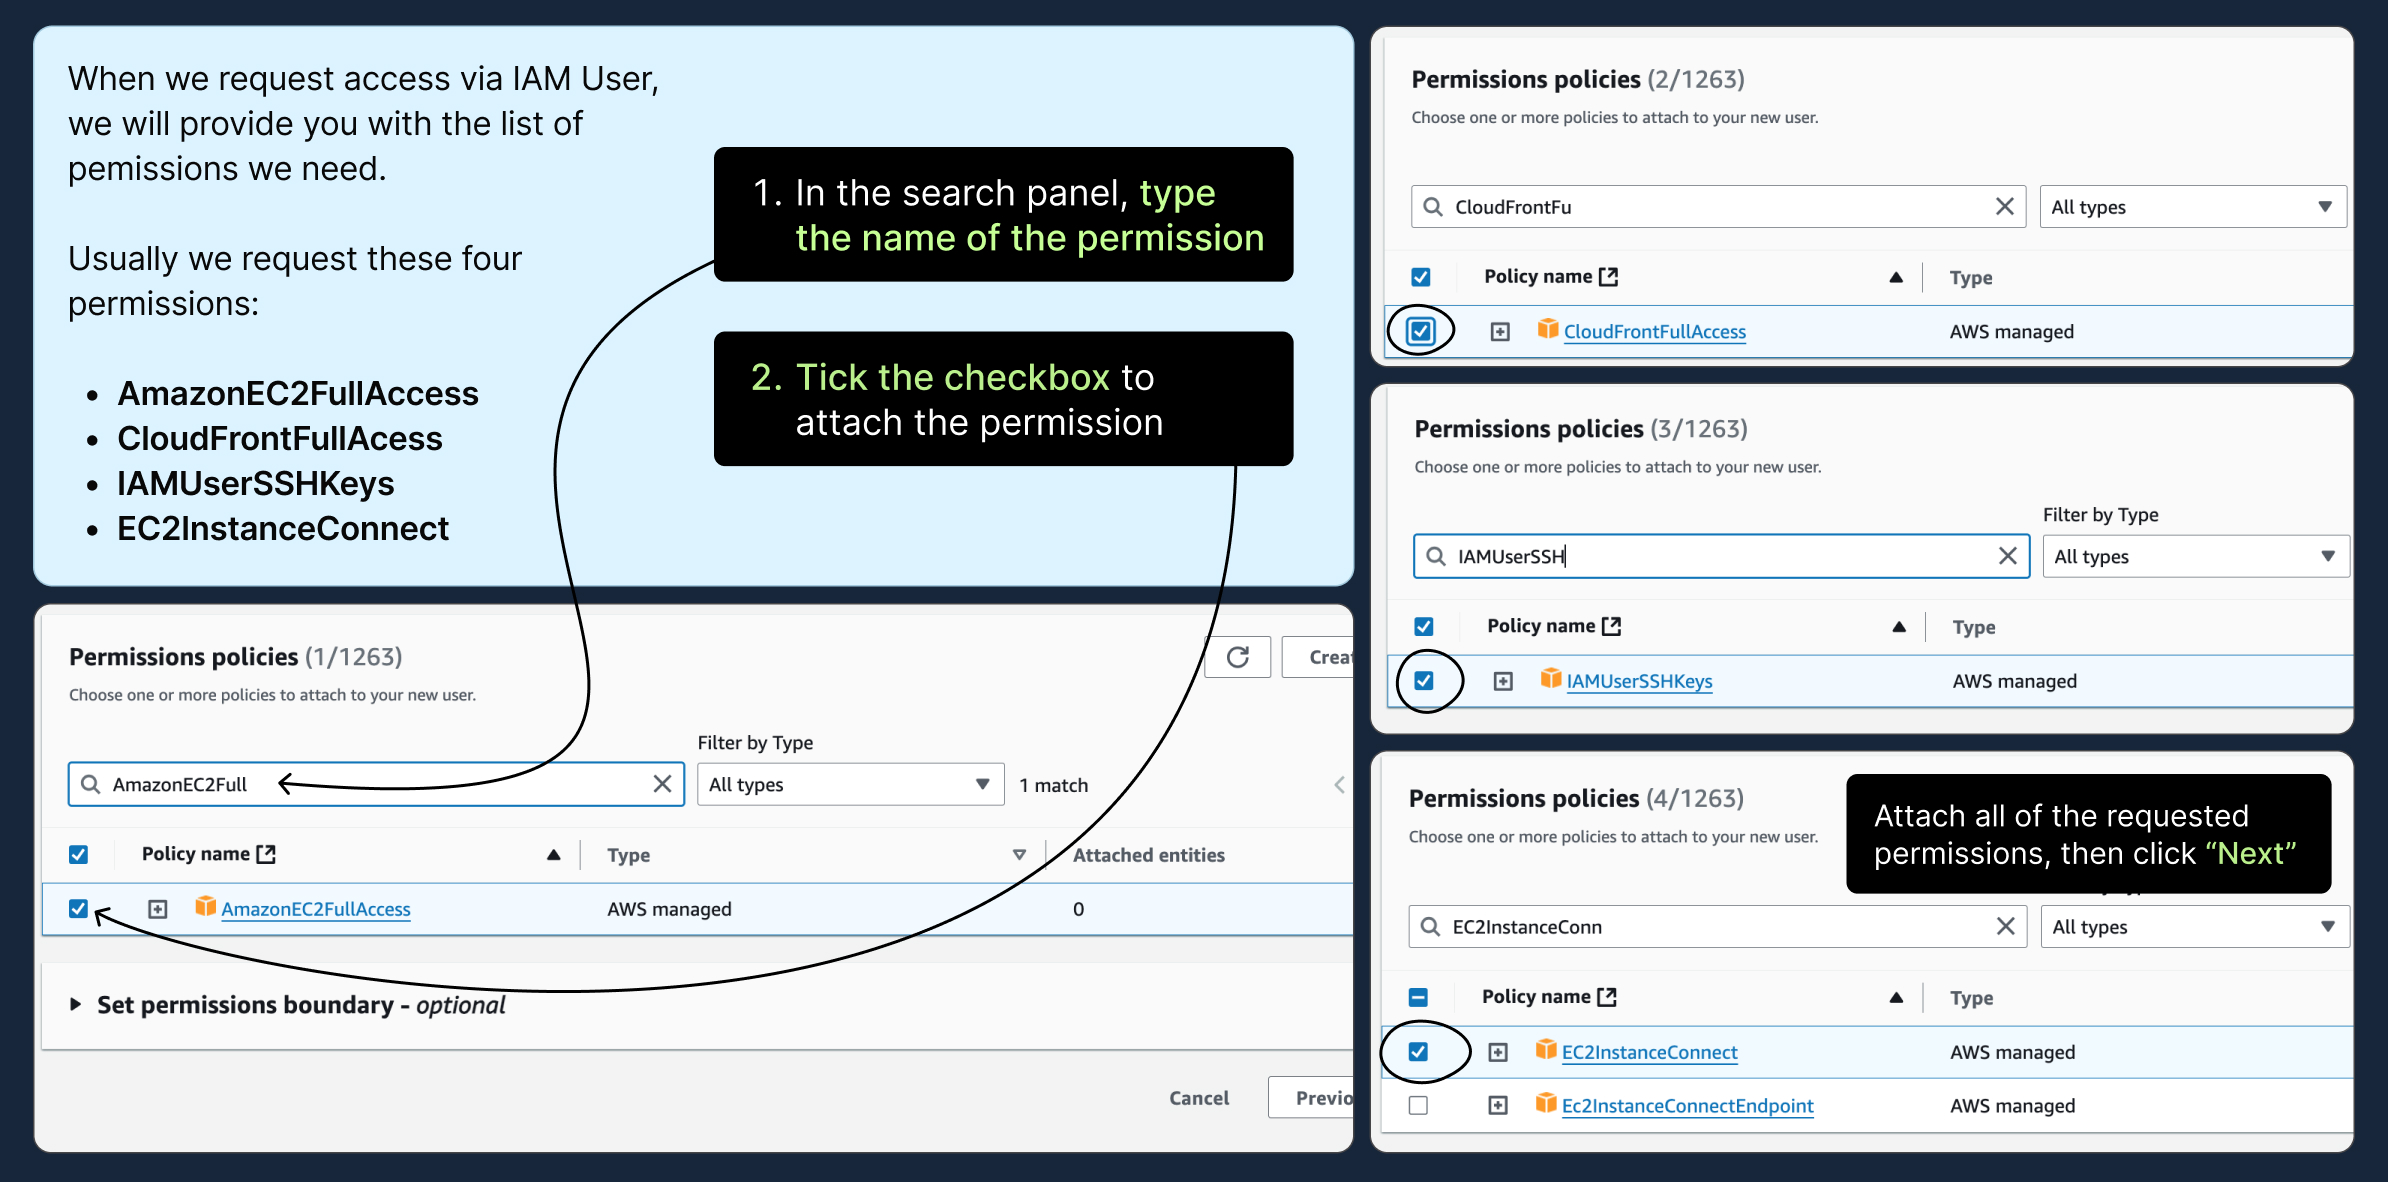
Step 4. Attach the permissions needed for the task
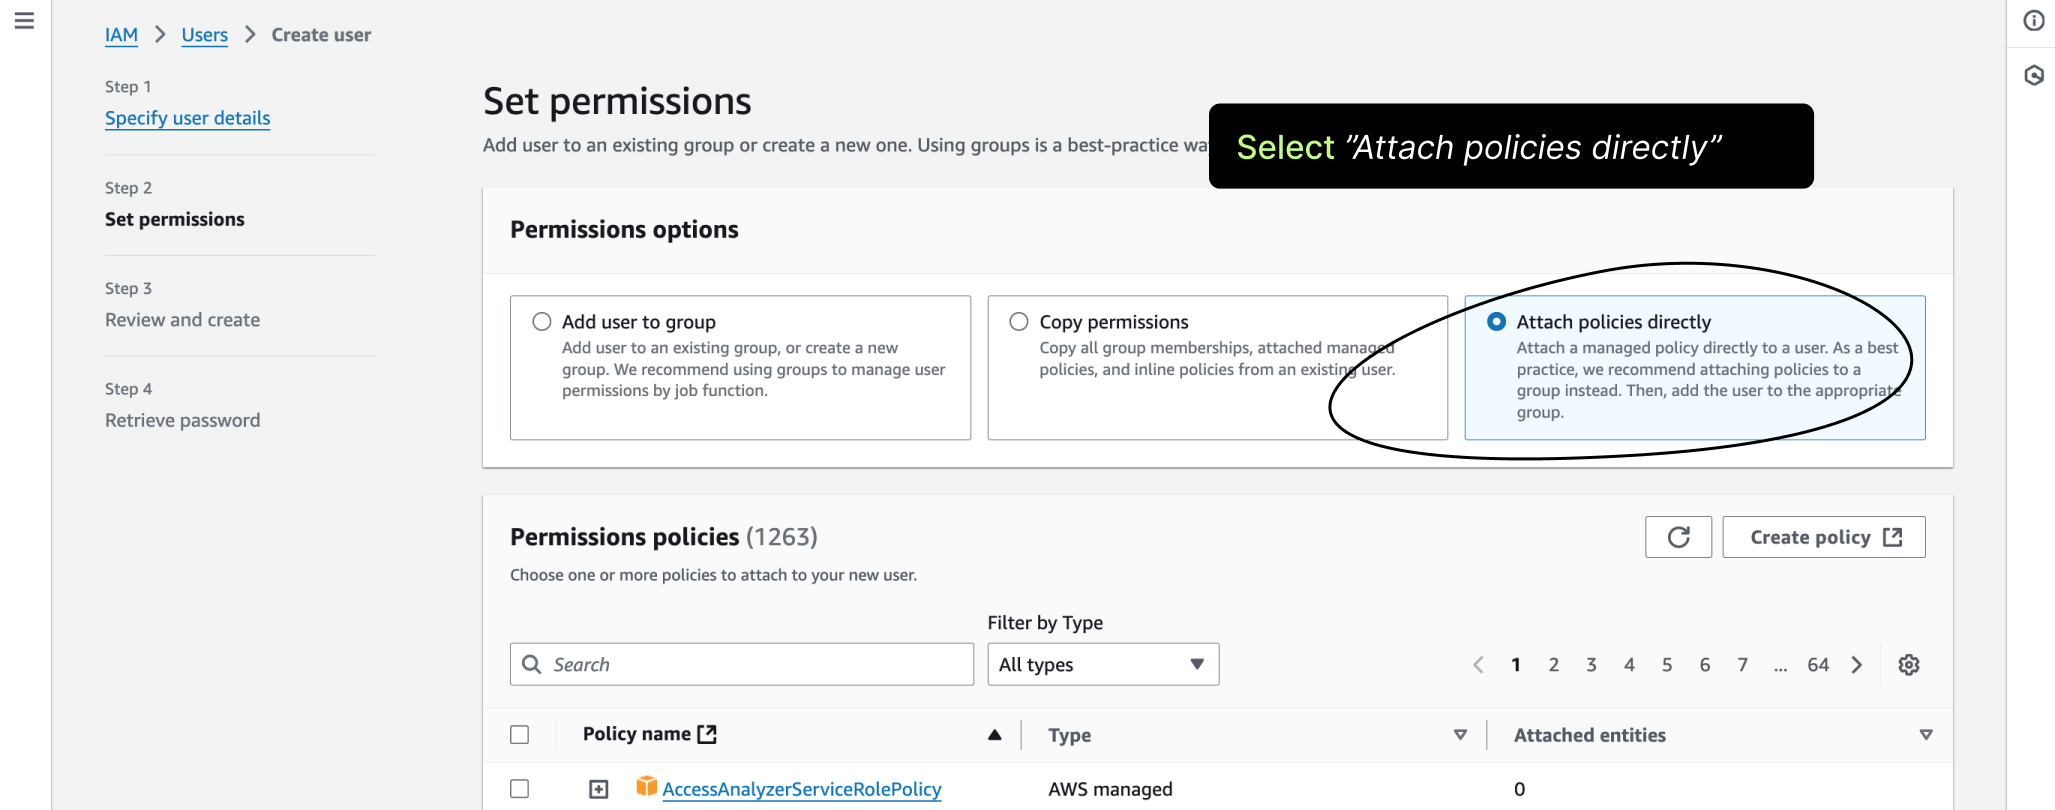
Grant only the permissions relevant to the issue being investigated. The right design is least privilege, not convenience-first overexposure.
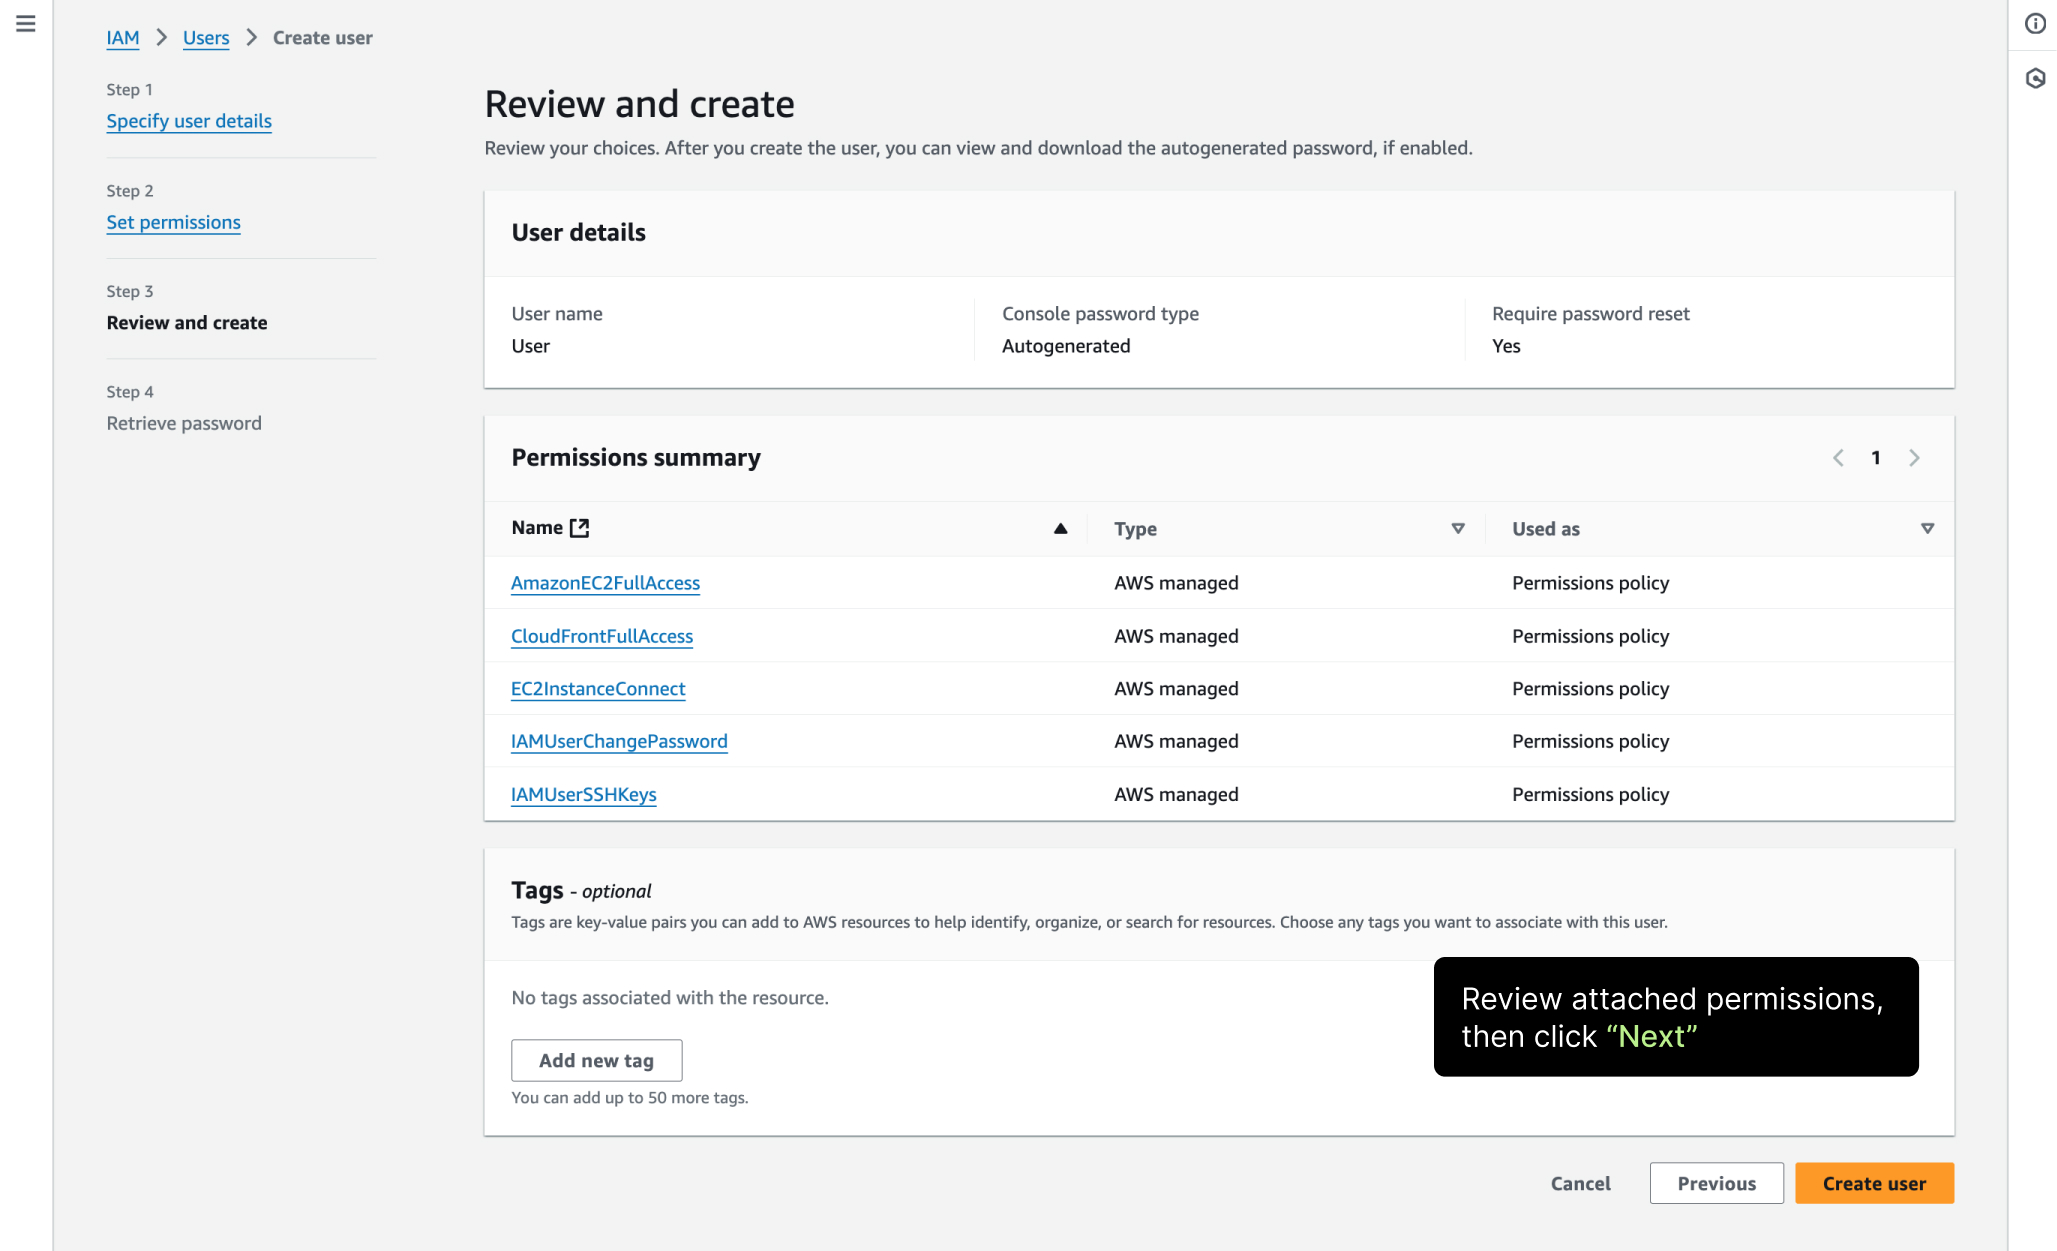
Step 5. Review and create the user
Check the summary carefully before creating the IAM user so you do not accidentally grant more than intended.
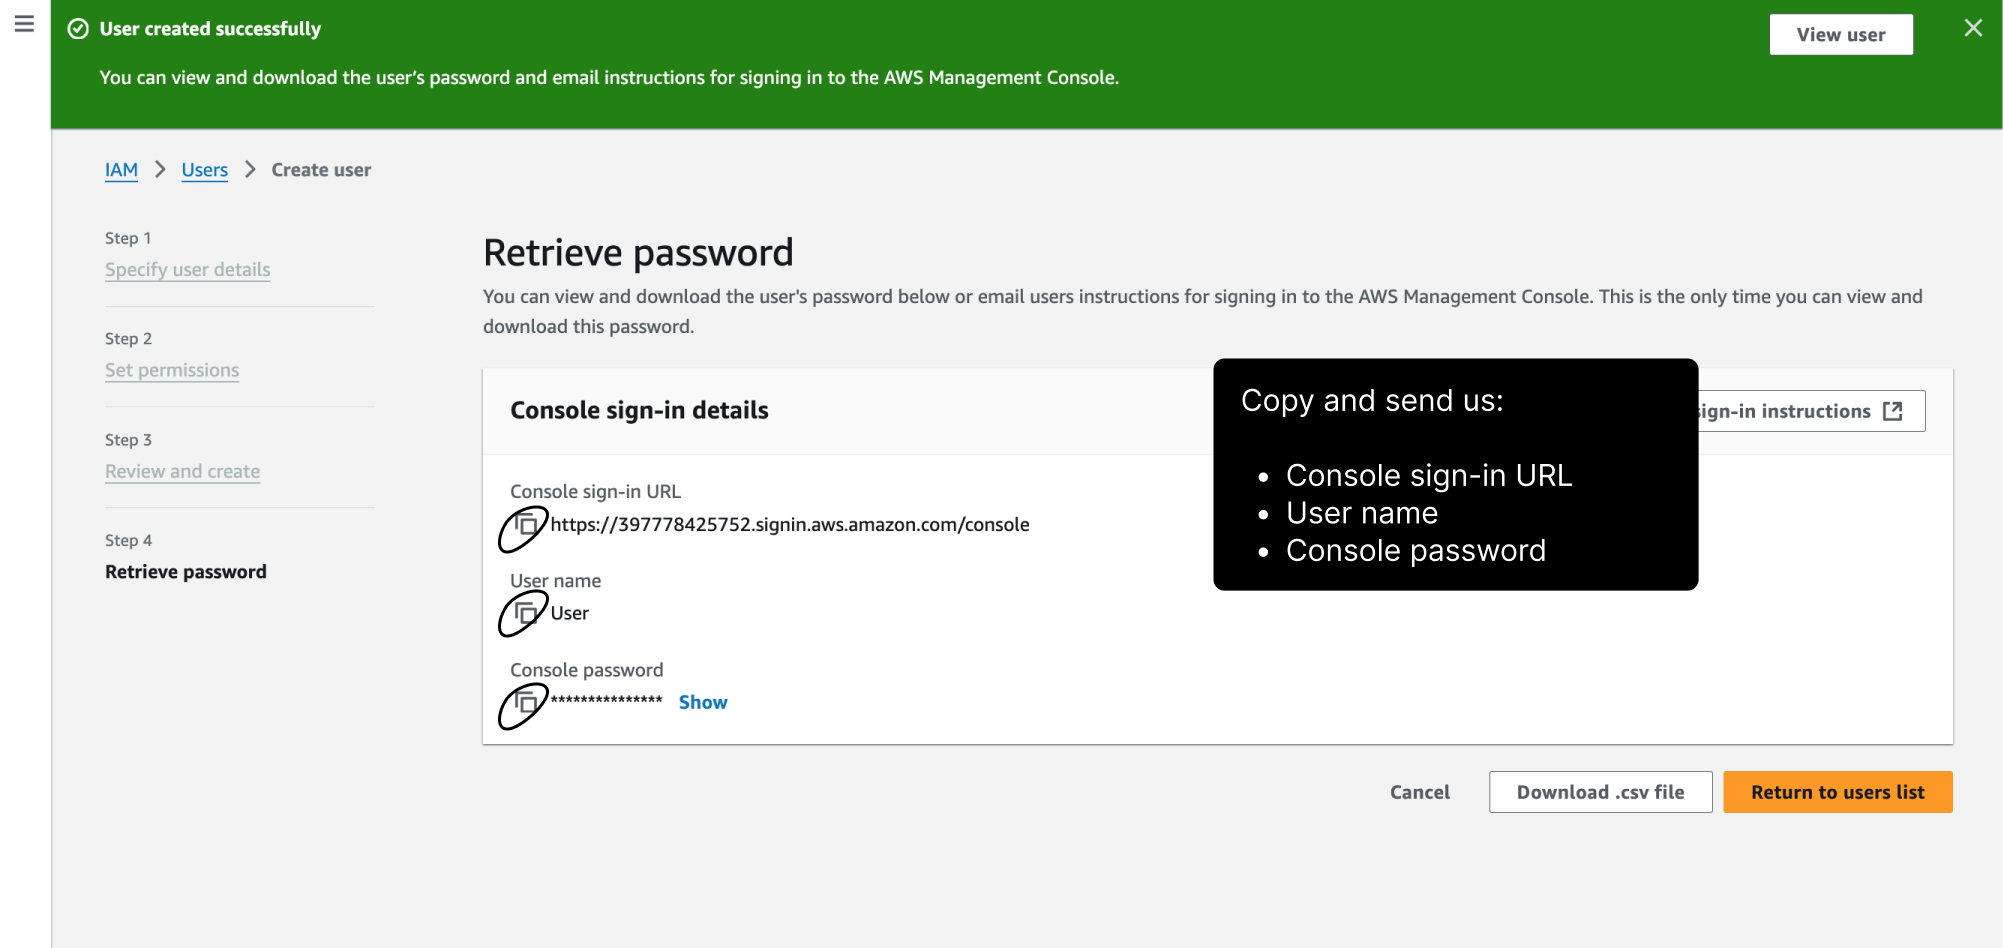
Step 6. Share access details safely
Once the user is created, share the relevant credentials with support using a controlled channel and only for the duration of the troubleshooting window.
After the support task is finished
- disable or delete the IAM user if it is no longer needed
- remove any policies that were granted only for troubleshooting
- record what access was provided and when it was removed
If the original issue was instance access rather than IAM itself, the next likely pages are security group troubleshooting and Elastic IP setup.
Final practical rule
Create a dedicated IAM user for support only when needed, grant the minimum permissions required for the task, and remove the access as soon as troubleshooting is complete.
