How to stream on Twitch: simple setup guide
More live video workflow notes and product updates.
Streaming on Twitch means sending a live video and audio feed from your encoder to your Twitch channel. The workflow is simple when the basics are clean: the right Twitch account, the right stream key or account connection, stable encoder settings, realistic bitrate, clean audio, and one test before the public stream.
Most first Twitch stream problems do not come from advanced production issues. They come from small setup mistakes: wrong stream key, unstable upload, too much bitrate, overloaded PC, muted microphone, wrong source, or no test before going live.
This guide gives you the practical launch path. If you only need one part of the workflow, use how to find your Twitch stream key, OBS settings for Twitch, or Twitch bitrate. If you want to stream to Twitch and other platforms at the same time, use multi-stream Twitch.
Quick answer: how do you stream on Twitch?
To stream on Twitch, create or access your Twitch account, connect your encoder to Twitch, choose stable stream settings, add your video and audio sources, run a private test, check stream health, and then go live.
What you need to stream on Twitch
The basic Twitch streaming setup is small:
- a Twitch account
- a computer, console, or hardware encoder
- streaming software such as OBS
- a stable upload connection
- a microphone or audio source
- a camera, game capture, screen capture, or other video source
- the correct stream key or connected account path
You do not need a complex studio for the first stream. You need a stable signal, understandable audio, and a setup that does not overload the computer or the network.
Step 1: prepare your Twitch account
Before opening OBS, confirm that the Twitch account itself is ready.
- Check that you are logged into the correct Twitch account.
- Set the stream title and category.
- Confirm whether the stream should be public, scheduled, or tested first.
- Do not share your stream key publicly.
The stream key is a private token that allows an encoder to send a live stream to your Twitch account. If someone else gets it, they may be able to stream to your channel. Treat it like a password.
For the detailed stream key path, use how to find your Twitch stream key.
Step 2: connect OBS or another encoder to Twitch
OBS is a common starting point because it is flexible, free, and widely used. You can connect OBS to Twitch in two common ways:
- Connected account: OBS connects to Twitch through account authorization.
- Manual stream key: OBS sends to Twitch using the copied stream key.
Do not mix those workflows unless you know why. If OBS is already connected through your Twitch account, you may not need to paste a stream key manually. If you are streaming to a different Twitch account, a manual stream key may be the correct path.
Step 3: add your video and audio sources
In OBS, a scene is a layout. A source is something inside that layout, such as a camera, game capture, display capture, browser source, image, media file, or microphone.
For a simple first Twitch stream, keep the scene clean:
- one main video source
- one microphone source
- optional camera source
- minimal overlays
- no unnecessary heavy browser sources
Many first streams fail because the scene is too heavy for the machine. Start simple, test, then add complexity later.
Step 4: choose practical Twitch stream settings
Do not choose settings because they look impressive. Choose settings your real machine and upload path can hold for the full stream.
For detailed Twitch output values, continue with OBS settings for Twitch and Twitch stream settings.
Step 5: choose a realistic Twitch bitrate
Twitch bitrate is a stability decision. The right bitrate is not the highest number your connection can hit once. It is the highest bitrate your real upload path can sustain consistently.
As a practical model:
- 720p30: safer for weak upload paths and simple streams
- 720p60: good for motion when upload is moderate
- 1080p30: good for cleaner detail when motion is not extreme
- 1080p60: useful for motion-heavy streams, but needs stronger upload and encoder headroom
If you see dropped frames, unstable bitrate, or stream health warnings, do not automatically blame Twitch. Lower bitrate, reduce resolution, simplify the scene, or check local network load first.
For bitrate-specific guidance, use Twitch bitrate.
Step 6: check audio before video perfection
Viewers forgive slightly lower video quality more easily than painful audio. Before going live, check:
- microphone input level
- game or desktop audio balance
- music volume
- clipping
- mute state
- audio delay or sync issues
Use headphones during setup if possible. A stream can look technically fine and still feel unwatchable if voice levels are too low, distorted, or out of sync.
Step 7: test before going live publicly
A short test saves a lot of public troubleshooting. Test on the same computer, network, scene, microphone, game, camera, and bitrate you plan to use for the real stream.
During the test, verify:
- the stream reaches the correct Twitch channel
- the title and category are correct
- audio is present and balanced
- video is not frozen or cropped incorrectly
- OBS does not show growing dropped frames
- the stream remains stable for several minutes
- viewer playback looks acceptable on another device
Use Twitch stream health tools or Twitch Inspector when you need to understand ingest stability and connection quality.
Common Twitch streaming problems and fixes
OBS says it is streaming, but Twitch shows nothing
Check the stream key or account connection first. Then confirm you are logged into the right Twitch account and that OBS is sending to Twitch, not another platform profile.
The stream drops frames
Dropped frames are often network-related. Lower bitrate, stop background uploads, use wired Ethernet, or reduce the number of local outputs.
The encoder is overloaded
Encoding overload usually means the computer cannot keep up. Lower resolution, lower frame rate, simplify the scene, switch encoder preset, or use a hardware encoder if available.
The stream has video but no audio
Check the microphone source, mute state, OBS audio mixer, operating system permissions, and selected audio device.
The stream looks blurry
The bitrate may be too low for the resolution and frame rate, or the source may be low quality. Sometimes 720p at a stable bitrate looks better than forced 1080p with too little data.
The stream works for a few minutes, then becomes unstable
This often means the network or computer cannot sustain the workload over time. Test longer, watch temperature, CPU/GPU load, upload stability, and background tasks.
How to stream on Twitch from OBS
A simple OBS launch path looks like this:
- Install OBS.
- Connect OBS to Twitch or paste your Twitch stream key.
- Create a scene.
- Add your game, screen, camera, or video source.
- Add microphone and desktop audio.
- Set output resolution, bitrate, encoder, and keyframe interval.
- Start a test stream.
- Check Twitch stream health and viewer playback.
- Go live publicly only after the test is stable.
This page gives the overall path. For the actual OBS values, use OBS settings for Twitch.
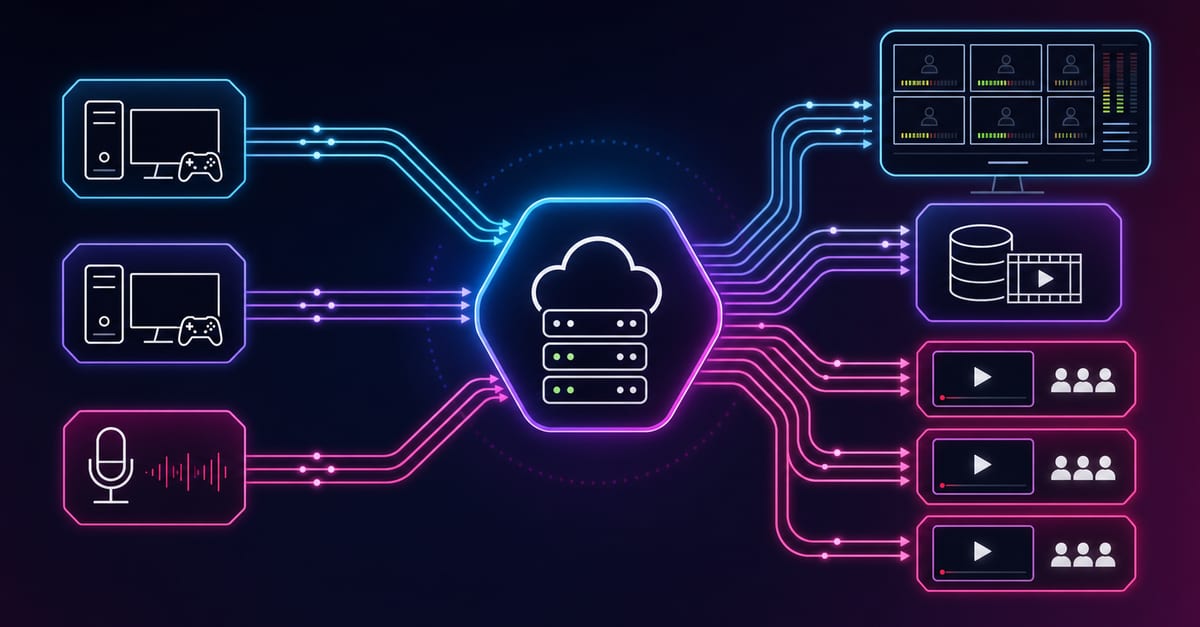
When to use a cloud workflow instead of one local encoder
A local OBS-to-Twitch workflow is good for simple streams. But it becomes fragile when Twitch is only one destination or when the show needs routing, backup, recording, remote contribution, or multiple outputs.
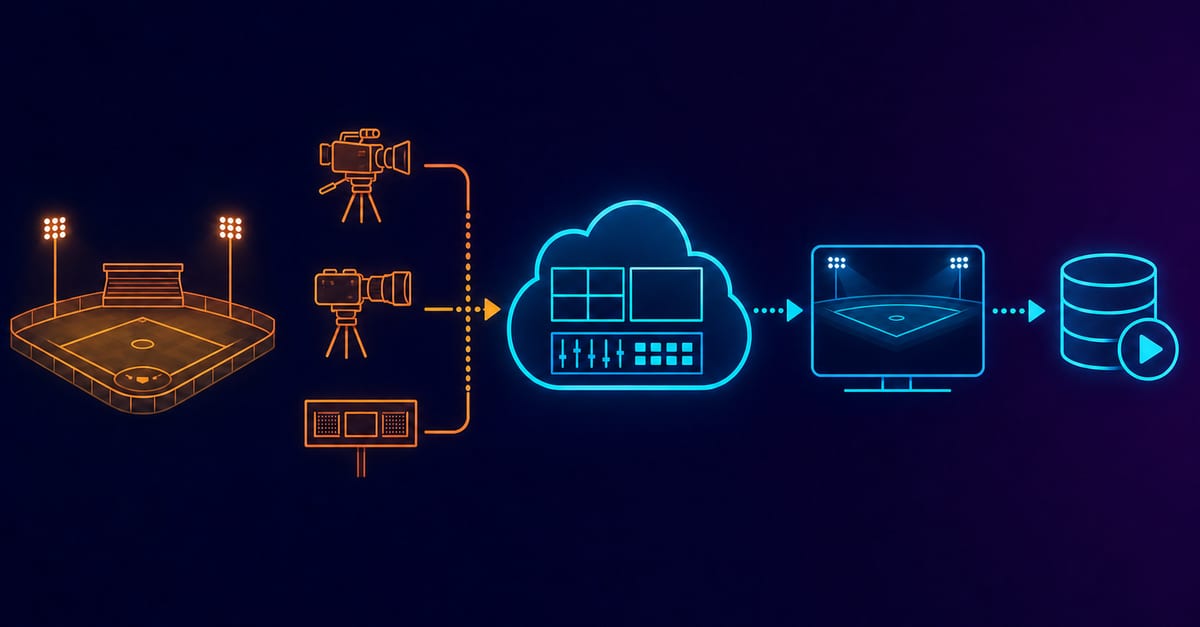
A cloud or server-based workflow is useful when you need to:
- send one input to Twitch, YouTube, Facebook, and other platforms
- record the stream in the cloud
- use SRT or RTMP ingest before sending to Twitch
- monitor bitrate and stream health outside the local encoder
- restart one destination without touching the main source
- separate production from distribution
For that path, see multi-streaming, continuous streaming, and self-hosted streaming solution.
Streaming only to Twitch vs multistreaming
Streaming only to Twitch is one workflow. Streaming to Twitch and other platforms at the same time is a different operational decision.
If you multistream, you need to think about:
- platform rules and policy
- extra upload if sending multiple outputs locally
- per-platform stream keys
- separate destination health
- whether to use a cloud relay or one-input fan-out setup
Do not overload your first Twitch launch with multistreaming unless you really need it. Start simple first. Then move to multi-stream Twitch when the single-destination path is stable.
Preflight checklist before you go live
- Correct Twitch account is selected.
- Stream key or account connection is valid.
- Stream title and category are correct.
- OBS scene contains the correct video source.
- Microphone and desktop audio are working.
- Bitrate is realistic for the upload path.
- Keyframe interval is set correctly.
- There are no growing dropped frames during the test.
- Audio and video are in sync.
- Stream preview works on another device.
FAQ
What do I need to stream on Twitch?
You need a Twitch account, an encoder such as OBS, the correct stream key or account connection, a stable upload connection, video and audio sources, and a short test before going live.
How do I stream on Twitch with OBS?
Install OBS, connect it to Twitch or paste your stream key, add your video and audio sources, choose stable output settings, run a test stream, then go live.
Do I need a stream key to stream on Twitch?
You may need a stream key if you are using manual encoder setup. Some tools can also connect directly to Twitch through account authorization.
What bitrate should I use for Twitch?
Use the highest bitrate your upload path can hold consistently. If the stream drops frames or becomes unstable, lower bitrate, resolution, or frame rate.
Is OBS the best way to stream on Twitch?
OBS is a practical default for many streamers because it is flexible and widely used. It still needs realistic settings and a stable machine.
Can I stream on Twitch without OBS?
Yes. You can use other encoders, streaming tools, console streaming options, or hardware encoders, depending on the workflow.
Why is my Twitch stream dropping frames?
Dropped frames are often caused by upload instability, too much bitrate, Wi-Fi problems, background traffic, or local output pressure.
Why is my Twitch stream blurry?
The stream may be using too little bitrate for the chosen resolution and frame rate, or the source itself may be low quality. A stable lower resolution can sometimes look better than an unstable higher one.
Can I stream to Twitch and YouTube at the same time?
Sometimes yes, but treat it as a separate multistreaming workflow. Check platform rules and consider sending one upstream feed to a relay instead of pushing several outputs from one PC.
Should I test before every Twitch stream?
For important streams, yes. A short test catches stream key, audio, bitrate, sync, source, and network problems before viewers see them.
Next steps
- How to find stream key on Twitch
- OBS settings for Twitch
- Twitch bitrate
- Twitch stream settings
- Multi-stream Twitch
- Multi-streaming
- Continuous streaming
Final practical rule
Keep your first Twitch launch boring: correct account, correct key or connection, stable OBS settings, clean audio, realistic bitrate, and one test before the public stream. Most Twitch launch failures come from skipping these basics.