How To Go Live On Twitch On Pc
More live video workflow notes and product updates.
Use the bitrate calculator to size the workload, or build your own licence with Callaba Self-Hosted if the workflow needs more flexibility and infrastructure control. Managed launch is also available through AWS Marketplace.
What it means (definitions and thresholds)
Before you press "Start Streaming", you need to understand the pieces and the numeric thresholds that affect quality and latency: For an implementation variant, compare the approach in Best Camera For Live Streaming.
- RTMP ingest: The protocol you send from a PC encoder (OBS/FFmpeg) to Twitch. Typical URL pattern:
rtmp://live.twitch.tv/app/{stream_key}. Twitch expects a stable RTMP connection with a 2-second keyframe interval. - Keyframe interval / GOP: Keyframes (I-frames) are required at consistent intervals. Twitch and most CDNs expect a 2 second keyframe interval. GOP length = framerate * 2 (e.g., 60 fps → GOP = 120 frames).
- Bitrate: The steady-state video bitstream size. Common practical ranges:
- 1080p60: 4,500–6,000 kbps
- 1080p30: 4,000–5,000 kbps
- 720p60: 3,500–5,000 kbps
- 720p30: 2,500–4,000 kbps
- 480p30: 1,200–2,000 kbps
- Audio: AAC-LC, 48 kHz, 128–320 kbps (160–256 kbps is common for stereo).
- Latency categories:
- Interactive/near real-time: <500 ms (WebRTC, not generally available on Twitch ingest)
- Low-latency streaming: 1–5 s (LL-HLS / Twitch Low Latency)
- Standard streaming: 5–30 s (HLS with 4–6 s segments and player buffer)
- Segments and part size: HLS segment length historically 4–6 s; low-latency HLS uses parts/fragments of 0.25–1.0 s to reduce viewer latency. Expect Twitch viewer latency 2–15 s depending on settings and viewer player buffer.
- Upload margin: Always plan for 1.5×–2× the chosen bitrate as required uplink (e.g., 6,000 kbps stream → provision 9–12 Mbps upload).
Decision guide
Pick the right flow for your goals — the next steps change depending on whether you need low latency, high fidelity, or multi-destination delivery. If you need a deeper operational checklist, use Obs Recording Software.
- You want the simplest, fastest route: Stream from OBS or XSplit directly to Twitch using RTMP. Use the OBS recipes below.
- You want to push the same live to Twitch + socials (YouTube/Facebook):
- Option A: Use a cloud multi-streaming service to send a single uplink from your PC and distribute for you. See /products/multi-streaming and the multi-streaming guide /docs/multi-streaming-guide.
- Option B: Stream from PC to each platform directly (requires sum of bitrates and more CPU).
- You need VODs and clipped content automatically: Integrate with a VOD pipeline after the stream. See /products/video-on-demand.
- You need programmatic control (start/stop, scheduled streams, recordings): Use a video API for automation. See /products/video-api and /docs/getting-started.
- You prefer full self-hosted control: Consider a self-hosted streaming stack — see /self-hosted-streaming-solution and the AWS Marketplace appliance AWS Marketplace.
Latency budget / architecture budget
Break down end-to-end latency into measurable stages and assign budget. This makes choices predictable. A related implementation reference is Low Latency.
- Capture (camera, game capture): 10–40 ms typical for local USB/PCIe capture.
- Encode (CPU x264 vs GPU NVENC):
- x264 veryfast: 150–500 ms depending on CPU load and resolution
- x264 faster/fast: 200–800 ms (better quality but higher CPU)
- NVENC (modern NVIDIA): 40–150 ms
- Network uplink (to ingest): 50–500 ms depending on RTT; allow jitter cushion
- Ingest/transcode on CDN: 500–2,000 ms depending on platform
- Transport & distribution to edges: 500–2,000 ms
- Player buffer on viewer: 1,500–6,000 ms (configurable; lower increases risk of rebuffering)
Example budgets (target total):
- Conservative (good quality, stable): 5–12 s total (capture 20 + encode 300 + network 300 + ingest 1500 + edge 1000 + player buffer 3000)
- Low-latency (interactive): 1.5–4 s total (capture 10 + encode 50–150 + network 50–200 + ingest 500 + edge 500 + player buffer 300–1000)
Practical recipes
Concrete, copy-paste-capable workflows. Use the one that matches your decision above.
Recipe A — Quick direct stream from PC to Twitch (OBS)
- Get your Twitch stream key (Twitch Dashboard → Stream → Primary Stream Key).
- Open OBS → Settings → Output → Output Mode: Advanced → Streaming:
- Encoder: x264 (or NVENC H.264 if you have NVIDIA)
- Rate Control: CBR
- Bitrate: choose per resolution (see configuration targets)
- Keyframe Interval: 2
- CPU Usage Preset (x264): veryfast (if CPU limited, use superfast/ultrafast)
- Profile: high
- Settings → Audio: set sample rate 48 kHz and bitrate 160–256 kbps for main track.
- Settings → Video: Base (canvas) resolution = your capture resolution; Output (scaled) resolution = target resolution; FPS = 30/60.
- Settings → Stream: Service: Twitch; Server: Auto; Stream Key: paste key.
- Use Ethernet, close extra upload-heavy apps, confirm upload bandwidth > 1.5× bitrate.
- Start streaming. Monitor OBS Stats (dropped frames, encode lag) and Twitch Stream Manager (Stream Health).
Recipe B — High-quality 1080p60 using NVENC
- In OBS → Output → Streaming:
- Encoder: NVIDIA NVENC (new) - H.264
- Rate Control: CBR
- Bitrate: 6,000 kbps
- Keyframe Interval: 2
- Preset: Quality (or Performance if you need lower GPU usage)
- Profile: High
- Video settings: Output resolution 1920x1080, FPS 60. If you drop frames, reduce to 1080p30 or 720p60.
- Audio: AAC 48 kHz, 192 kbps (stereo).
- Verify GPU utilization & OBS Stats frequently; NVENC reduces CPU but not network needs.
Recipe C — Multi-destination restream with a cloud service (one uplink)
- Create a multi-destination group in your chosen multi-streaming dashboard (for example /products/multi-streaming).
- Add Twitch, YouTube, and Facebook destinations with their stream keys.
- From OBS, set the stream target to the multi-streamer's RTMP ingest endpoint and stream key (single outgoing stream).
- Encoder: NVENC or x264 as above
- Bitrate: pick a single outgoing bitrate (4,000–6,000 kbps recommended)
- The cloud restreamer receives one incoming RTMP and forwards appropriate outputs to each destination, optionally transcoding per destination to meet each platform's bitrate limits.
- Benefits: local upload = single stream; simplified studio CPU. Expected extra CDN/processing latency < 1–3 s depending on the service.
Practical configuration targets
Choose a profile based on your machine and audience. These are targets you can copy exactly.
- 1080p60 (gaming / action):
- Video codec: H.264 (NVENC or x264)
- Bitrate: 4,500–6,000 kbps
- Keyframe interval: 2 s (GOP = 120 frames)
- Encoder settings: x264 preset = veryfast; NVENC preset = quality
- Audio: AAC 48 kHz 192 kbps
- Uplink: reserve 9–12 Mbps
- 720p60 (balanced latency/quality):
- Bitrate: 3,500–5,000 kbps
- Keyframe interval: 2 s (GOP = 120 frames at 60 fps)
- Uplink: reserve 6–10 Mbps
- 720p30 or 480p30 (lower bandwidth):
- Bitrate: 2,500–4,000 kbps (720p30) / 1,200–2,000 kbps (480p30)
- Keyframe interval: 2 s
- Uplink: reserve 4–8 Mbps / 2–4 Mbps
- Encoder VBV / buffer:
- For CBR, keep VBV buffer equal to bitrate × 1–2 seconds if you have an option (e.g., 6,000 kbps → vbv-bufsize 6,000–12,000). This stabilizes bursts and avoids encoder stalls.
Limitations and trade-offs
- Latency vs quality: Lower player buffer and smaller segments reduce latency but increase risk of rebuffering for viewers with poor connectivity.
- CPU vs GPU encoding: x264 yields higher quality per bitrate at the cost of CPU. NVENC offloads to GPU with lower latency and CPU load, but quality-per-bit may be slightly lower depending on GPU generation.
- Multi-streaming trade-off: Direct multi-stream from your PC increases outgoing bandwidth linearly by destination count. Use cloud multi-streaming to send a single stream upstream and distribute from cloud to reduce local uplink usage.
- Platform terms: Check Twitch agreements (partner/affiliate) before scheduling exclusive cross-posting or monetized multi-streaming.
Common mistakes and fixes
- Wrong stream key / server: Fix: re-copy stream key from Twitch Dashboard and use the recommended ingest server. Never share your key.
- Insufficient upload bandwidth: Symptom: dropped frames and reconnects. Fix: reduce bitrate, use a wired connection, close background uploads, or offload to a cloud restreamer.
- Incorrect keyframe interval: Symptom: platform rejects stream or viewer quality issues. Fix: set keyframe interval to 2 seconds.
- Using Wi‑Fi: Symptom: packet loss, jitter. Fix: use Ethernet (CAT5e/6) and disable other heavy devices during the stream.
- High CPU preset (slow encode): Symptom: encode lag/frames skipped. Fix: move to faster preset (veryfast or NVENC).
- No VODs saved: Fix: enable "Store past broadcasts" in Twitch settings and integrate with a VOD pipeline such as /products/video-on-demand for automatic archive storage and transcoding.
Rollout checklist
Use this pre-flight checklist before your first public stream.
- Verify Twitch stream key and set streaming server region (Dashboard).
- Confirm encoder settings match configuration targets (bitrate, keyframe=2, profile).
- Run an upload speed test — ensure 1.5×–2× margin.
- Use Ethernet and disable VPNs that route traffic away from the ingest region.
- Start a private/test stream or unlisted test to validate stability; check OBS Stats for frames dropped and bitrate stability.
- Confirm audio levels and mic monitoring.
- Confirm overlays and webcam are rendering without GPU overload. Monitor GPU and CPU load in Task Manager.
- Have a fallback plan: lower bitrate preset, switch to NVENC, or stream to a cloud restreamer if local issues occur.
- Verify automatic VOD / highlight capture settings or integrate with /products/video-on-demand.
- For multi-destination: pre-authorize all destinations in your multi-stream console and run a test; see /docs/multi-streaming-guide.
Example architectures
Textual diagrams of common setups and expected properties.
1) Solo streamer — direct to Twitch
PC (OBS) → RTMP → Twitch ingest → Twitch transcode/CDN → Viewers
- Pros: Low complexity, minimal cost.
- Expected viewer latency: 3–15 s depending on player buffer & Twitch Low Latency.
- Bandwidth: local uplink = stream bitrate.
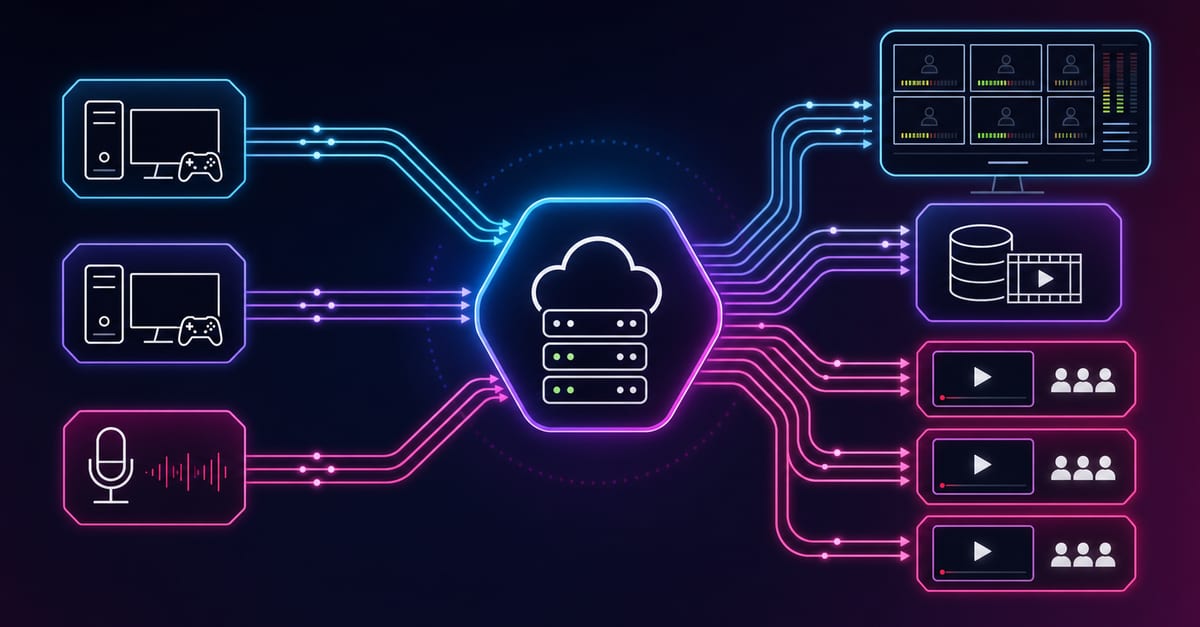
2) Single uplink, multi-destination via cloud restream
PC (OBS) → RTMP → Cloud restreamer → Twitch / YouTube / Facebook → Viewers
- Pros: single uplink, lower local CPU and network usage; per-destination transcoding handled in cloud.
- Expected additional latency: +0.5–3 s versus direct, depending on service.
- Recommended for social restreaming — see /products/multi-streaming.
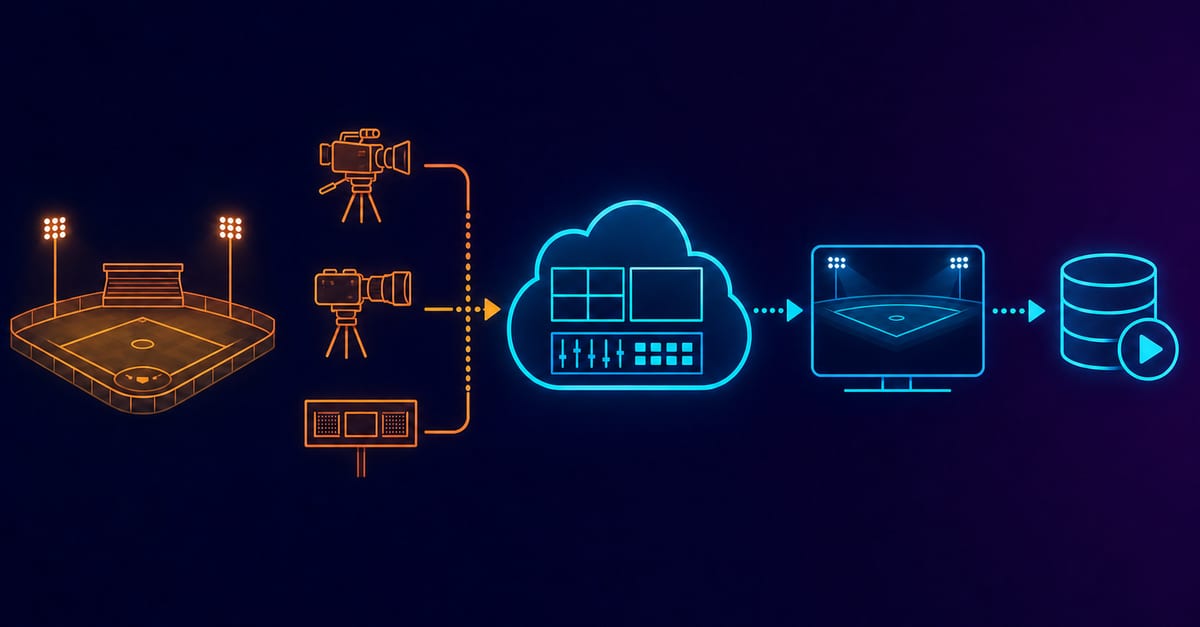
3) Studio (multi-camera) → local switcher → cloud transcoder
Cameras → ATEM/NDI → PC switcher/OBS → SRT/RTMP to cloud transcoder → CDN → Viewers
- Pros: higher reliability, recorder + live, scalable transcoding.
- Use SRT when you need reliable transport over jittery networks.
Troubleshooting quick wins
Quick checks that often restore a broken stream within minutes:
- Dropped frames in OBS:
- Cause: insufficient upload or encoder overload.
- Fixes: lower bitrate by 20%, change x264 preset to veryfast or change to NVENC, move to 720p60 or 720p30.
- High latency for chat response:
- Cause: player buffer or platform processing.
- Fixes: enable Twitch Low Latency in Dashboard, reduce segment/part size if supported, or instruct moderators to use streamer-side tools for moderation if immediate interaction is required.
- Intermittent disconnects:
- Cause: transient network issues or firewall/NAT timeouts.
- Fixes: check router logs, reserve QoS for streaming, use static NAT port forwarding if required, or switch to a wired connection. If problems persist, send a single stream to a cloud restreamer and let it handle platform distribution.
- Audio out of sync:
- Cause: capture/processing order differences.
- Fixes: add audio delay correction in OBS (Settings → Advanced → Audio), resync at the source, or reconfigure capture chain so all devices use the same clock reference.
Next step
Pick the workflow you need and follow the matching resources:
- If you plan to stream to multiple social platforms, start with /products/multi-streaming and the multi-streaming guide /docs/multi-streaming-guide.
- For automated archiving, transcoding, and on-demand workflows see /products/video-on-demand and the getting started docs /docs/getting-started.
- For programmatic control (start/stop, programmatic ingest, orchestration) see /products/video-api and the encoder configuration doc /docs/encoder-settings.
- If you need a self-hosted appliance, evaluate /self-hosted-streaming-solution or the production-ready AMI on AWS Marketplace: AWS Marketplace.
If you want, tell me your PC specs (CPU, GPU, RAM, uplink speed) and the resolution/framerate you want — I will give an exact OBS/FFmpeg command-line and the minimal changes to go live to Twitch and to restream to socials with recommended settings for reliability and latency.